Customizing Approval Notifications
Throughout the previous tutorials, approval notifications were sent using the default email templates. While the default messages work well in many scenarios, you can customize every notification to match your organization's branding and communication requirements.
In this tutorial, you'll customize approval notification templates and test the updated email messages using the Purchase Requests workflow created in the previous tutorials.
Instructions
Prerequisites
Use the existing Purchase Requests list created in the previous tutorials.
Step 1: Open the Mail Templates
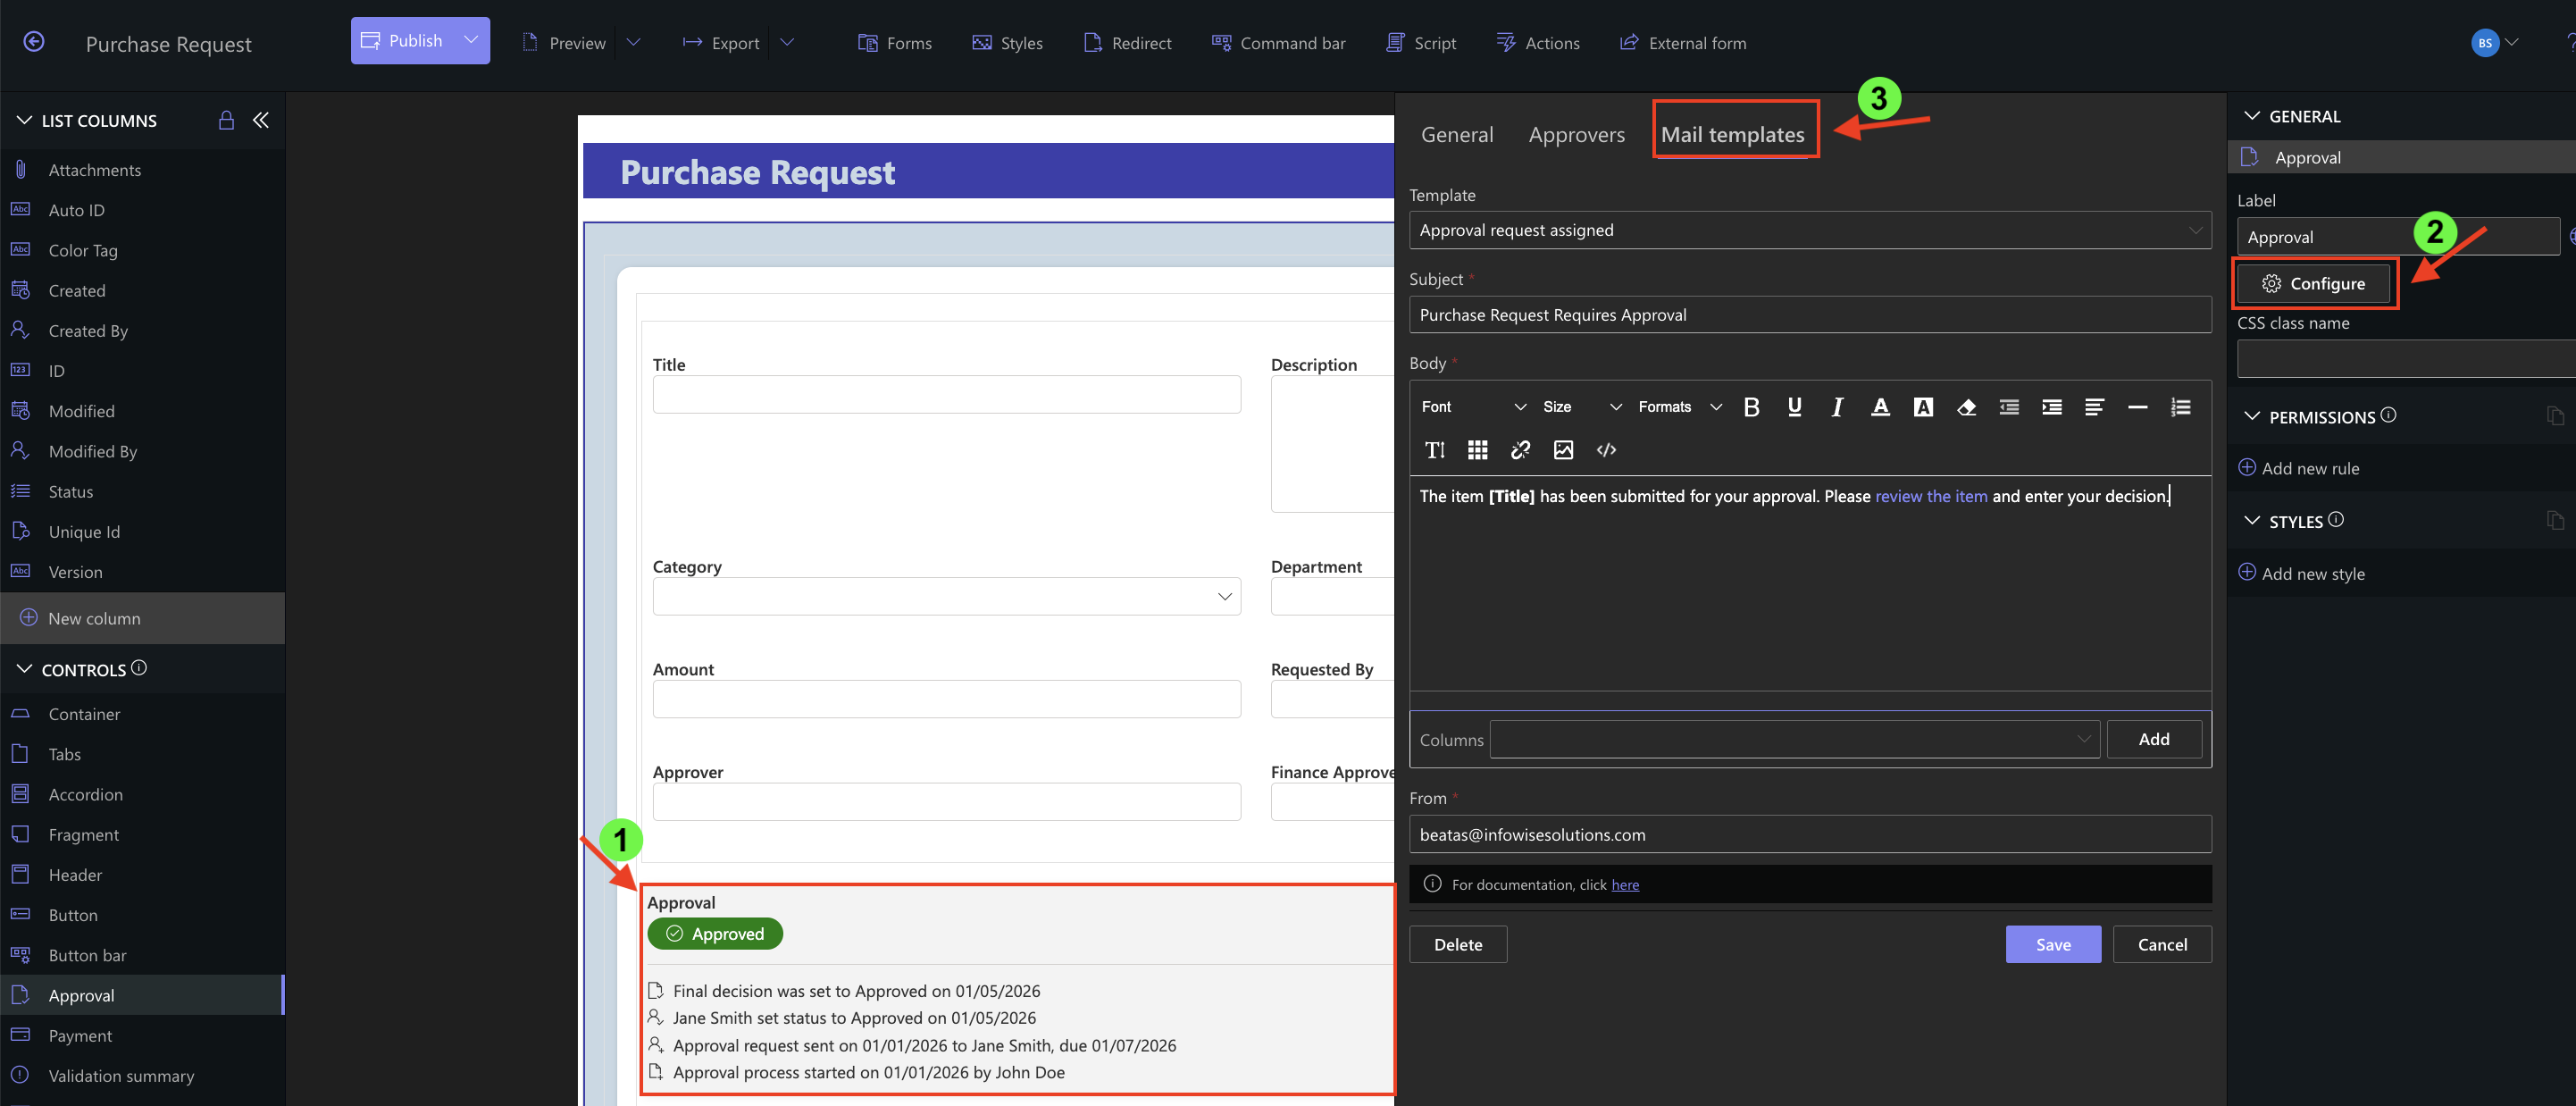
- Open the Purchase Requests list.
- Click Design.

- Open the Form Designer.

- Select the Approval control.
- Click Configure.
- Open the Mail Templates tab.
Step 2: Review Available Email Templates
The Approval control includes separate templates for different approval events.
Available templates include:
- Approval Request
- Reminder
- Approved
- Rejected
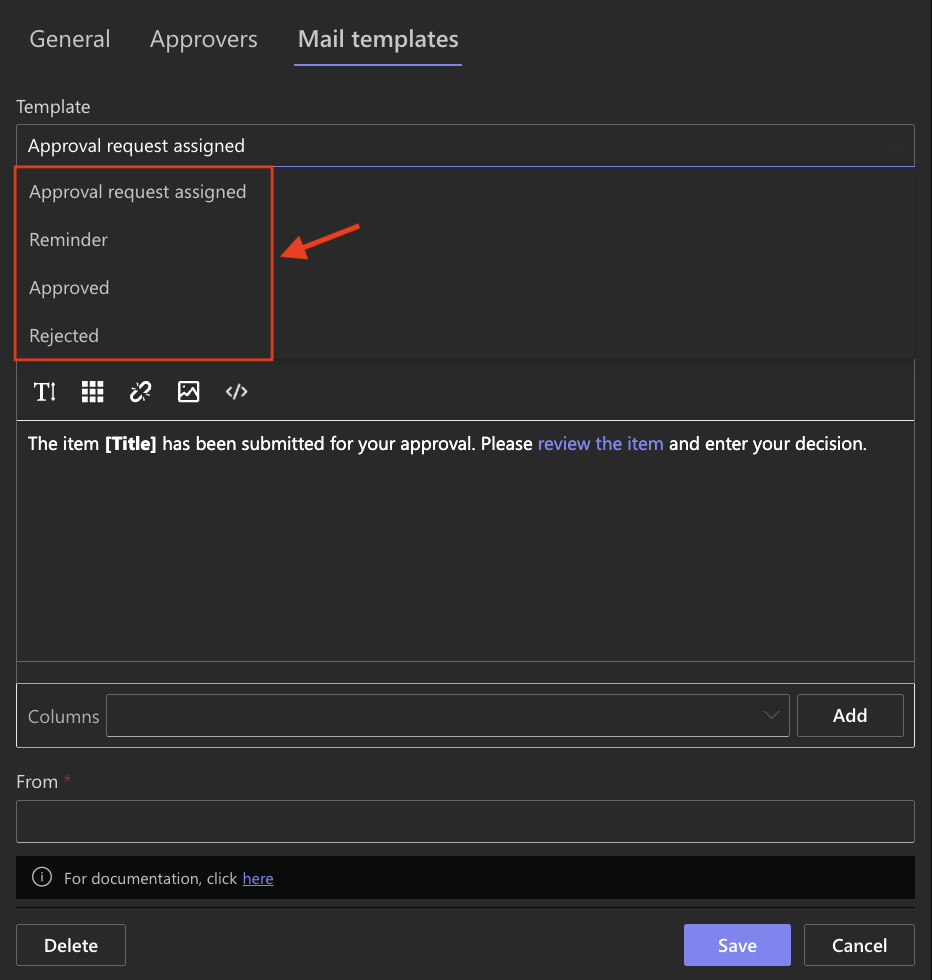
Each template can be customized independently, allowing different messages to be sent for different stages of the approval process.
Step 3: Customize an Approval Request Email
- Select the Approval Request
- Modify the email subject and body.
- For example:
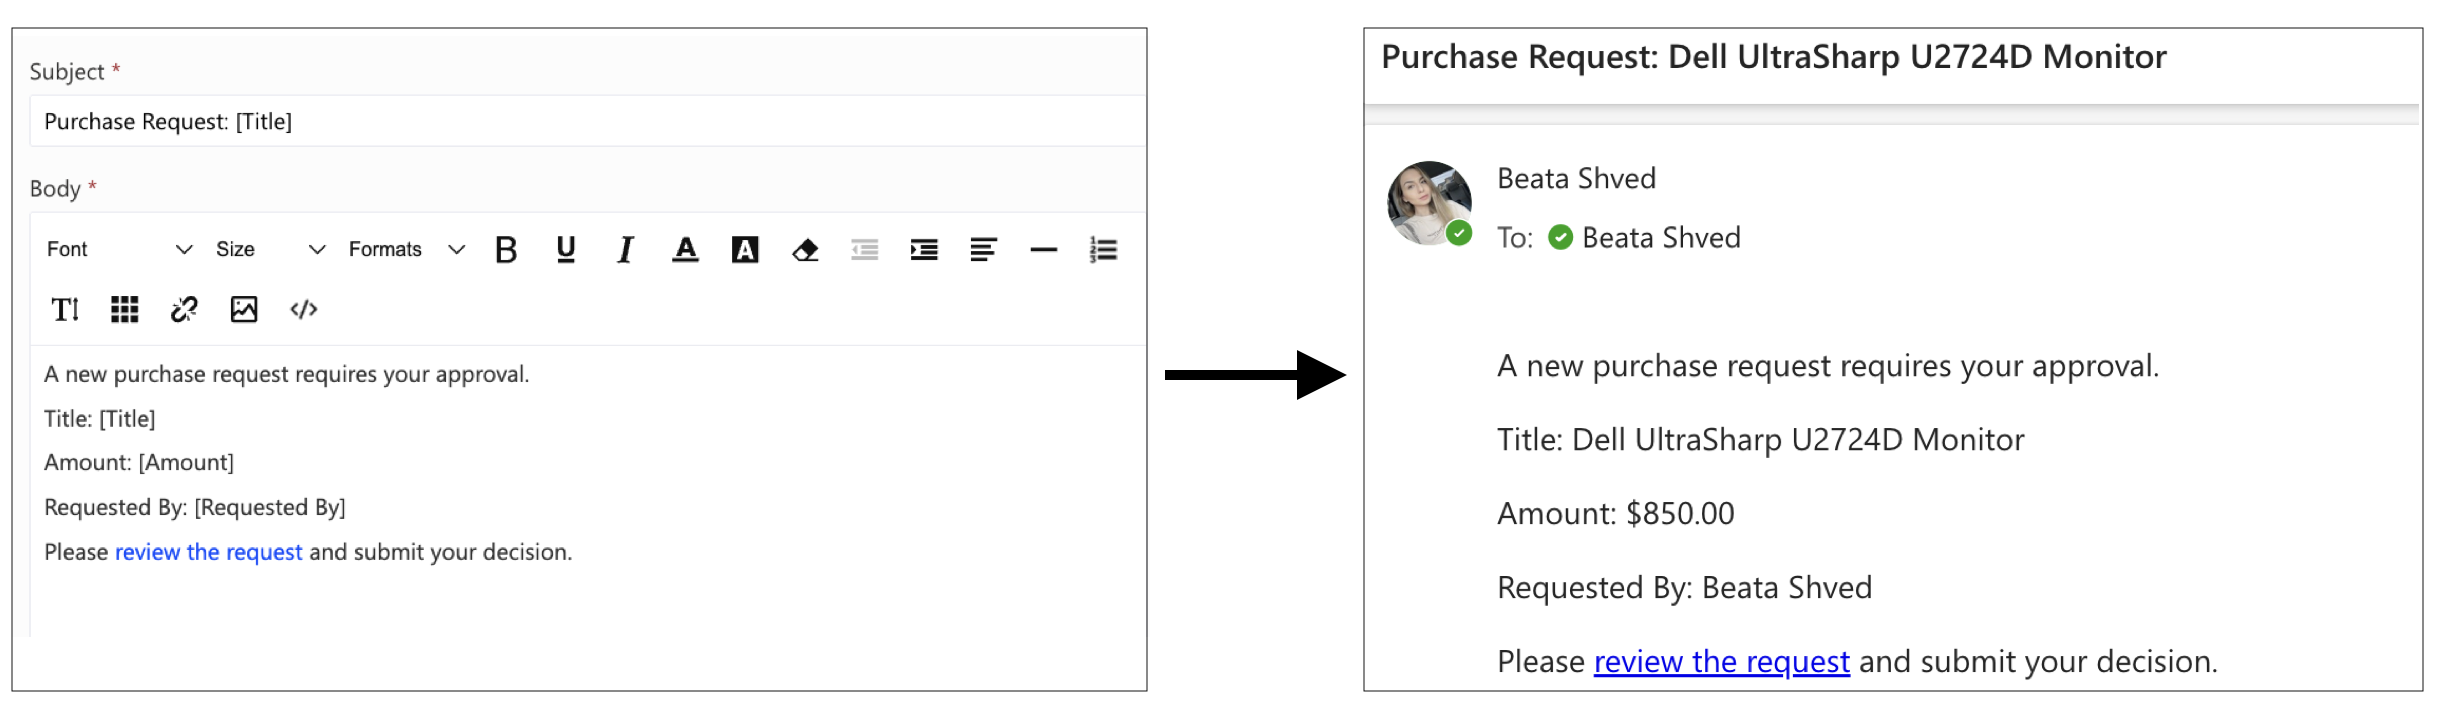
Subject: Purchase Request: [Title]
Body:
A new purchase request requires your approval.
Title: [Title]
Amount: [Amount]
Requested By: [Requested By]
Please review the request and submit your decision.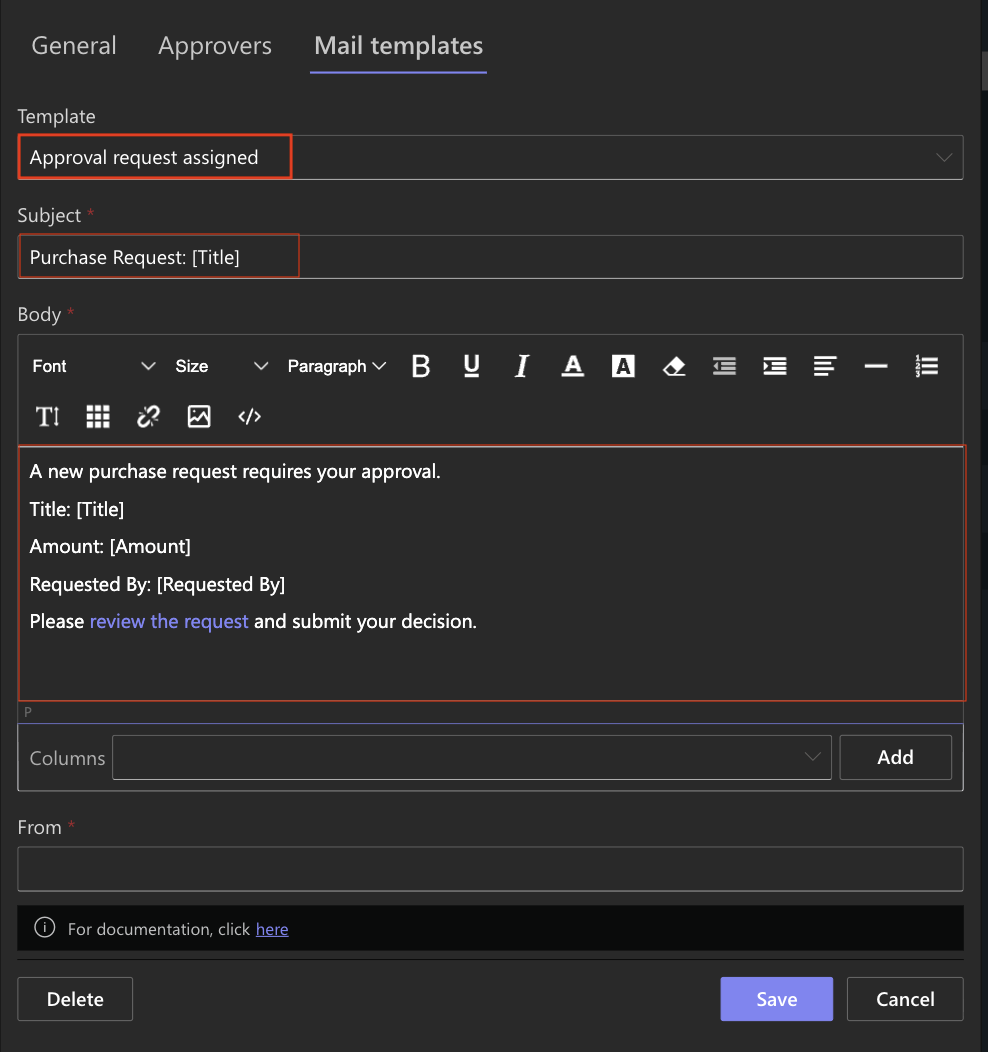
Step 4: Customize the Reminder Notification
- Select the Reminder
- First, customize the reminder email.
- For example:
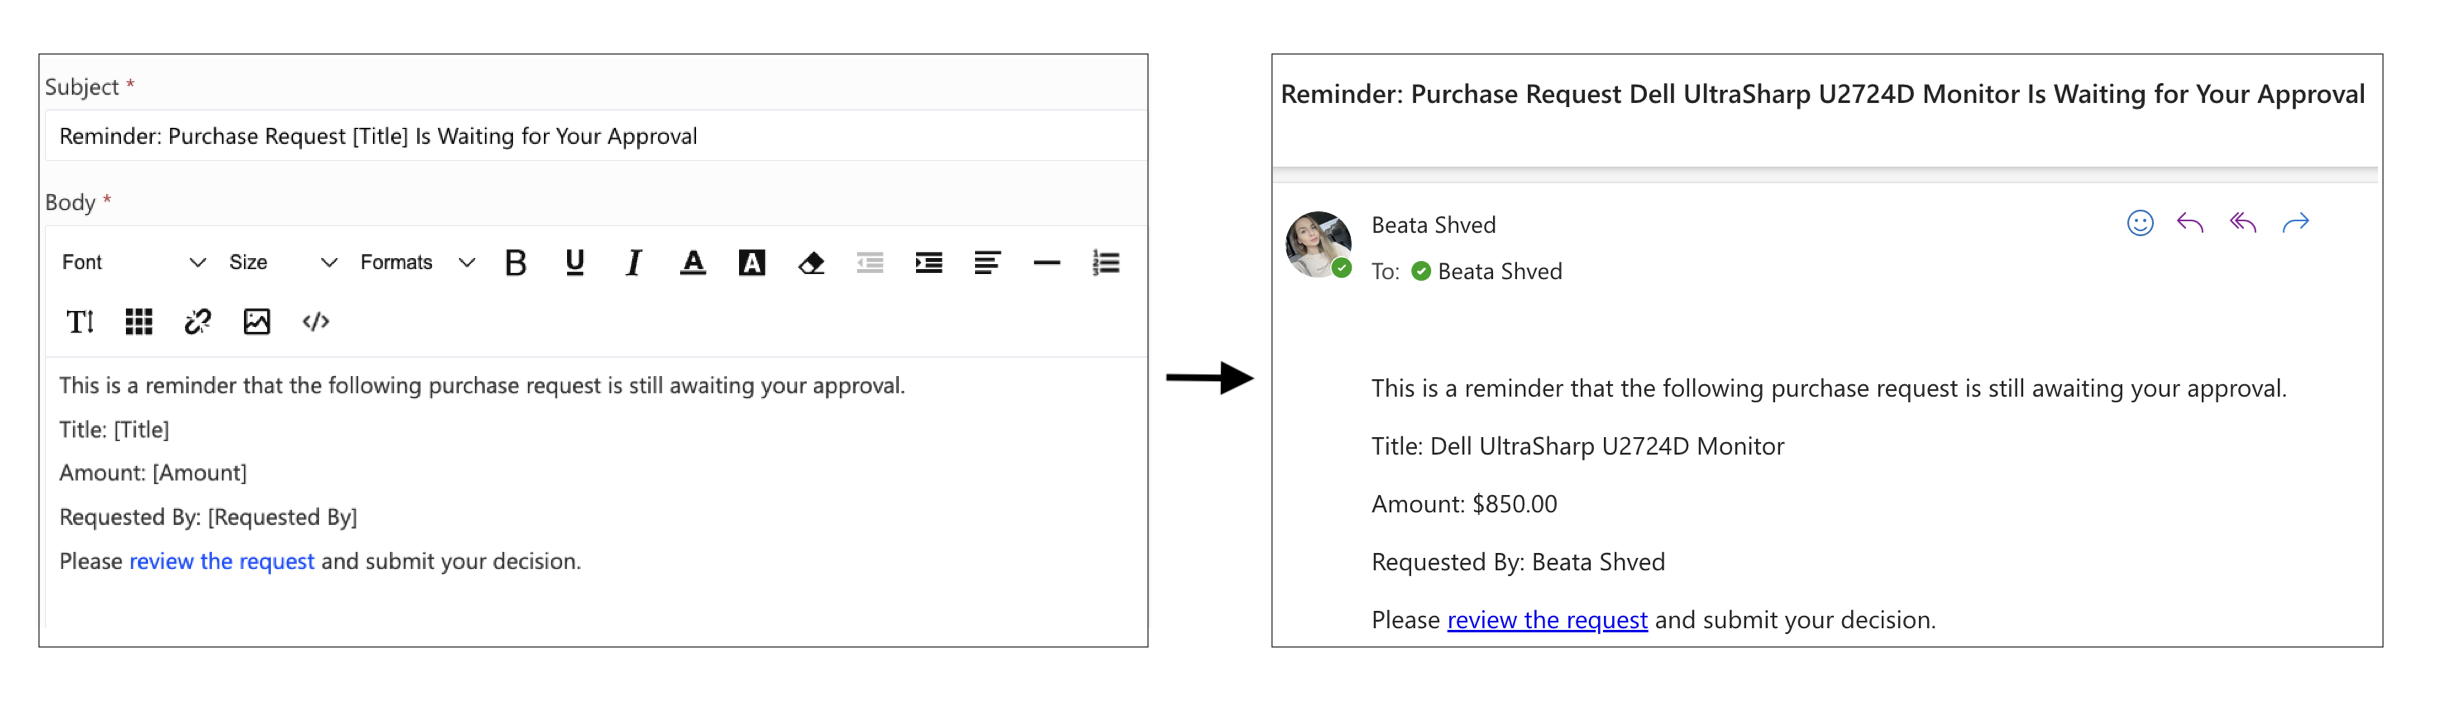
Subject: Reminder: Purchase Request [Title] Is Waiting for Your Approval
Body:
This is a reminder that the following purchase request is still awaiting your approval.
Title: [Title]
Amount: [Amount]
Requested By: [Requested By]
Please review the request and submit your decision.
- Next, configure the reminder settings as follows:
- Days before due date: 1
- Days between reminders: 1
- Maximum reminders: 3
- Hour: 9
With these settings, the first reminder is sent one day before the due date, followed by daily reminders at 9:00 AM until the request is approved or the maximum number of reminders has been sent.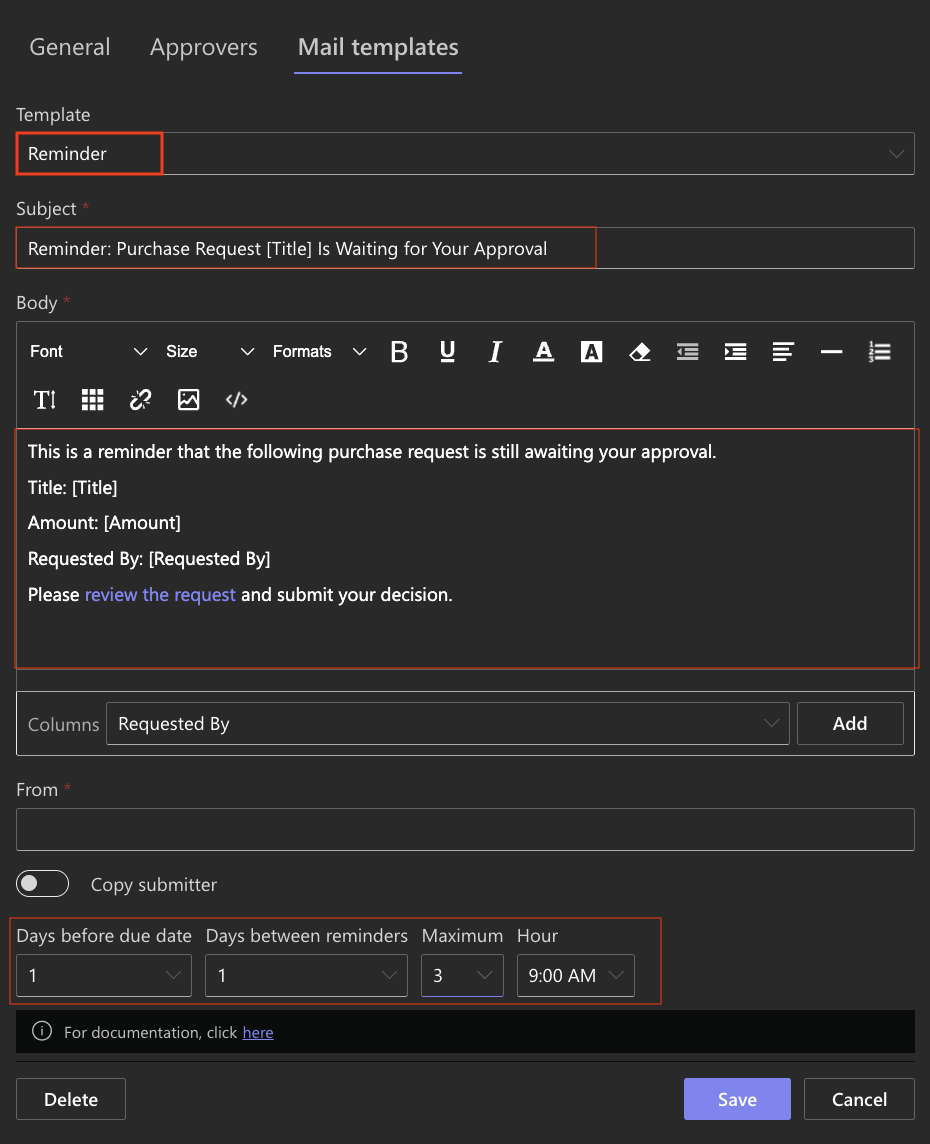
Step 5: Test the Notifications
- Publish the form and create a new purchase request.
- Start the approval workflow and verify that:
- the approver receives the customized Approval Request email;
- reminder emails use the updated subject and body;
- reminder emails are sent according to the configured schedule.
- the approver receives the customized Approval Request email;
Summary
In this tutorial, you learned how to customize Approval Request and Reminder notifications by updating their email templates and configuring reminder schedules. The same approach can also be used to customize the Approved and Rejected notification templates, ensuring a consistent notification experience throughout the approval workflow.