Form Building - Part 2
Now that you’ve completed the basic layout in Part 1, it’s time to enhance the appearance and structure of your SharePoint form. In this part, we’ll apply visual design elements like borders, layout containers, and icons to guide users and create a more professional, intuitive experience.
This step is all about usability and visual organization. Let’s get started!
Instructions
Step 1: Add a Border to a Section
- Click on the Header.
- In the right-hand settings panel, click Edit Style 1.
- Go to the Border section.
- Select Black as the color.
- Click OK.
Click Save to confirm.
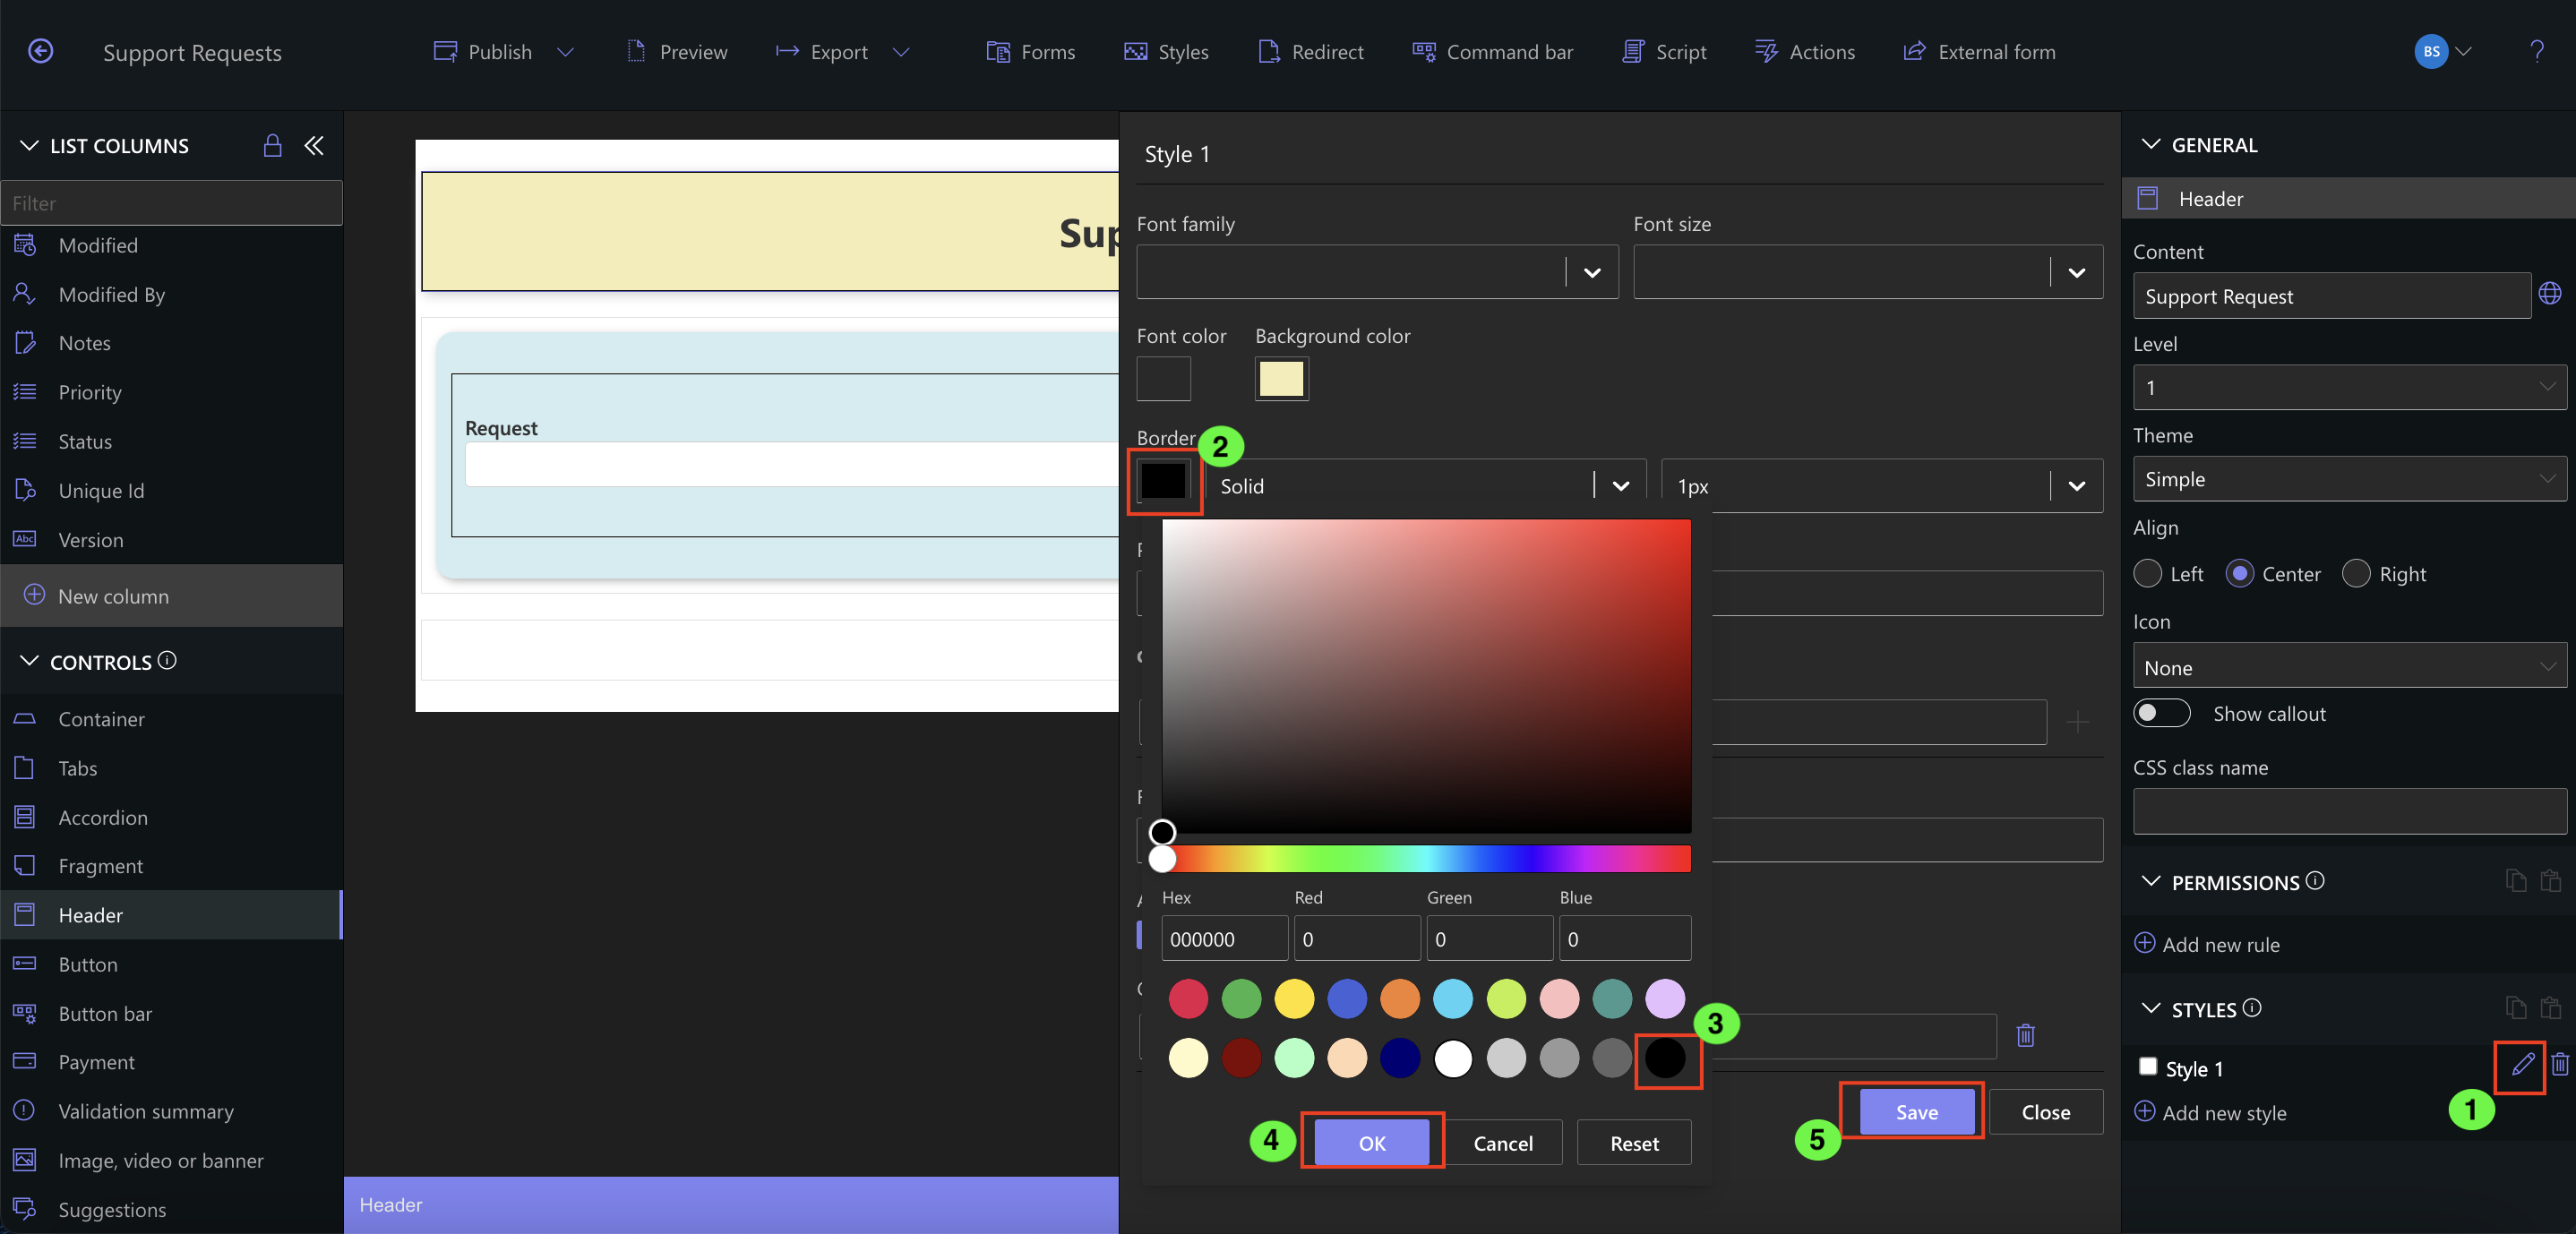
Borders help users visually separate content areas and understand structure at a glance.
Step 2: Publish Your Progress
- Click Publish at the top of the screen.

Tip: Publish often to save progress! Although this instruction won’t be repeated in the instructions, you should do this every few minutes to save progress.
Step 3: Insert a Fragment for Instructions
- Drag a Fragment component to a position above the Request column.
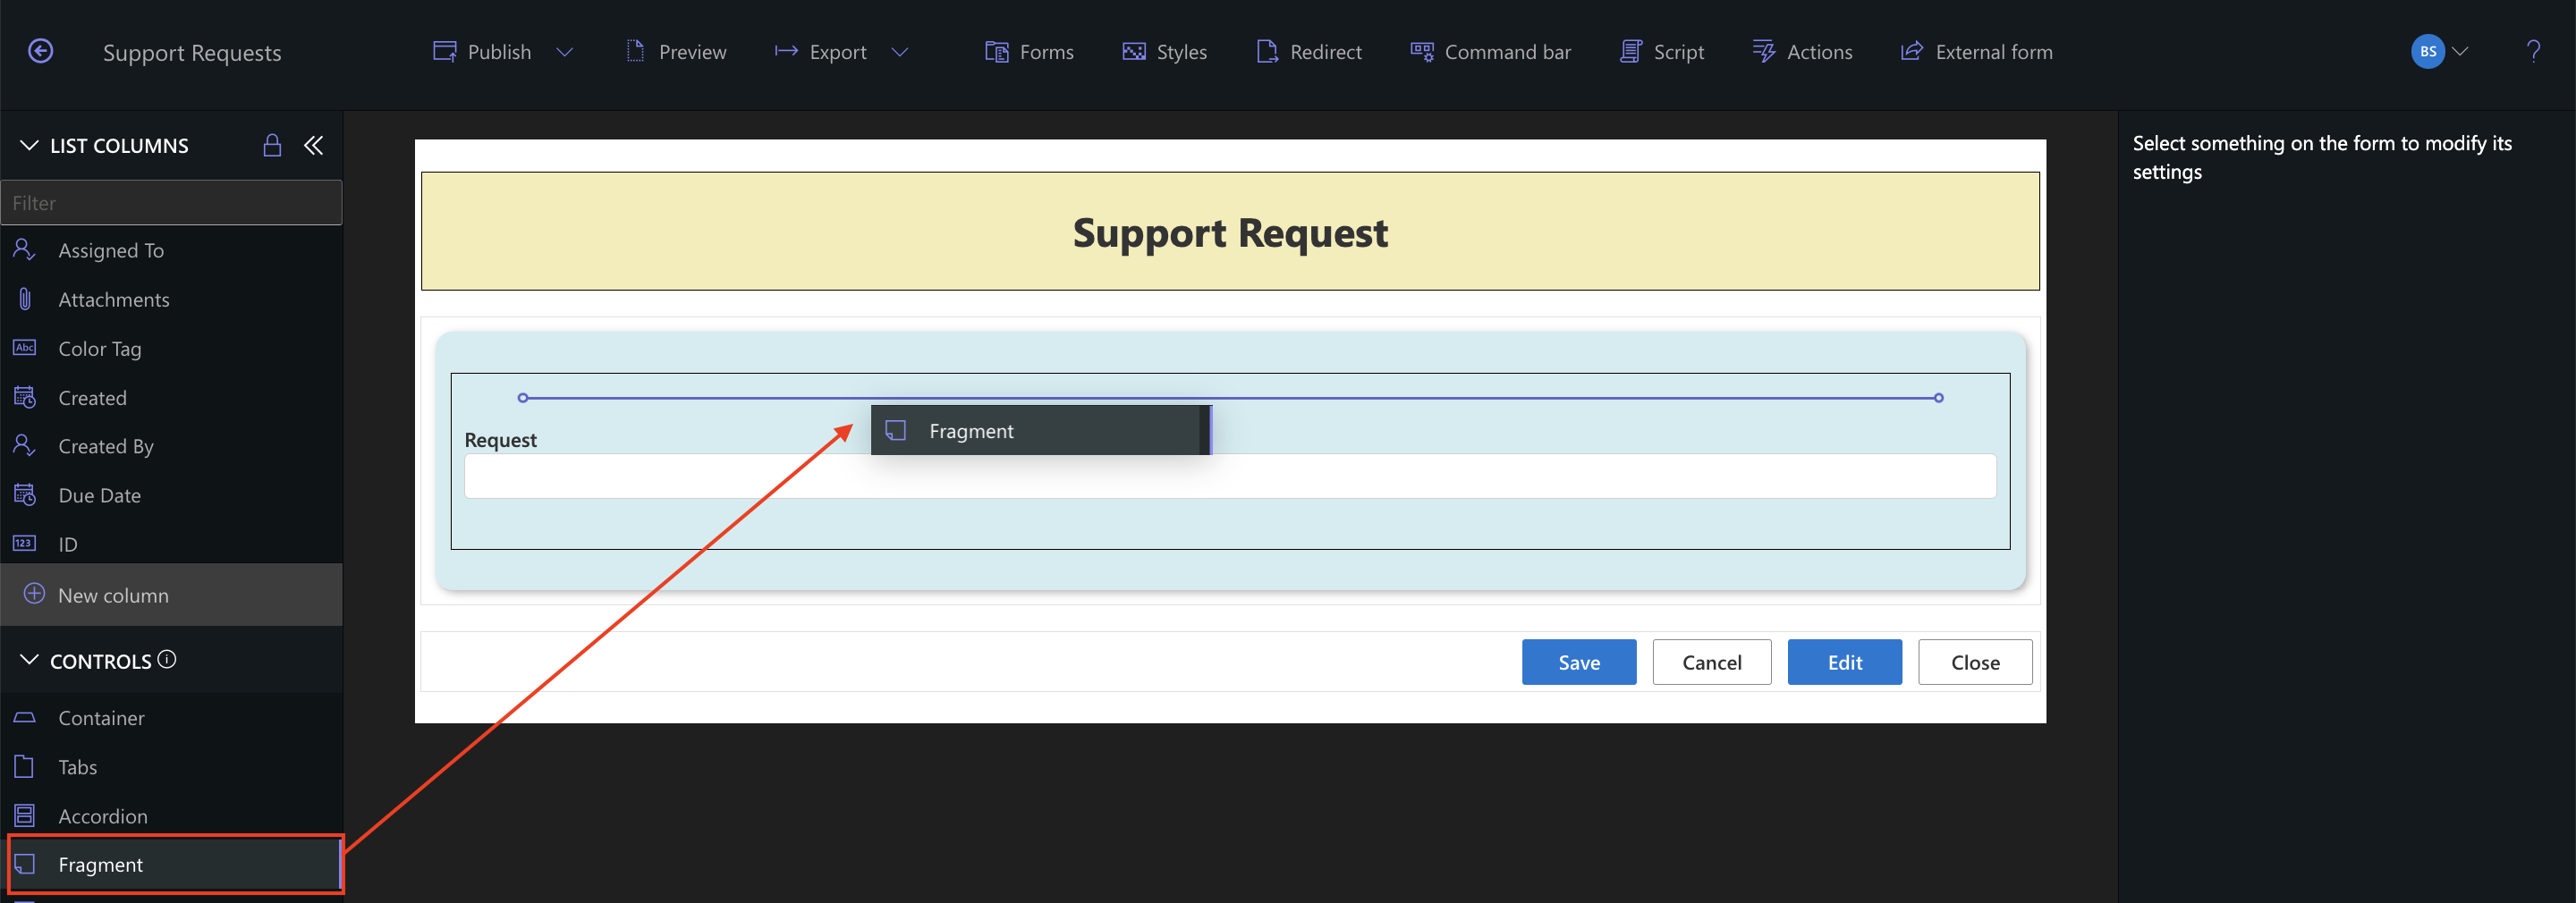
- Click on the fragment and edit the content using the built-in rich text editor.
- Use bold text, bullet points, or other formatting to provide guidance to the user.
- Save your changes
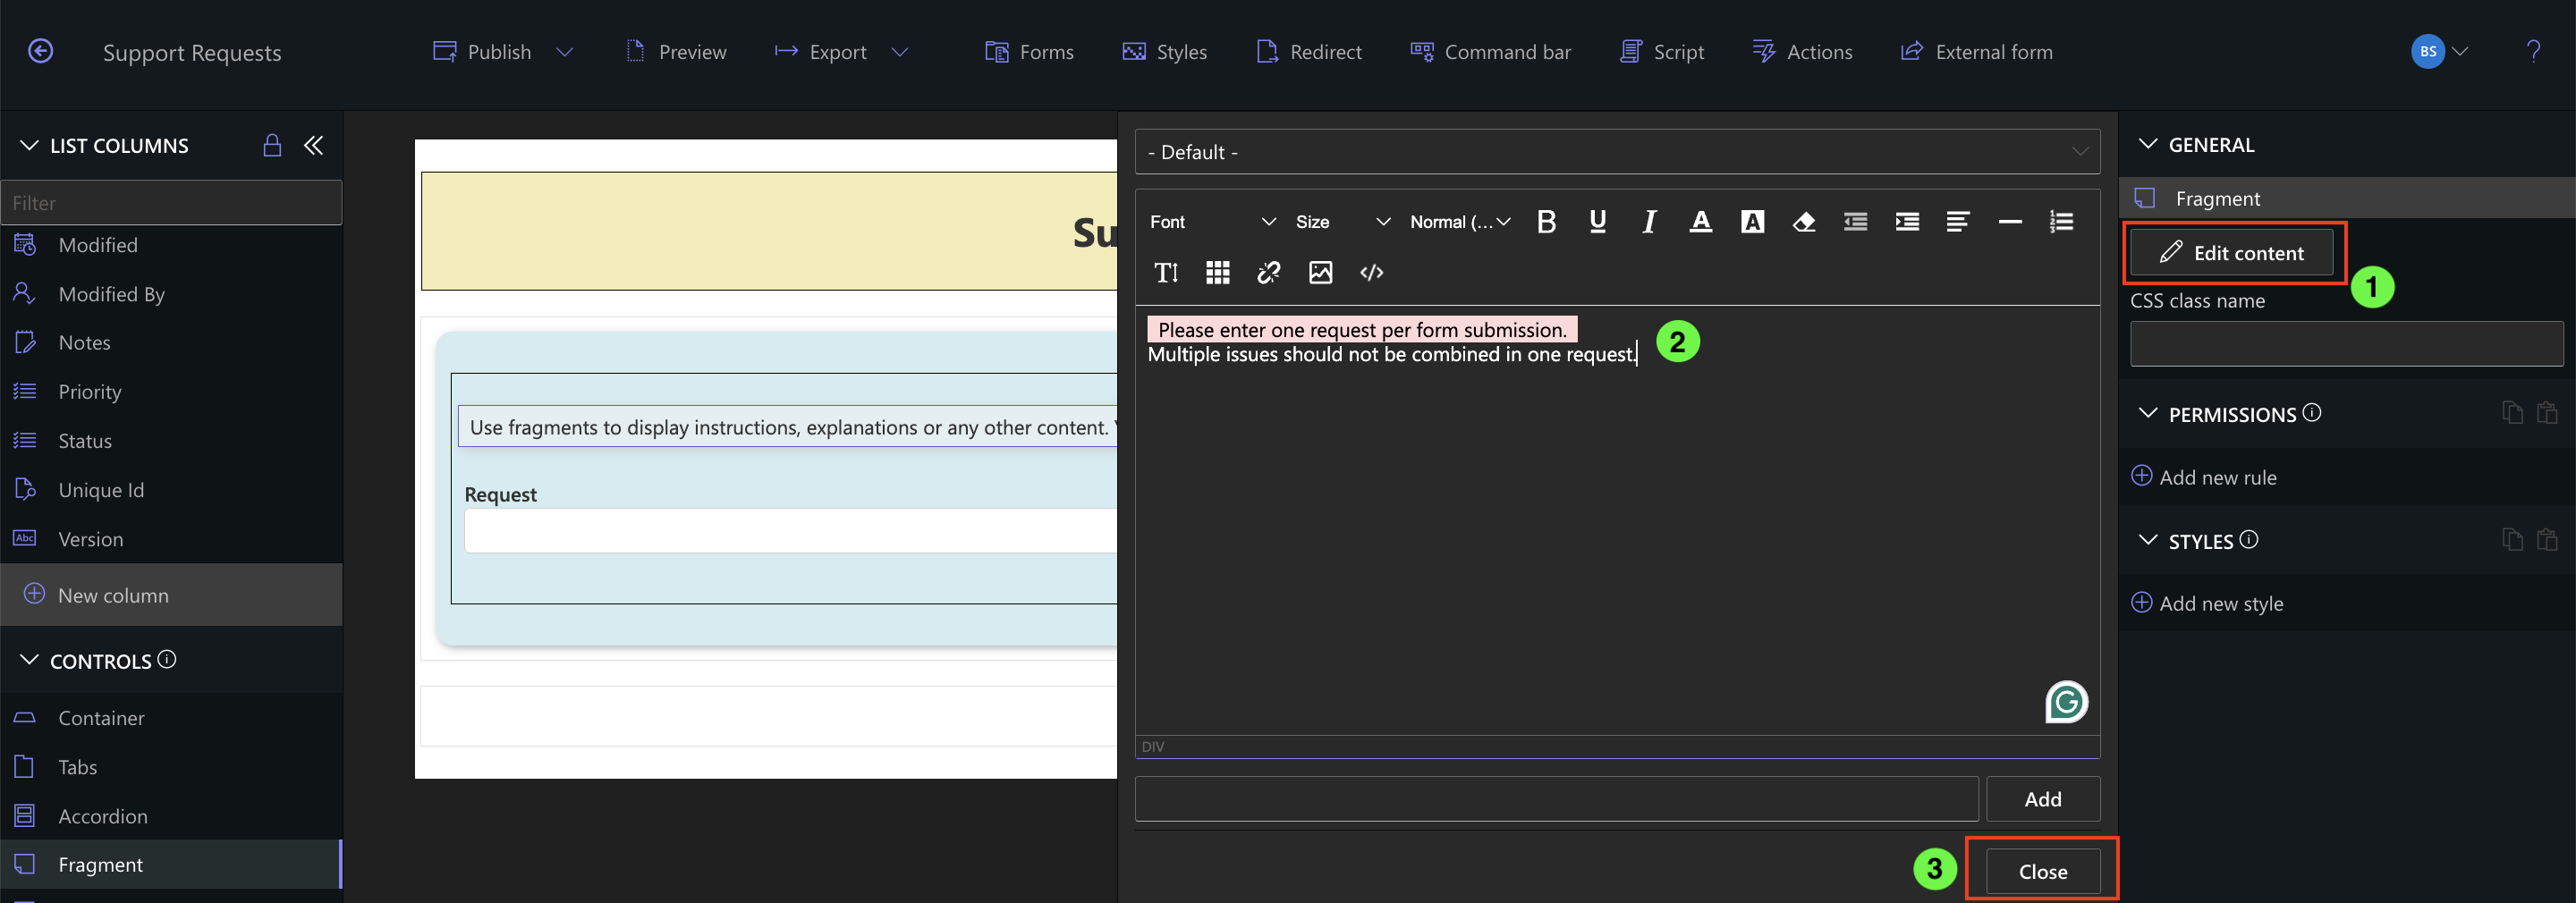
Fragments are perfect for instructional messages, section titles, or form context.
Step 4: Duplicate and Customize a Container
- Select the previously created container with the black border.
- Click the Copy button (two sheets icon).
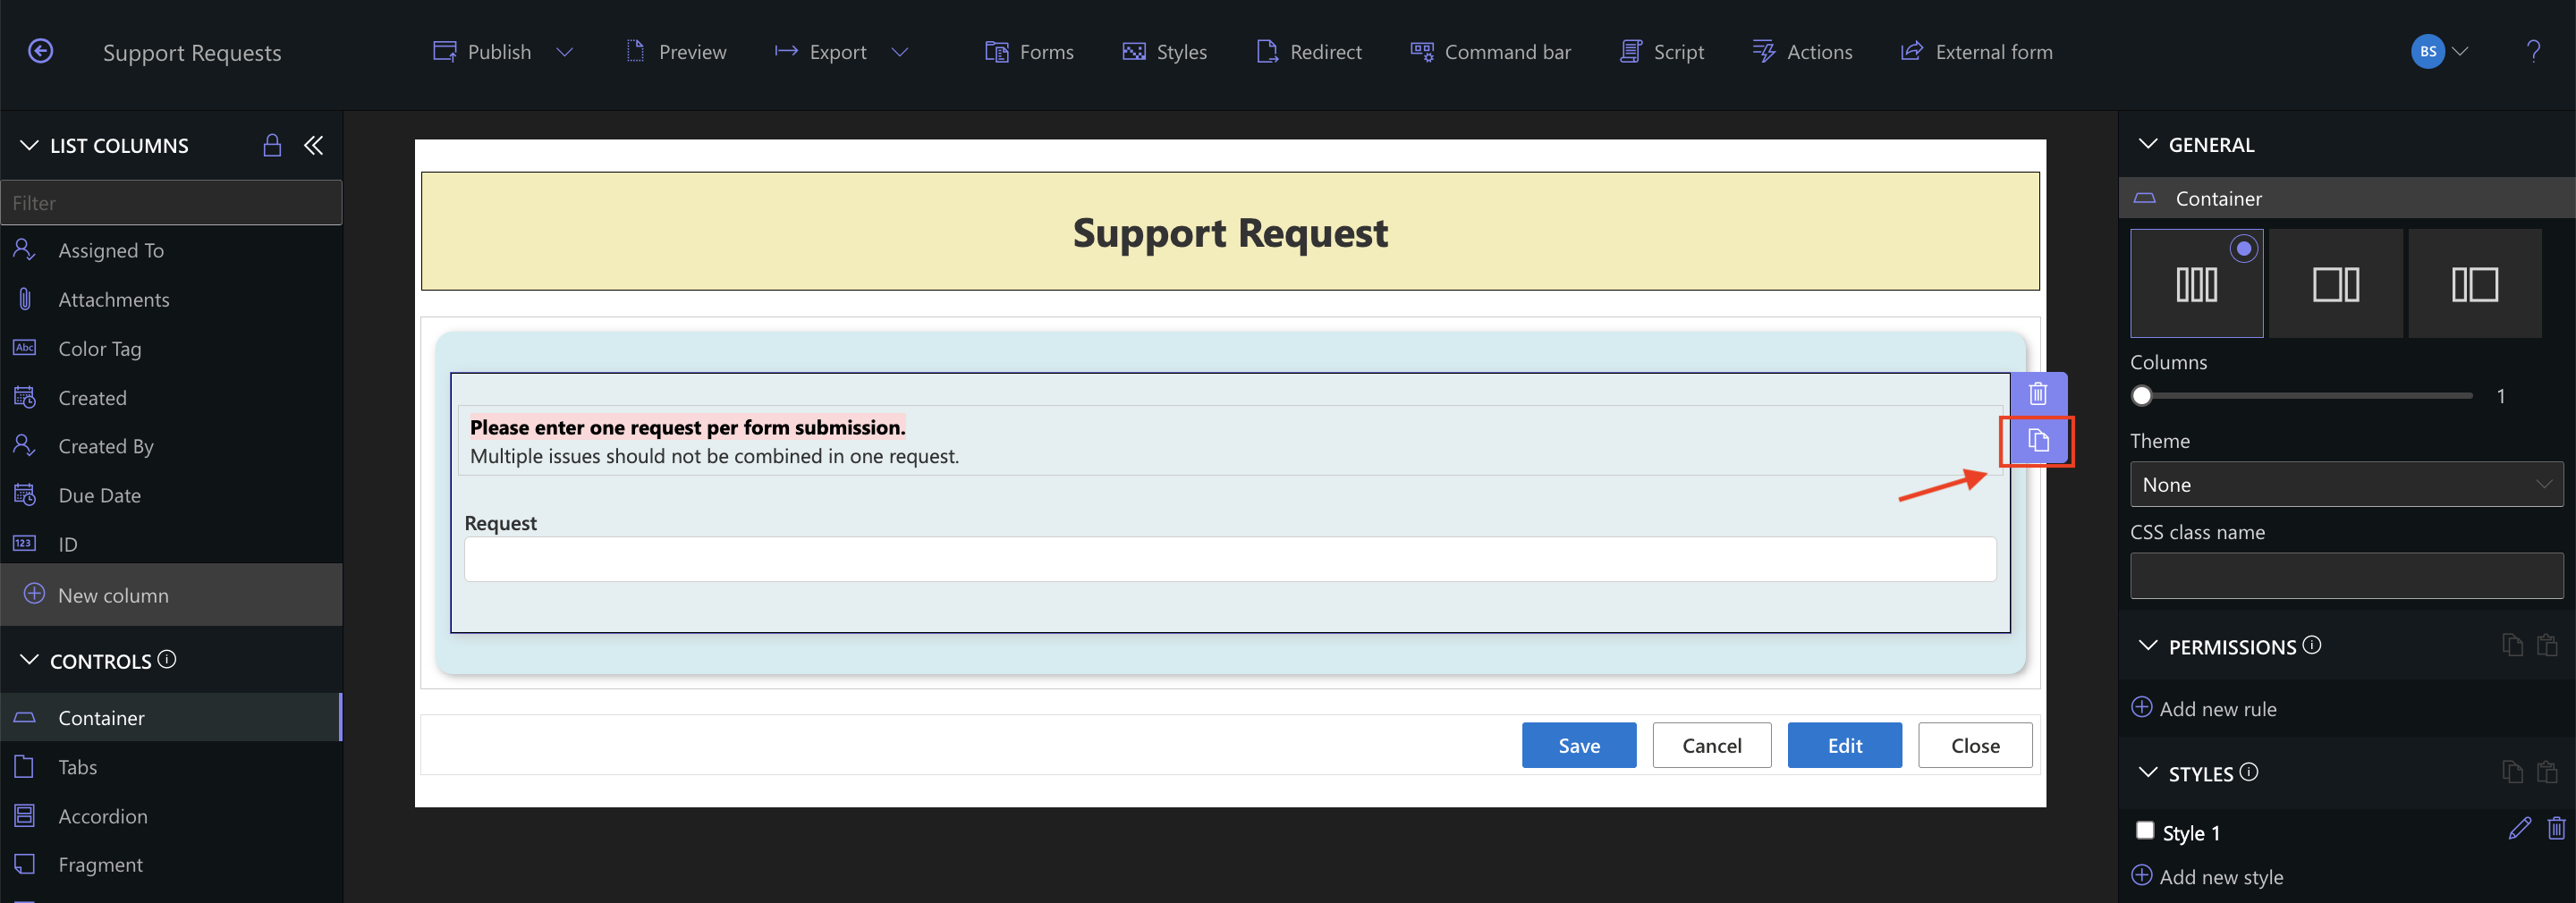
- Select the newly copied container.
- In the right-hand panel, set Columns = 3.
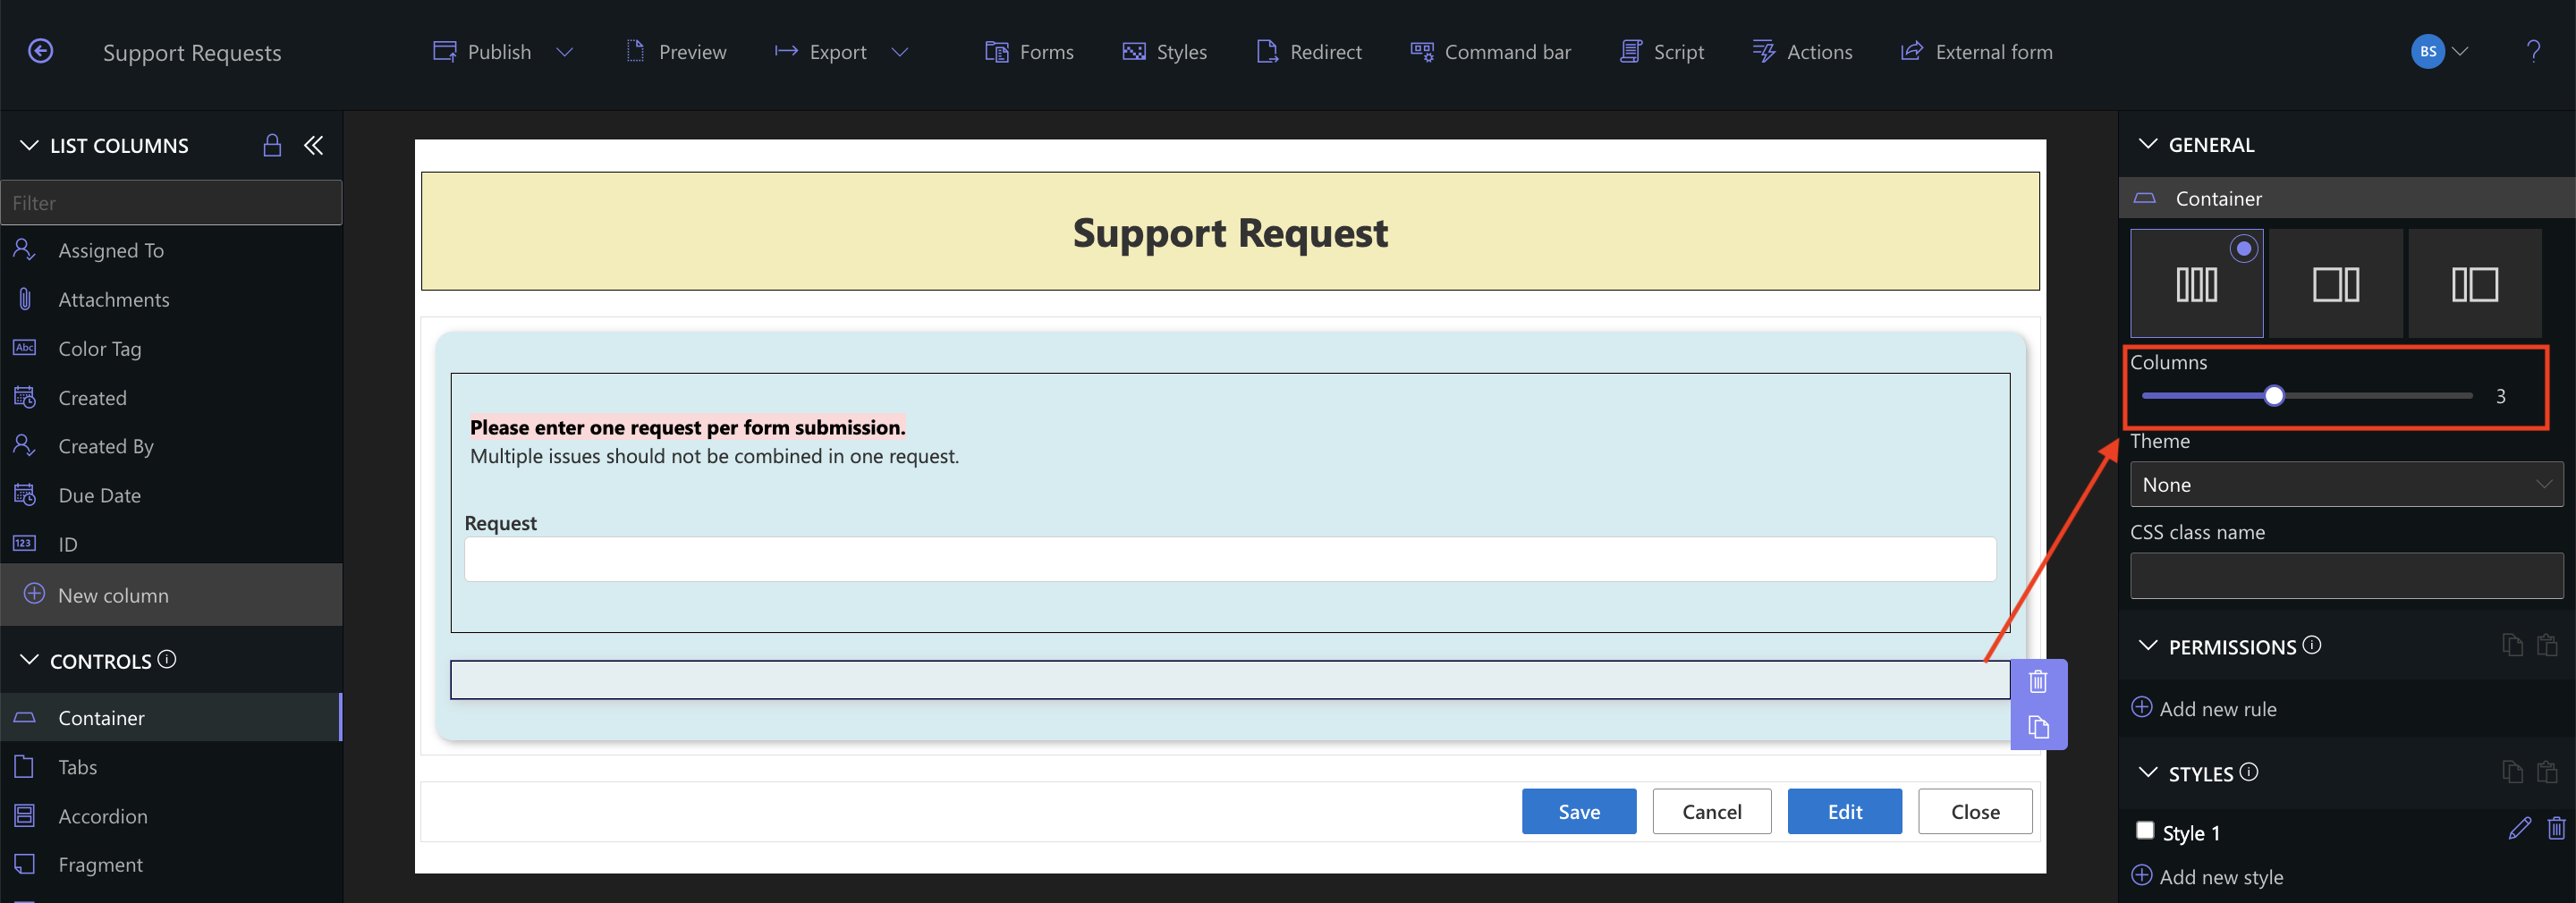
Using multiple columns keeps the form compact and logically arranged.
Step 5: Add a "Requester" Column
- Click New Column.
- Choose Person or Group as the column type.
- Name the column Requester.
- Set the column as Required.
- Click Save.
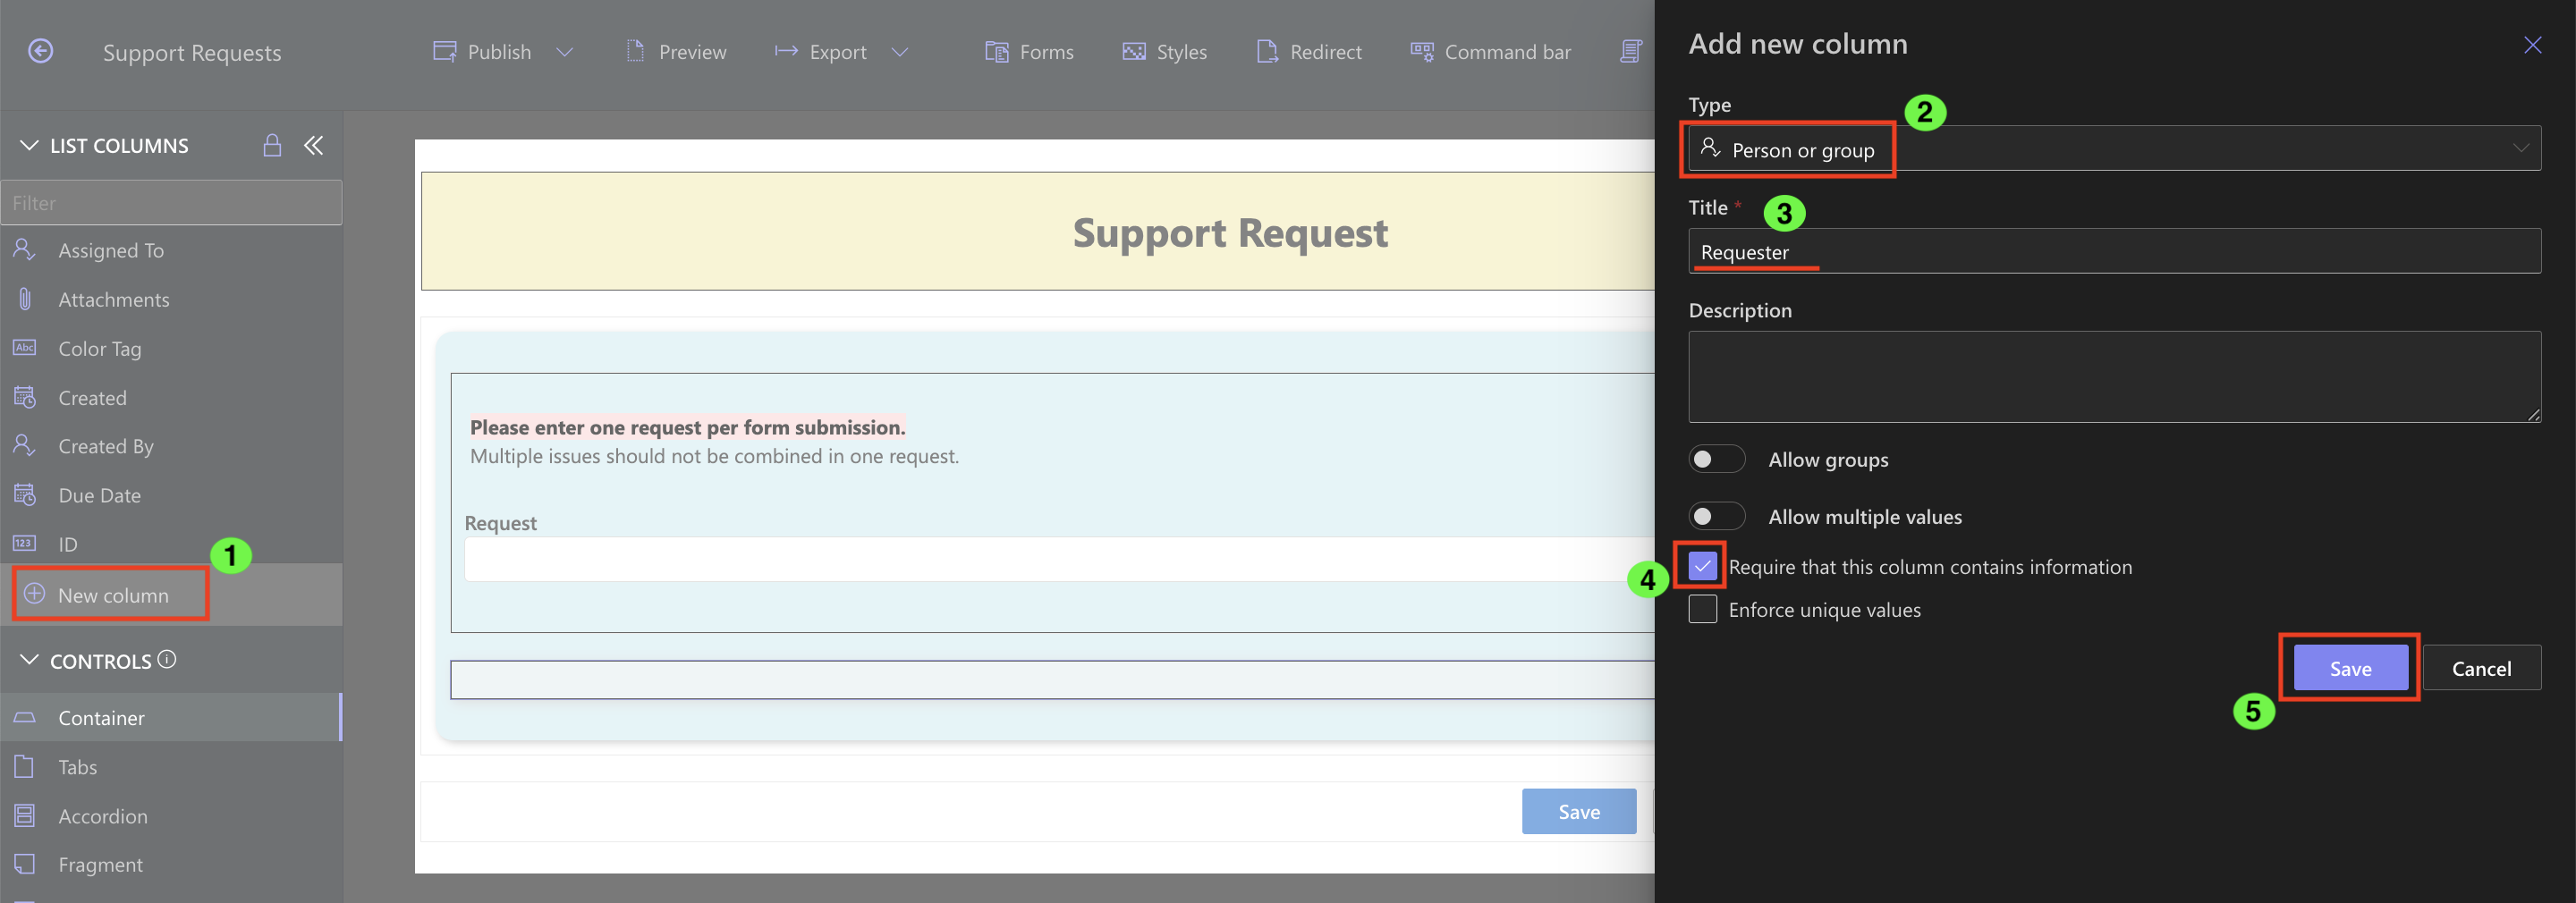
- Drag the new Requester field into one of the columns inside the 3-column container.
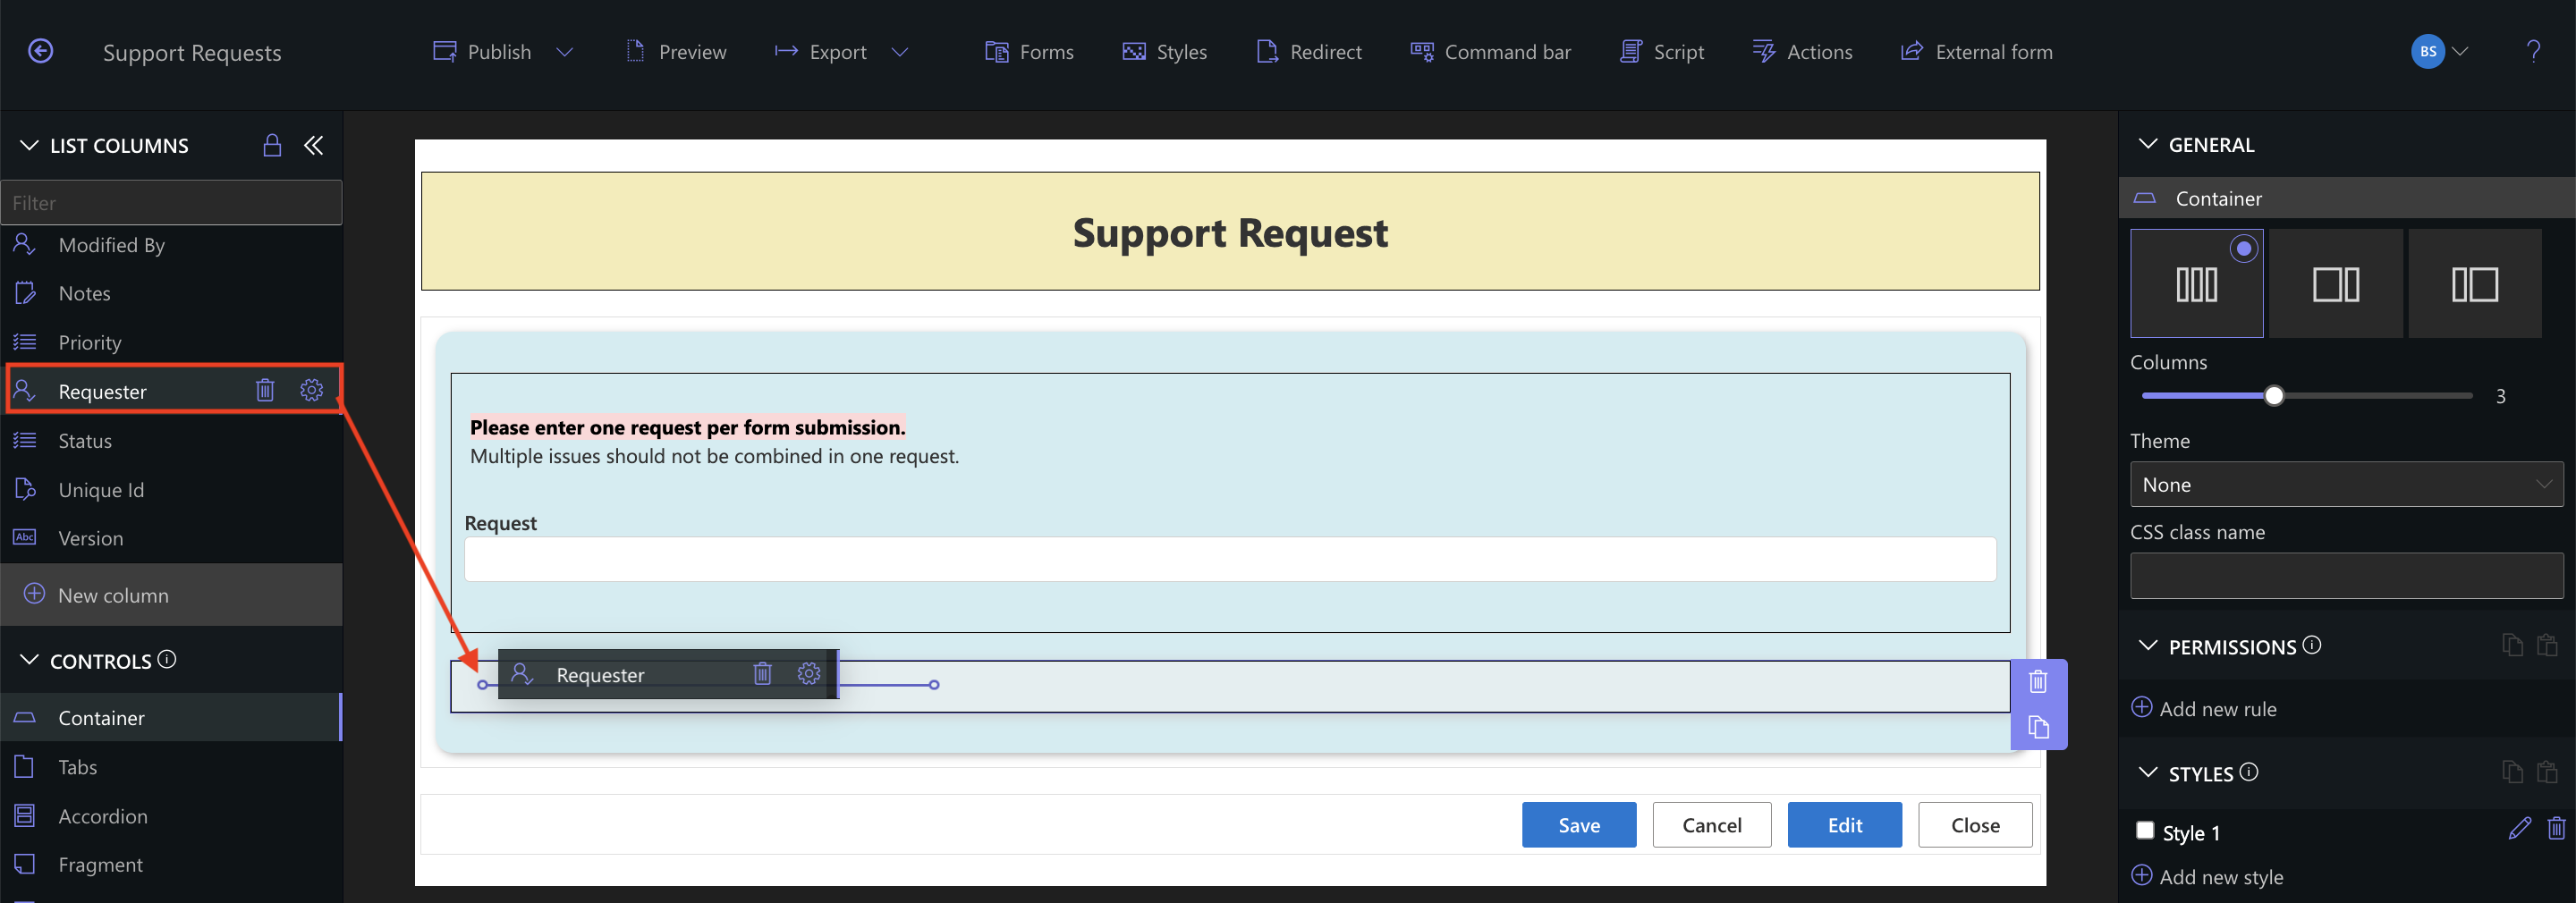
This column will be used to identify the person submitting the form.
Step 6: Add a "Category" Column with Icons
- Click New Column.
- Choose Color Choice as the column type.
- Name the column Category.
- Set the column as Required.
- Enable Show as icon.
- Enter values and select icons, for example:
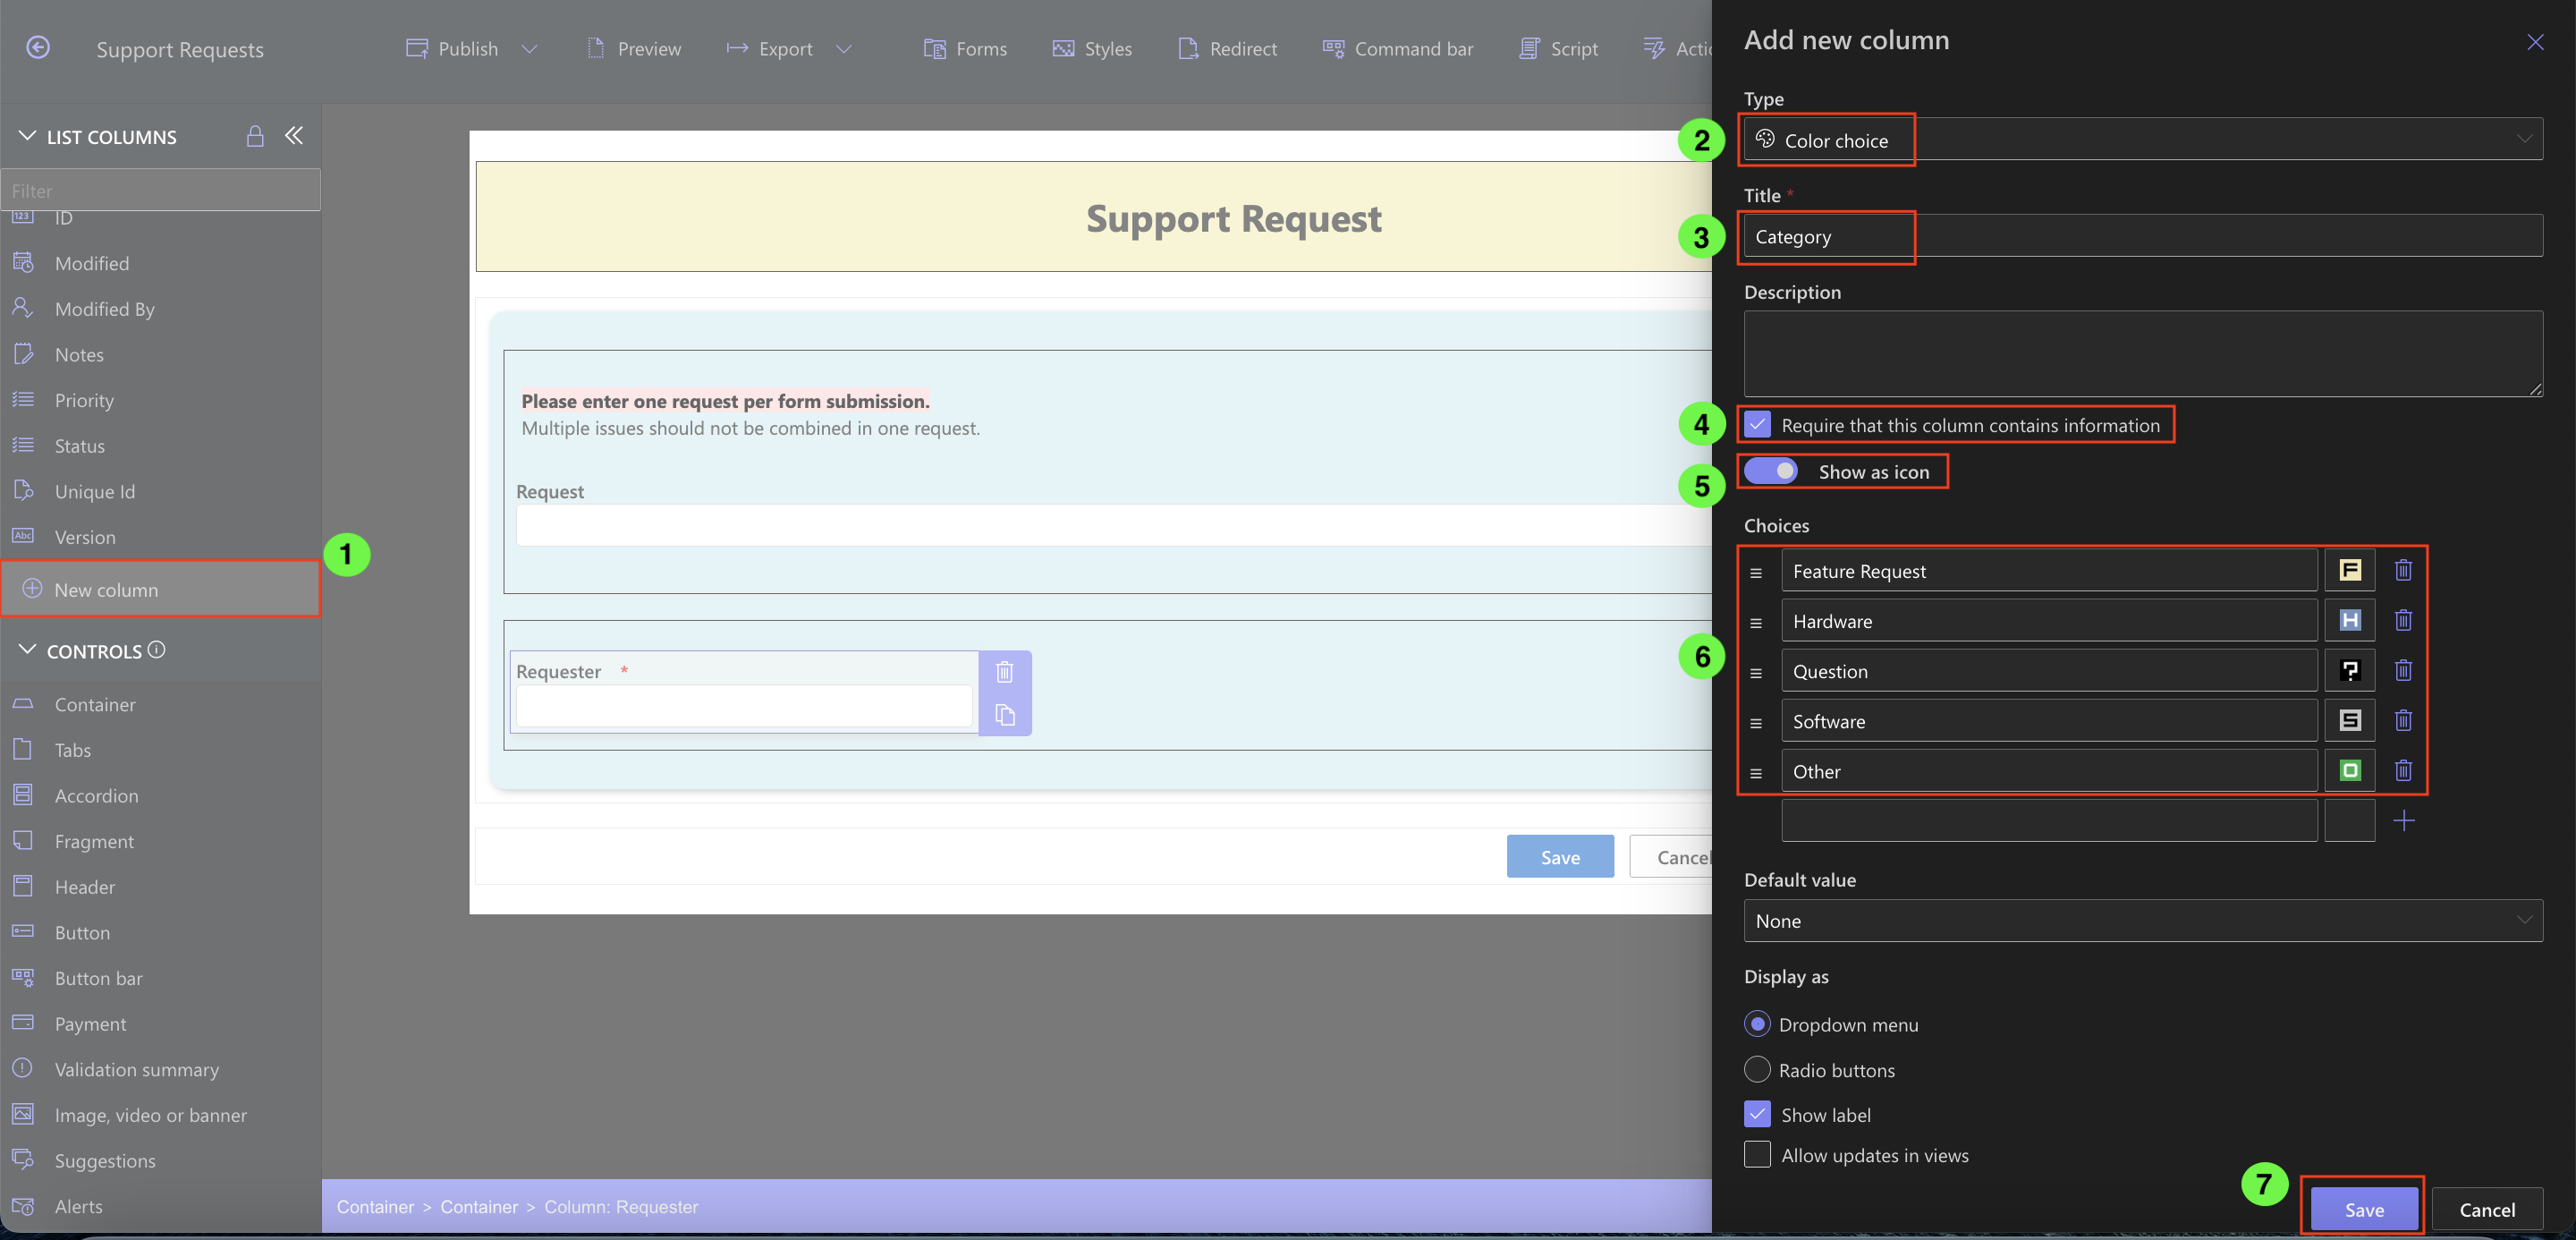
- Click Save.
- Drag the Category column into the container next to the Requester column.
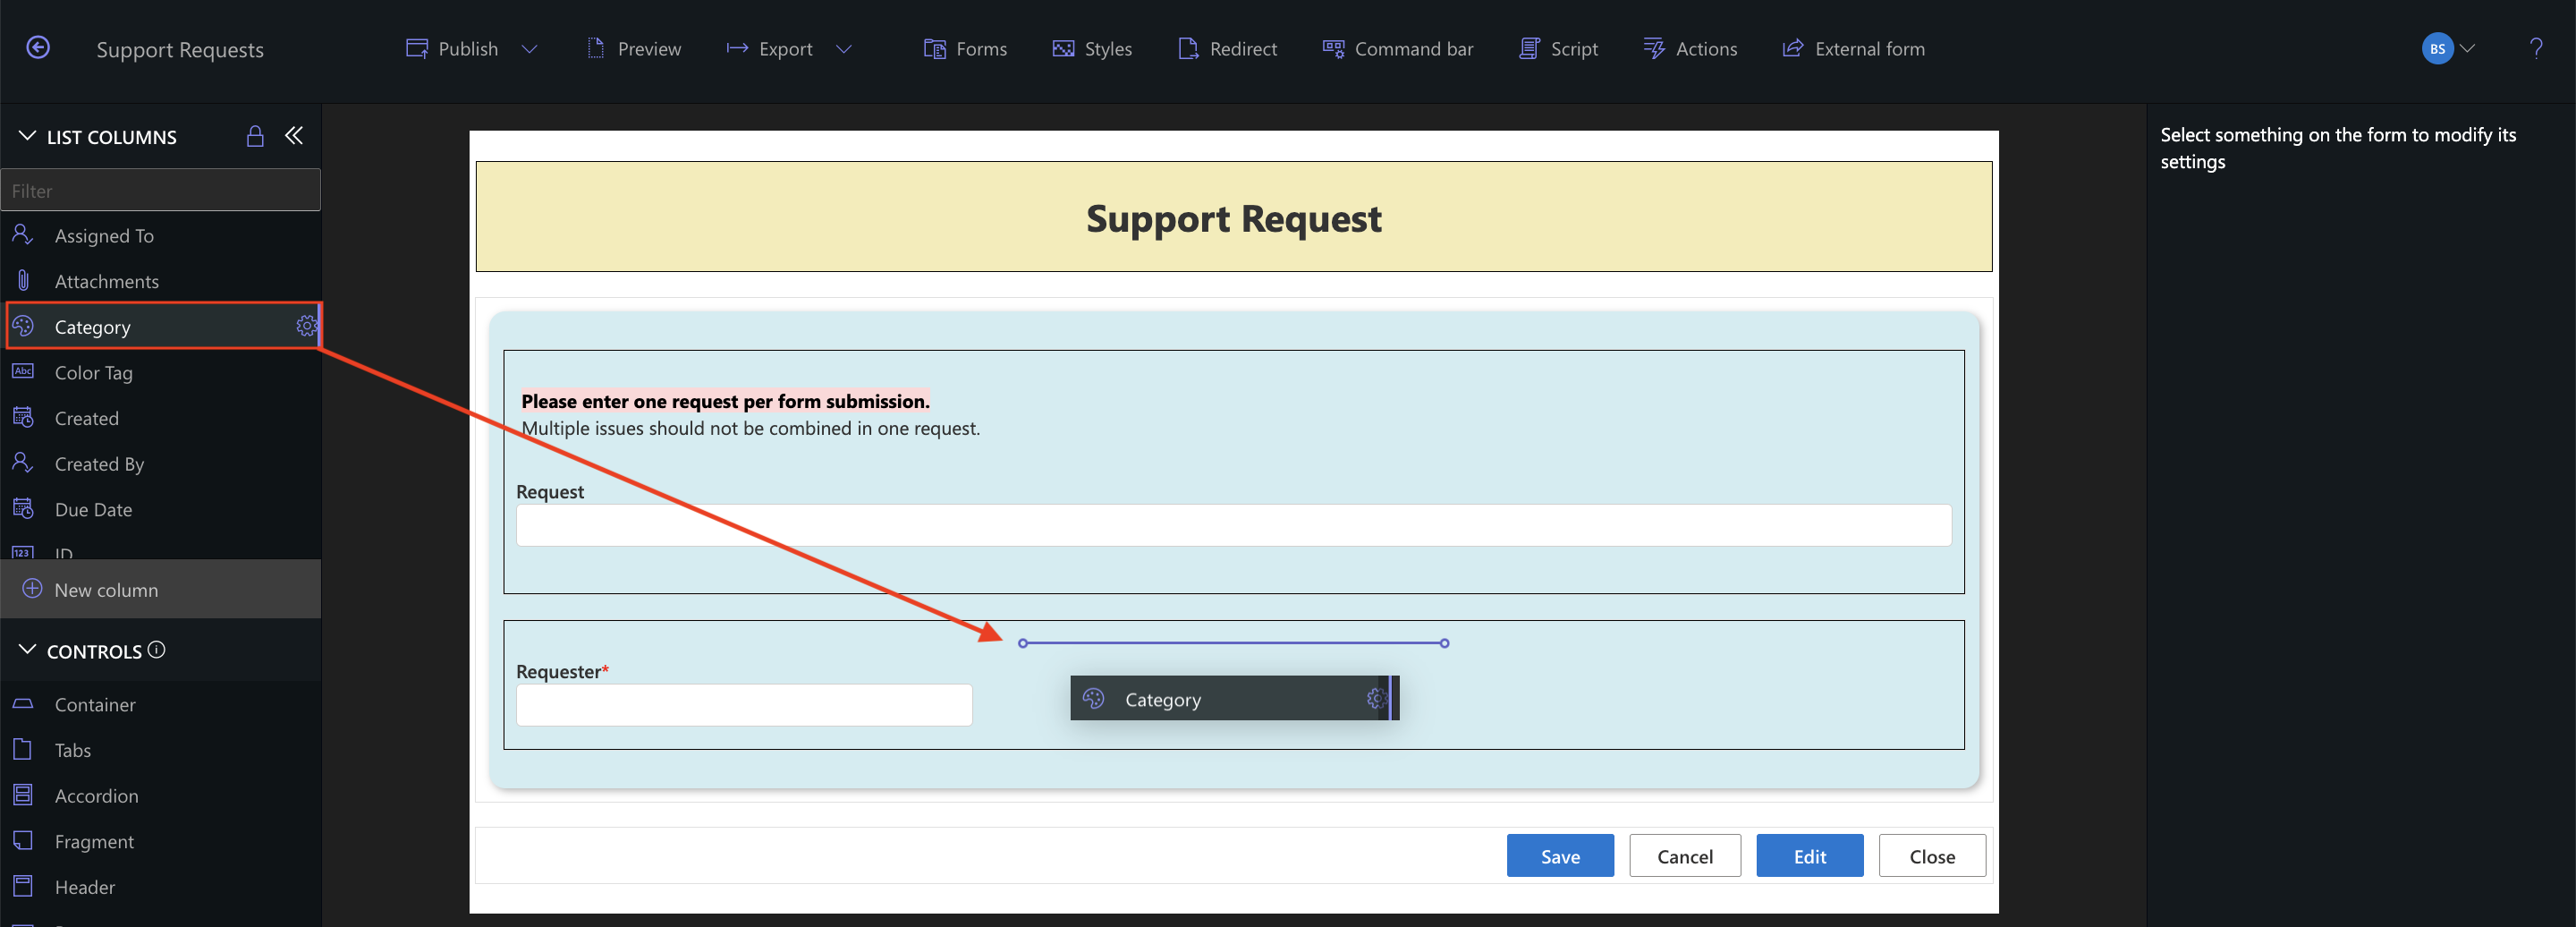
Icons help users visually scan and understand options faster.
Summary
In this tutorial, you enhanced the visual layout of your form using Infowise Ultimate Forms. By incorporating containers, columns, fragments, and styled fields, your form becomes easier to navigate and more efficient to complete. These best practices help build powerful, no-code business tools that users enjoy using