Validation Rules
Validation Rules help ensure that users enter valid information before submitting a form. They can validate user input in three different ways:
- Pattern – verifies that a value matches a specific format, such as an email address or phone number.
- Column – compares the value of one column with another column or a specified value.
- Length – validates the number of characters entered into a text column or, for columns that support multiple values, the number of selected values.
Instead of checking data after it has been saved, Validation Rules evaluate user input as it is entered and display an error message whenever the entered value does not meet the specified requirements.
In this tutorial, you'll create a simple Vacation Request form and configure all three validation rule types using practical business scenarios.
Instructions
Step 1: Create the Vacation Request List
Create a custom SharePoint list named Vacation Requests with the following columns:
- Employee Name - Single line of text
- Work Email - Single line of text
- Vacation Start Date - Date
- Vacation End Date - Date
- Reason - Single line of text
- Backup Employee - Person or Group (Allow multiple selections)

Step 2: Validate an Email Address Using Pattern Validation
The Work Email column should contain a valid email address.
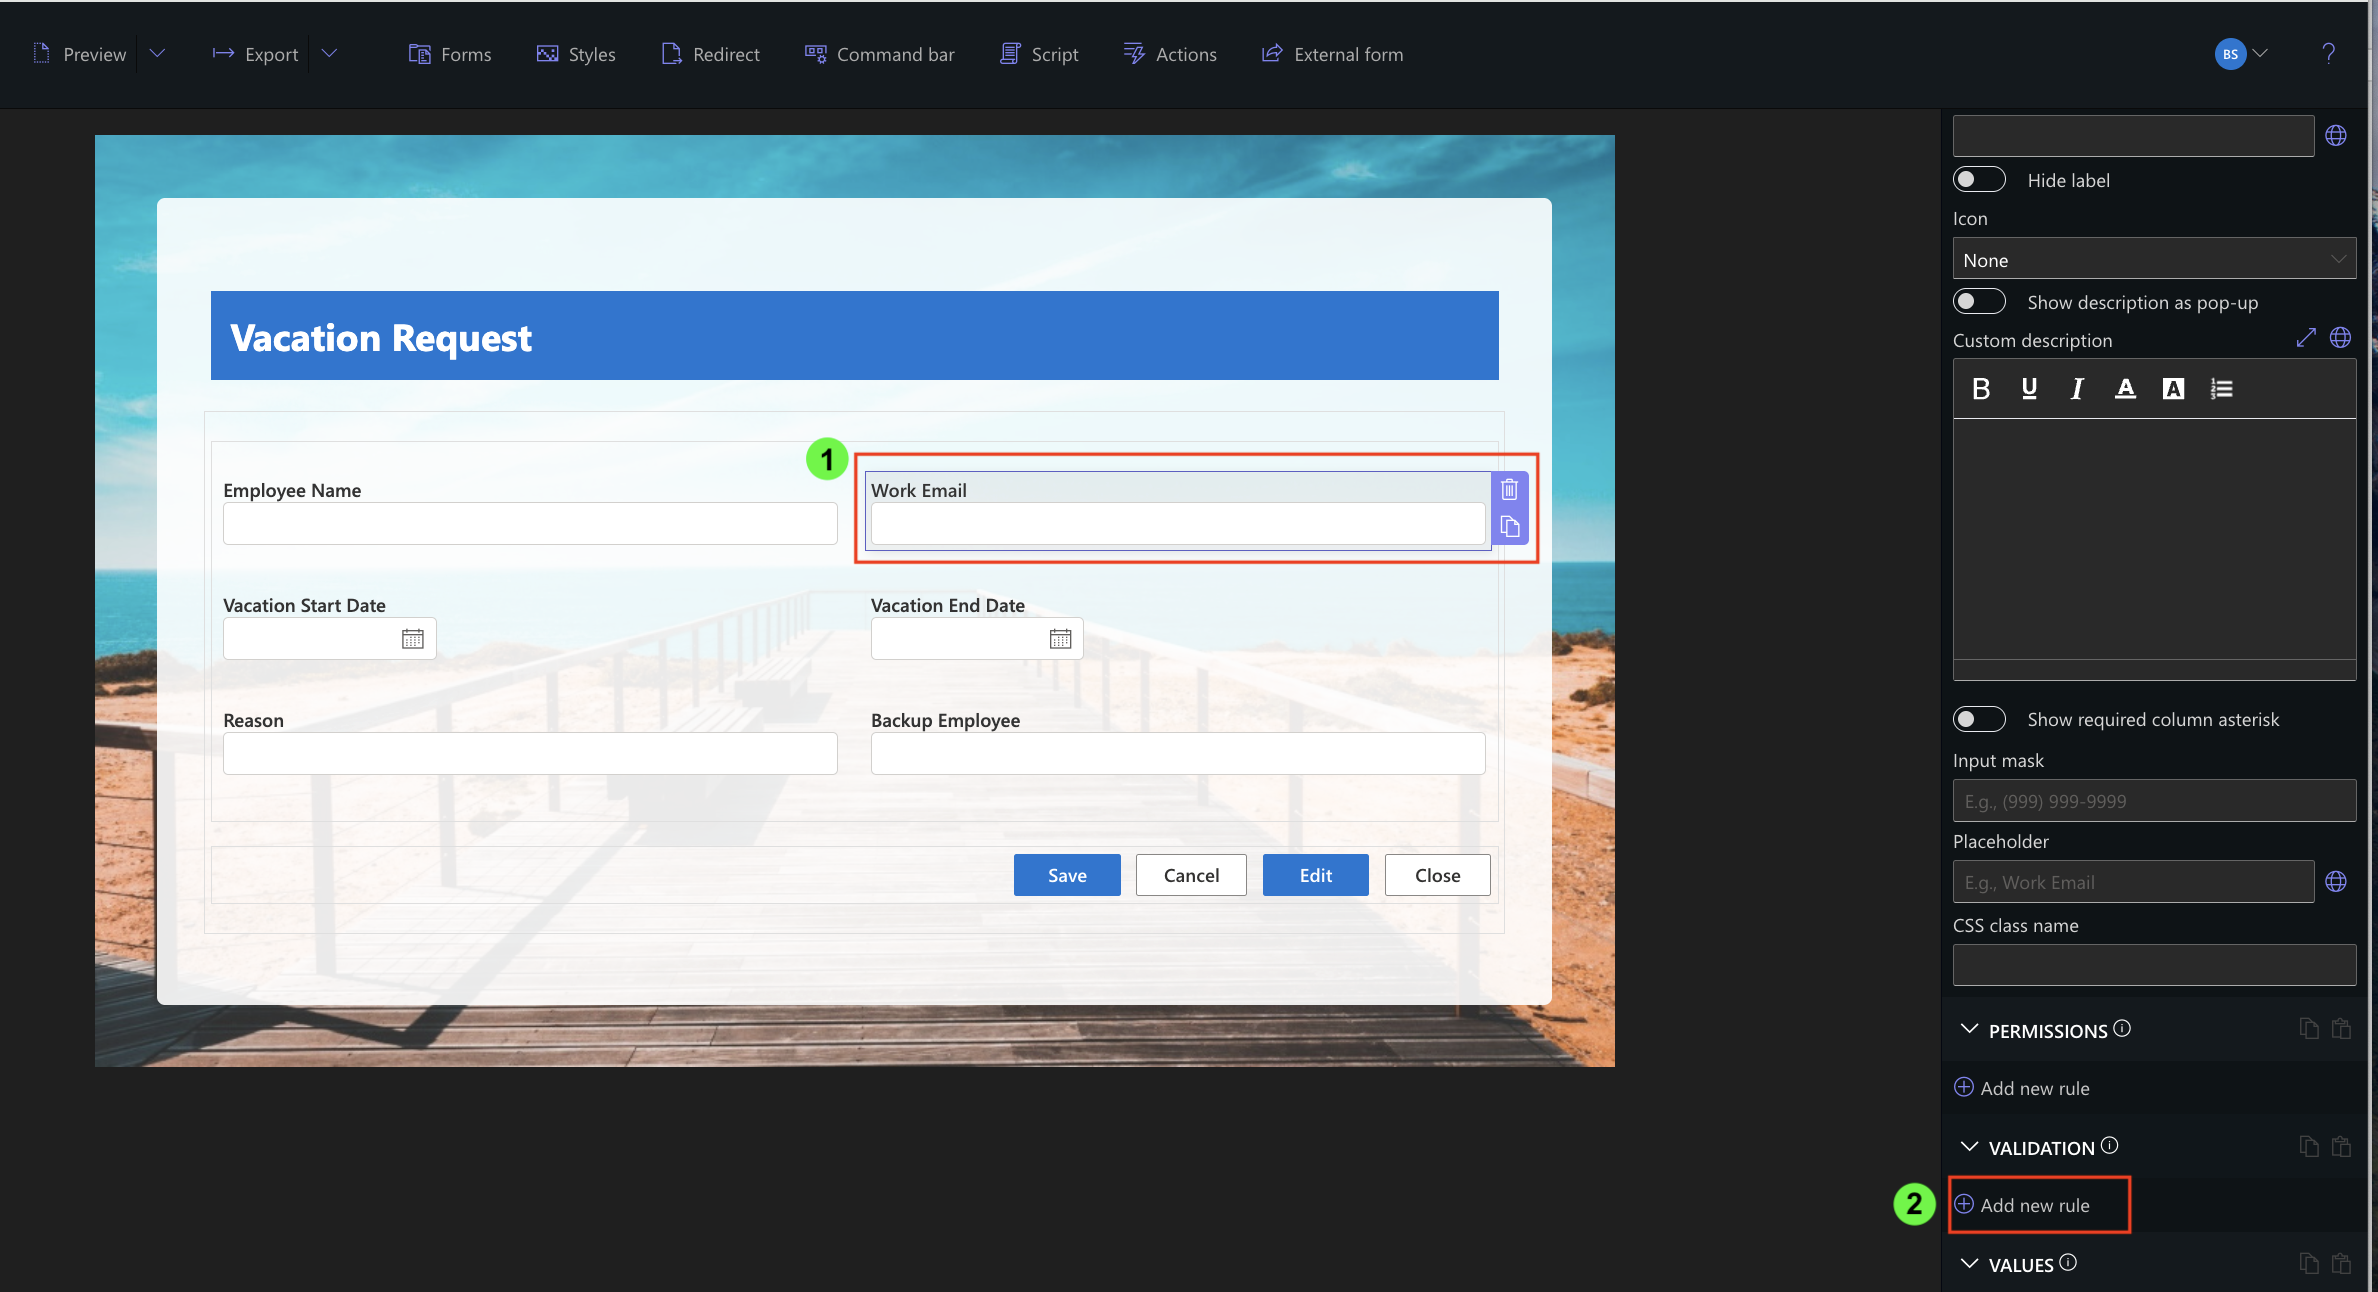
- Open Form Designer.
- Select the Work Email column.
- Expand the Validation section.
- Click Add New Rule.
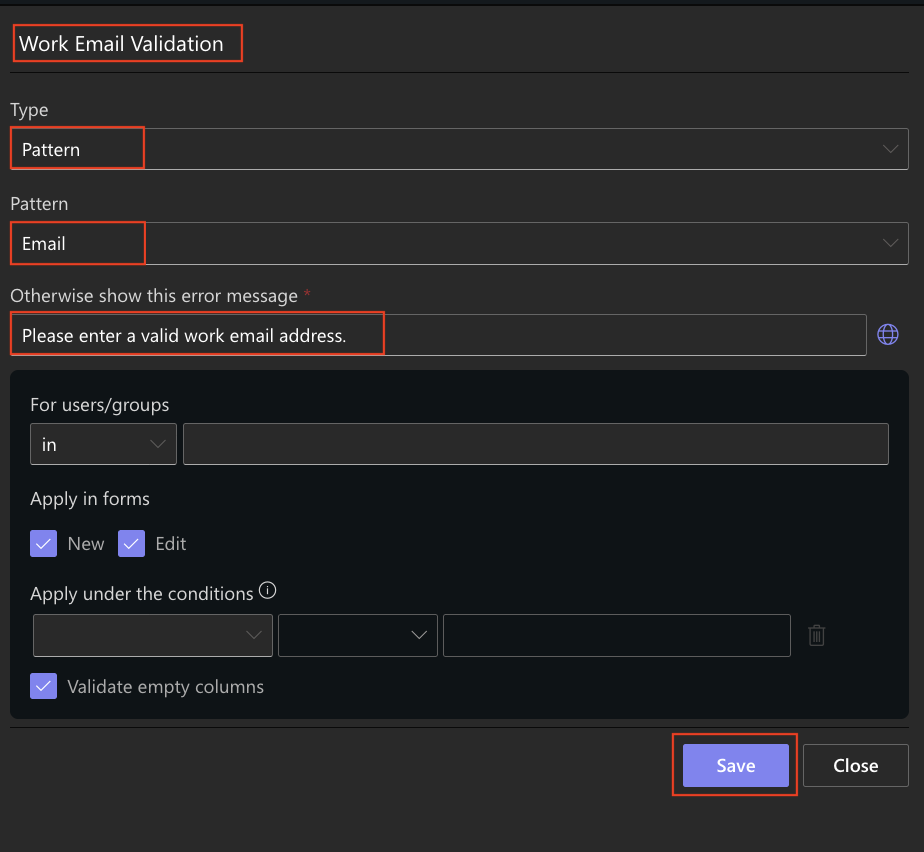
- Enter the rule name: Work Email Validation
- Set Type to Pattern.
- Select the built-in Email pattern.
- Enter the following error message:
- Please enter a valid work email address.
- Save the rule.
- Publish the form
- Open the form and enter an invalid email address, such as:
- john.company
The validation message is displayed because the entered value does not match the Email pattern.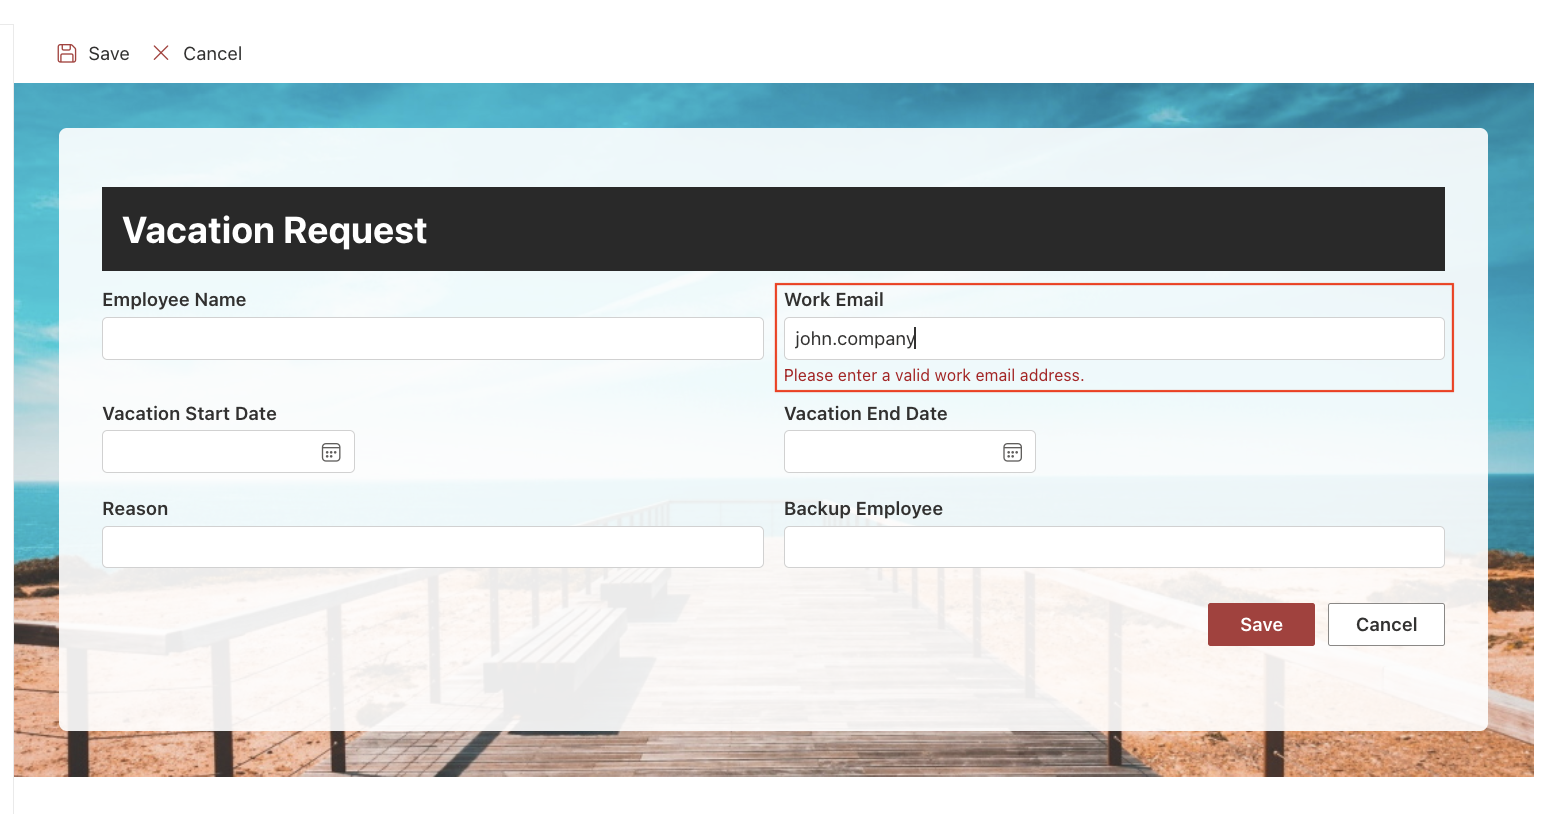
Step 3: Compare Two Dates Using Column Validation
Employees cannot return from vacation before their vacation begins.
We'll compare Vacation End Date with Vacation Start Date.
- Select the Vacation End Date column.
- Add a new Validation Rule.
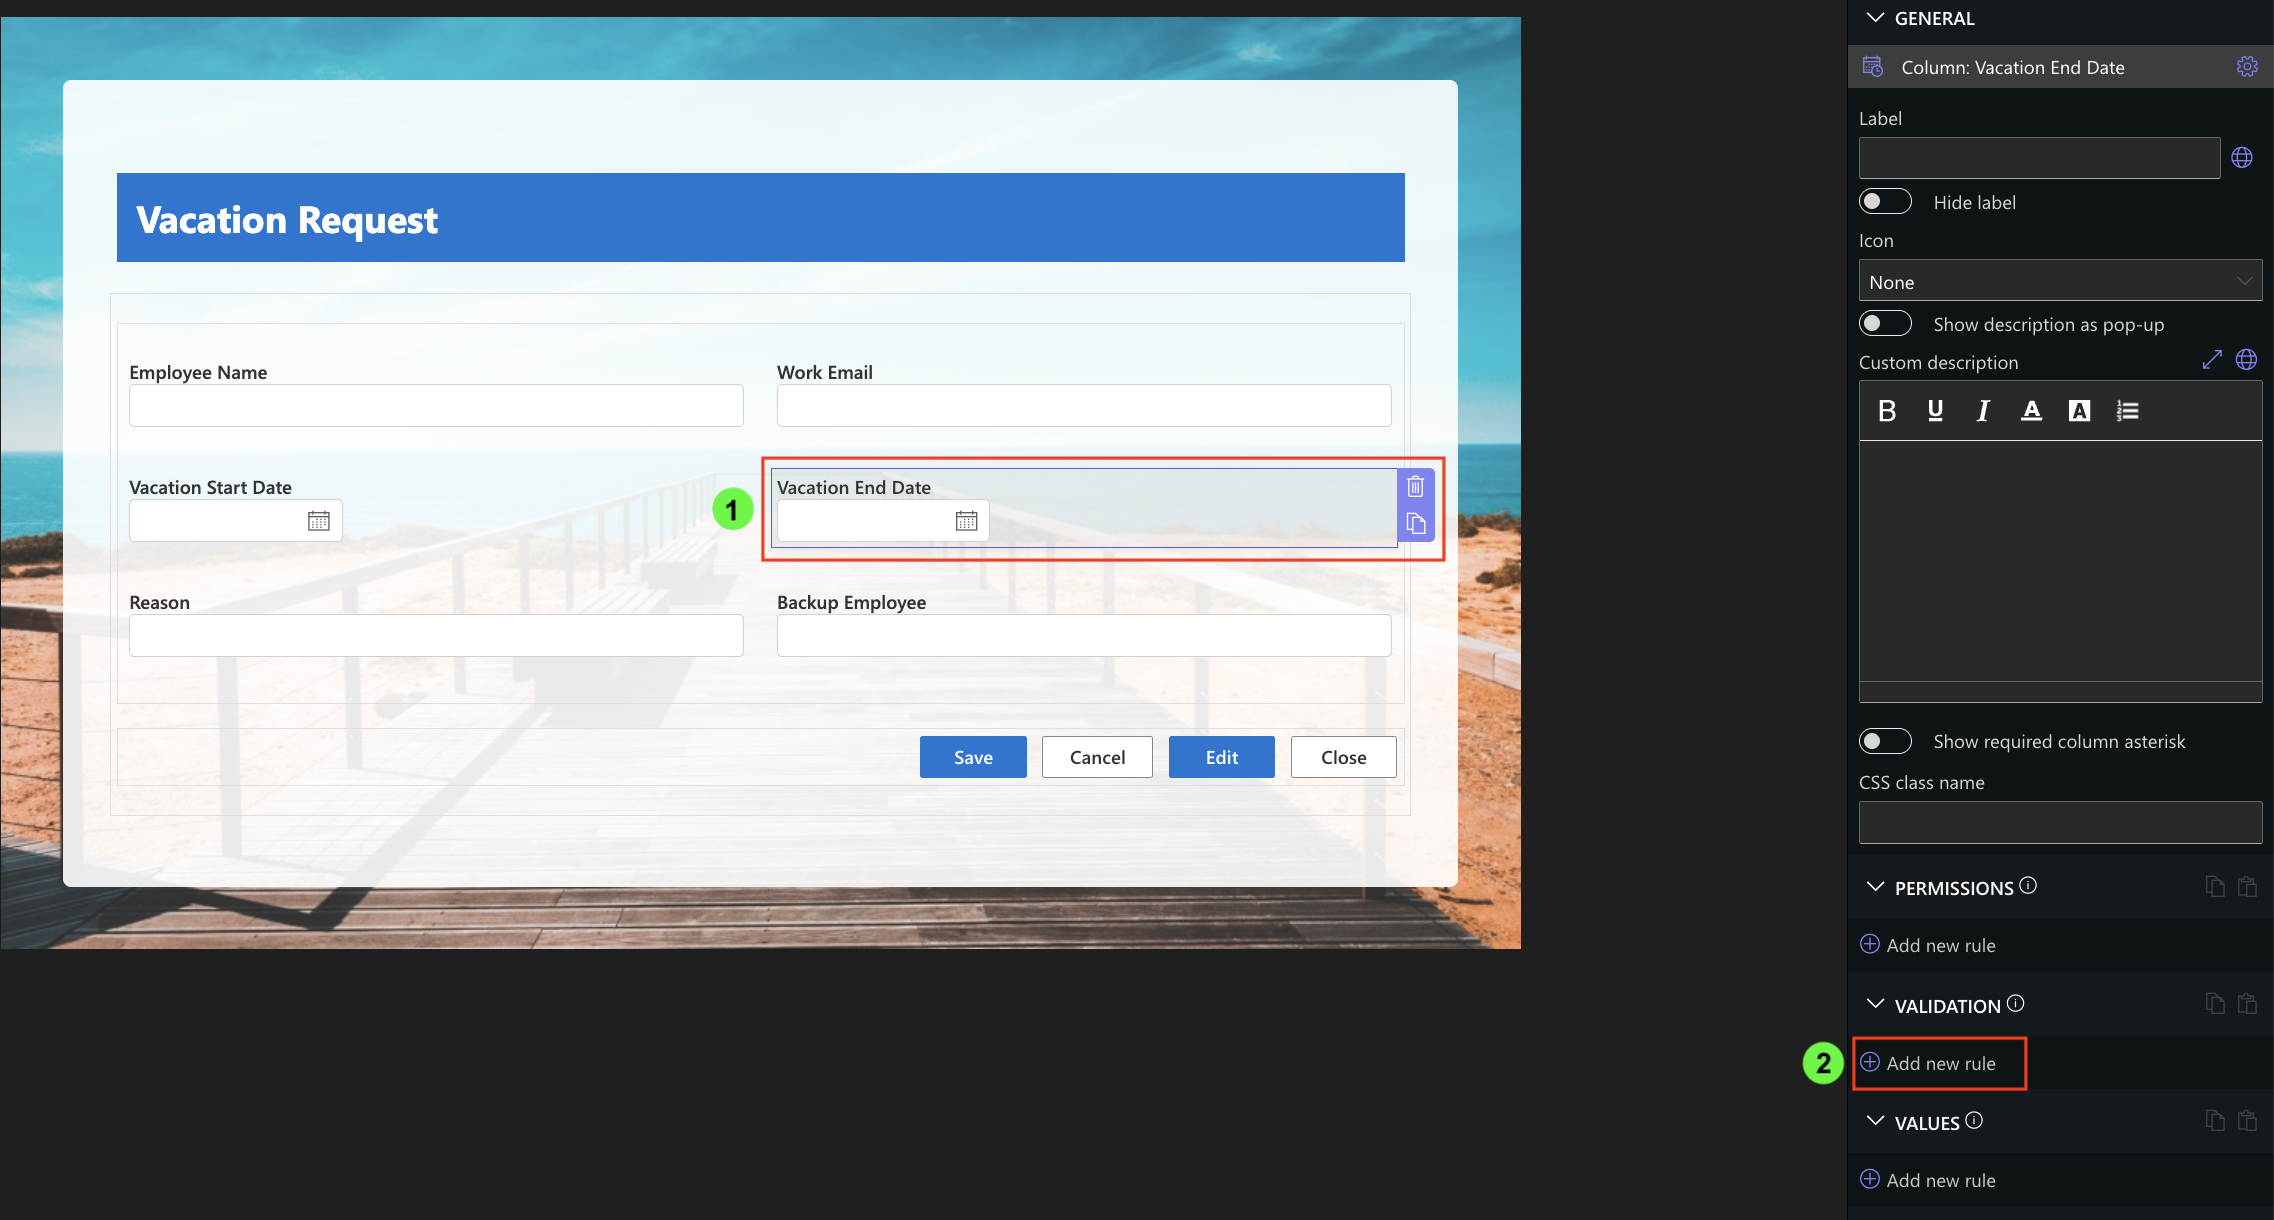
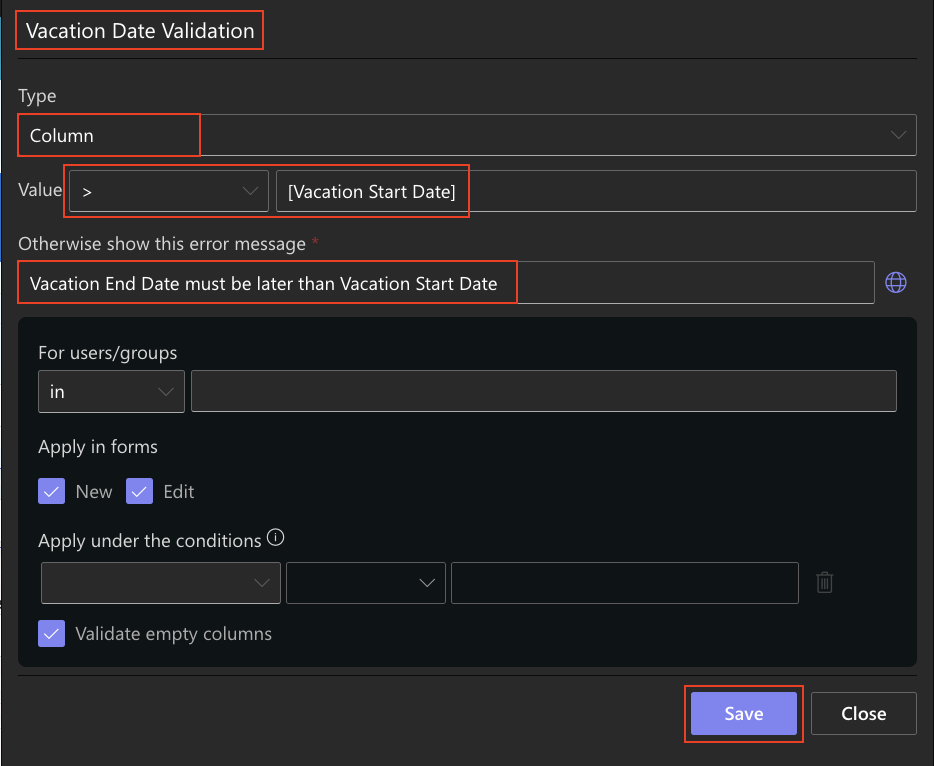
- Enter the rule name: Vacation Date Validation
- Set Type to Column.
- Configure the validation so that Vacation End Date must be later than Vacation Start Date.
- Vacation End Date > Vacation Start Date
- Enter the following error message:
- Vacation End Date must be later than Vacation Start Date.
- Save the rule.
- Publish the form
- Open the form and enter an end date that is earlier than the start date.
The validation message is displayed because the entered dates do not satisfy the validation rule.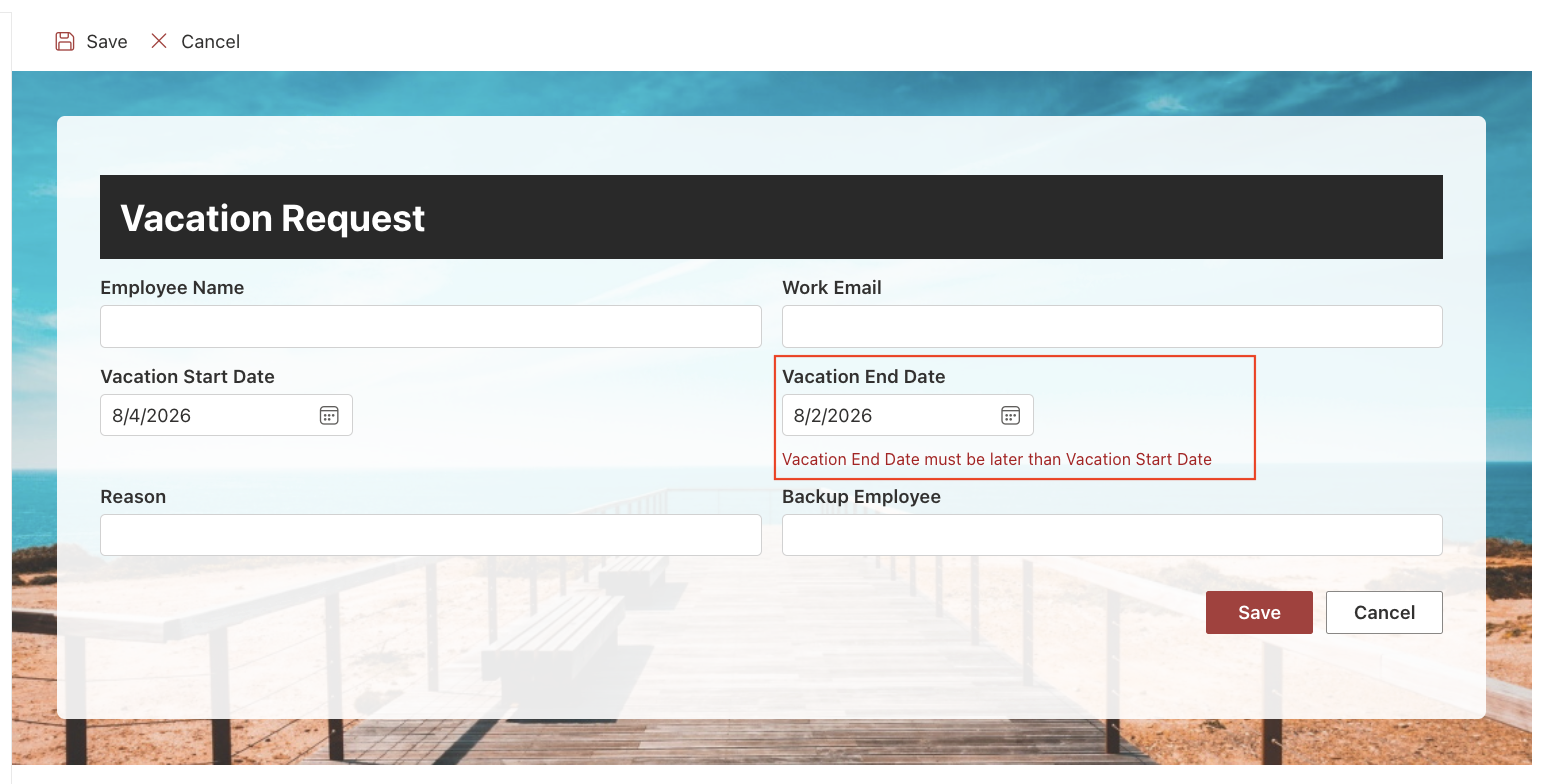
Step 4: Validate Text Length
Sometimes users provide responses that are too short to be meaningful.
For the Reason column, require employees to provide a more detailed explanation for their vacation request.
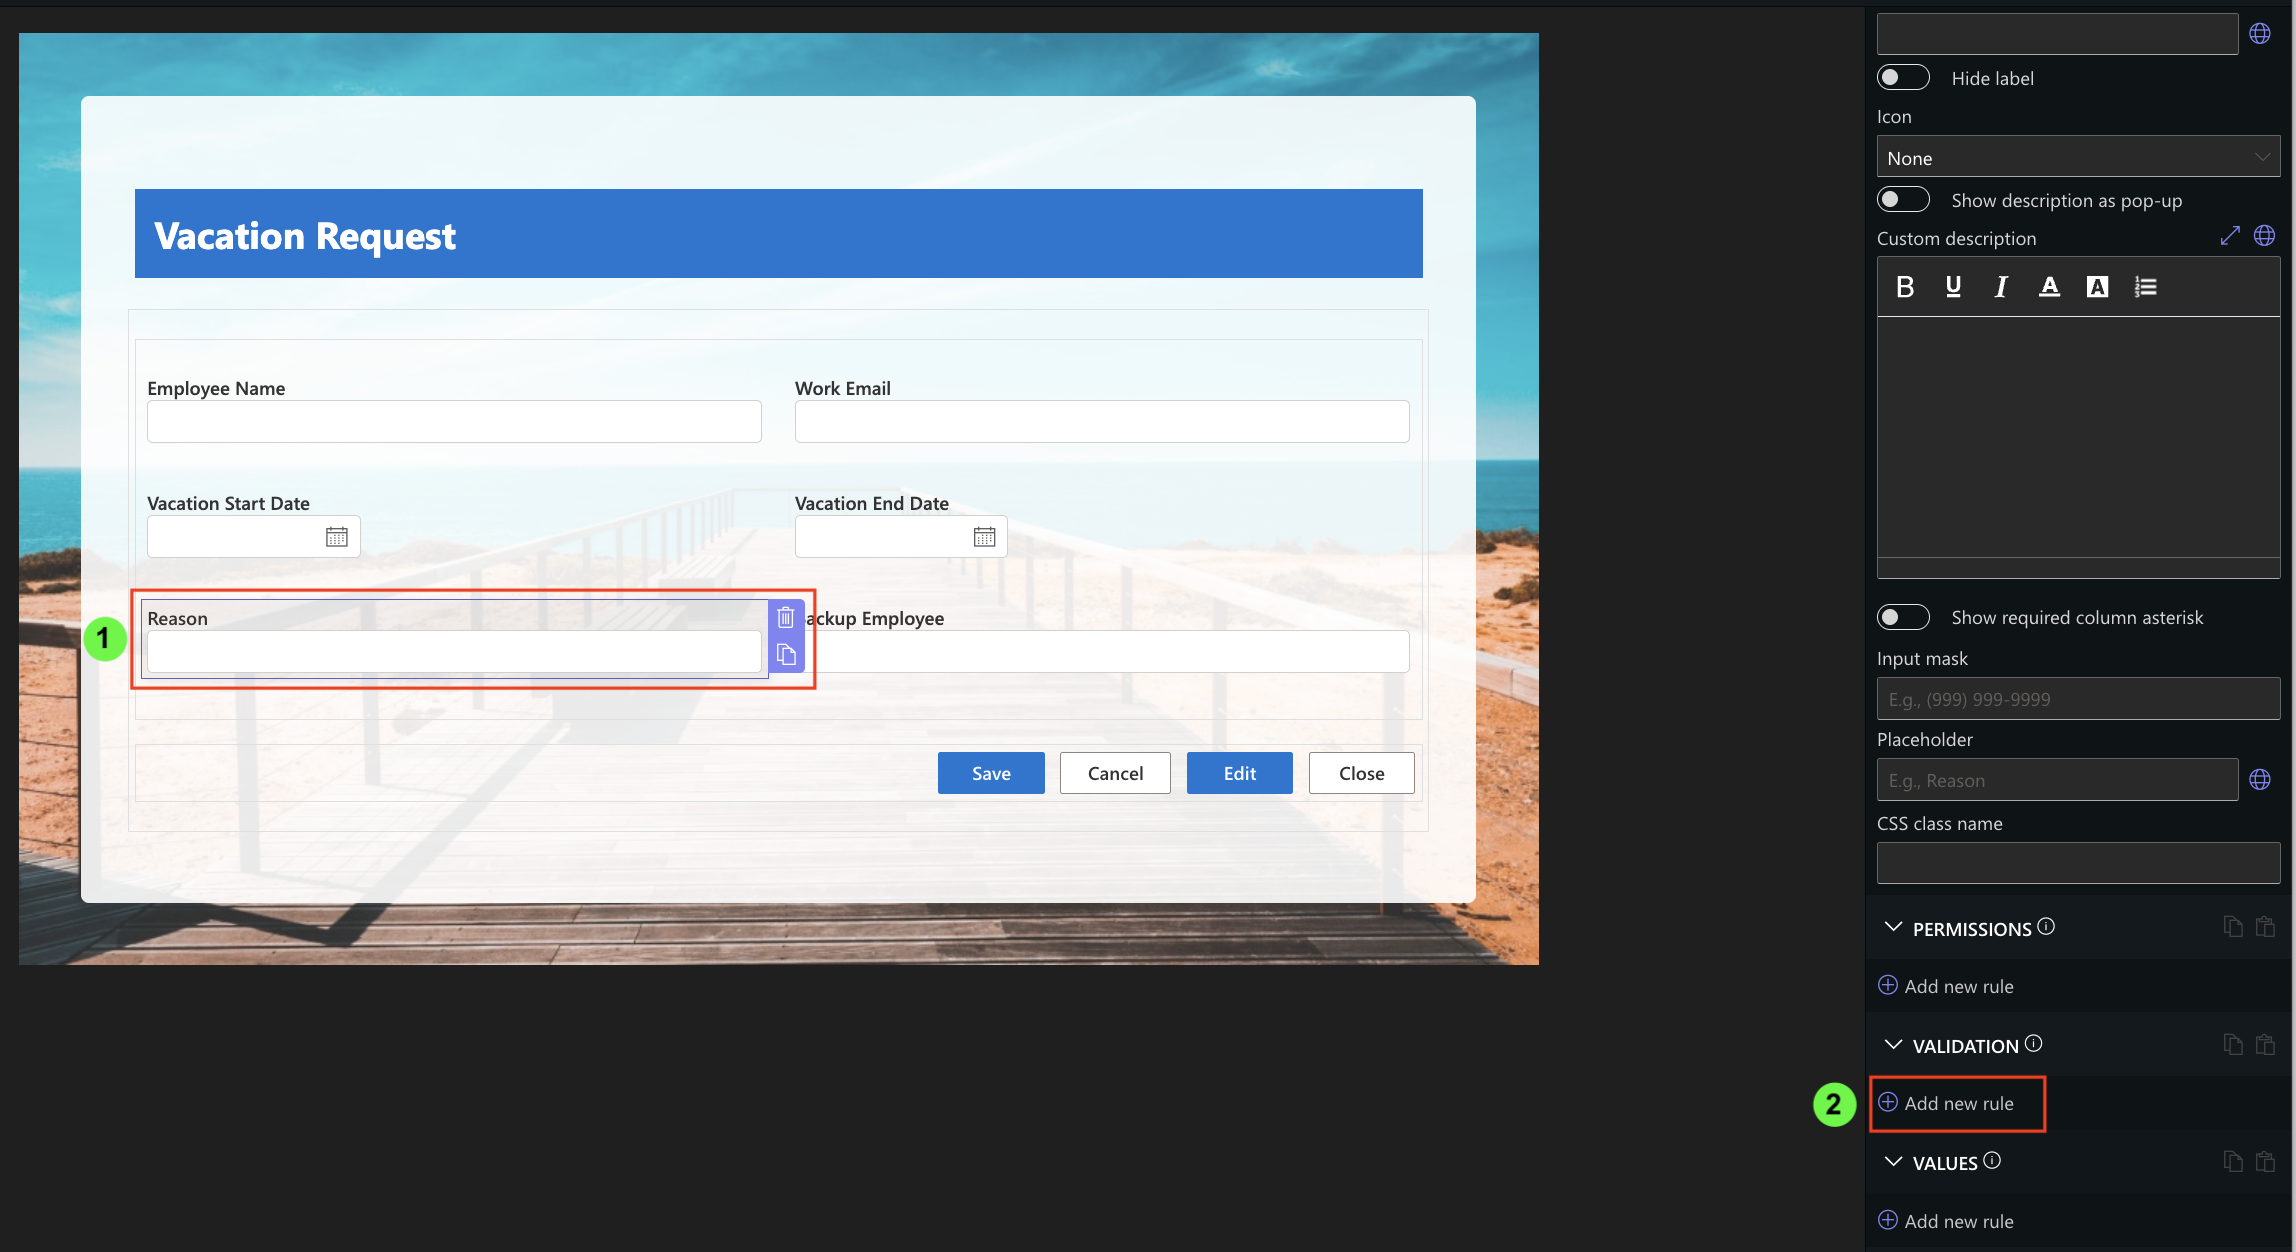
- Select the Reason column.
- Add a new Validation Rule.
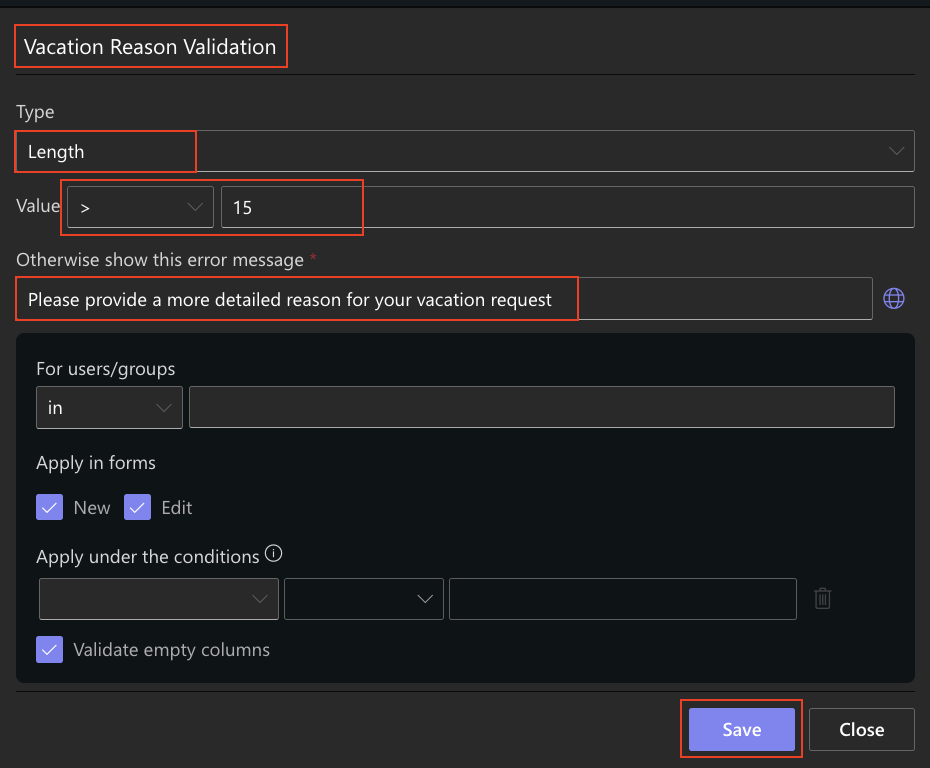
- Enter the rule name: Vacation Reason Validation
- Set Type to Length.
- Configure the rule to require a minimum length of 15 characters.
- Enter the following error message:
- Please provide a more detailed reason for your vacation request.
- Save the rule.
- Publish the form
- Open the form and enter: Trip
The validation message is displayed because the entered value is shorter than the required length.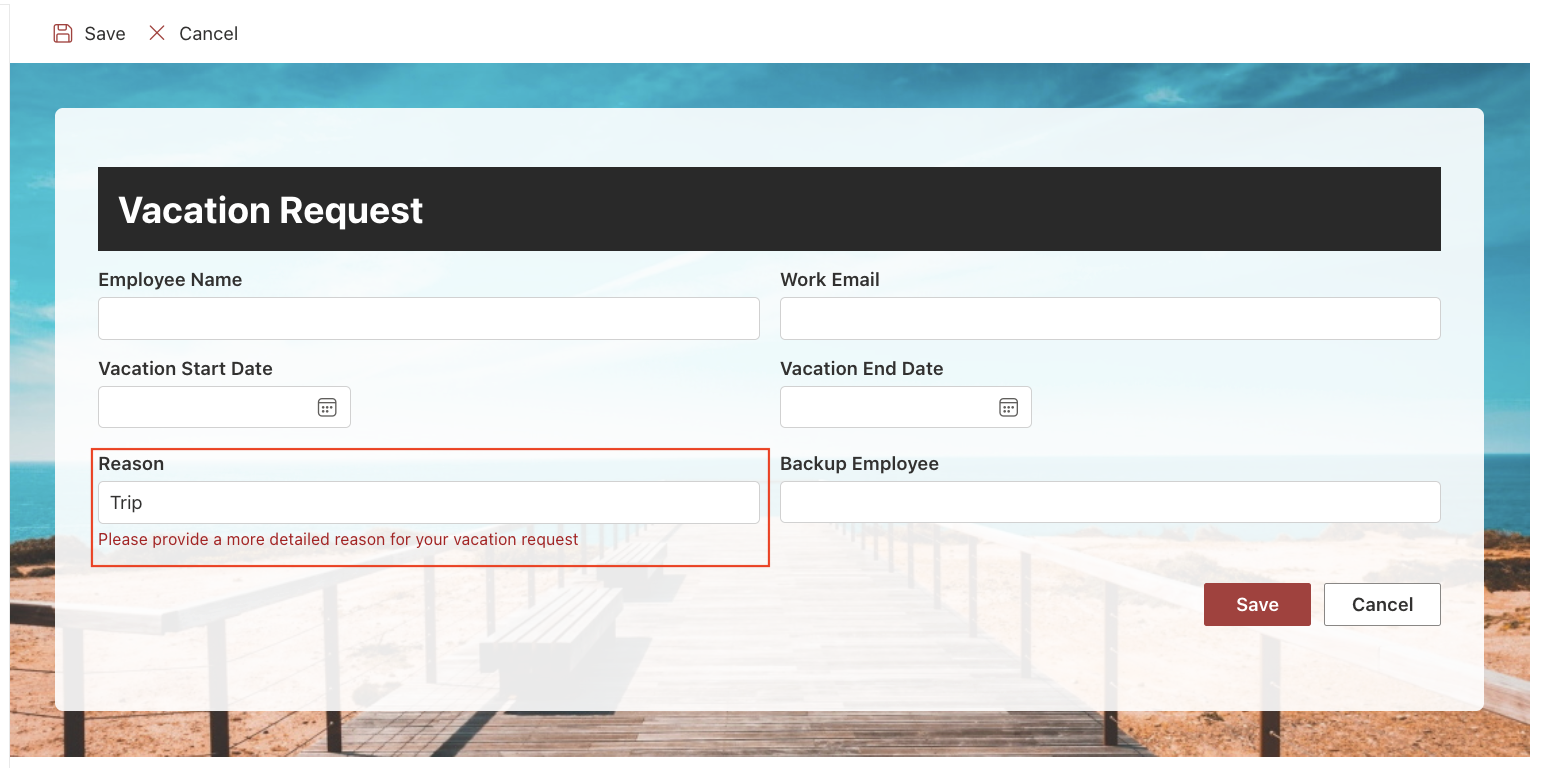
After entering a more descriptive reason, the validation succeeds.
Step 5: Validate Multiple Selections
Length validation can also be used with columns that support multiple values, such as Person, Choice, and Lookup columns. In these cases, the rule validates the number of selected values rather than the number of characters.
Before going on vacation, employees should select at least one colleague who will cover their responsibilities while they are away.
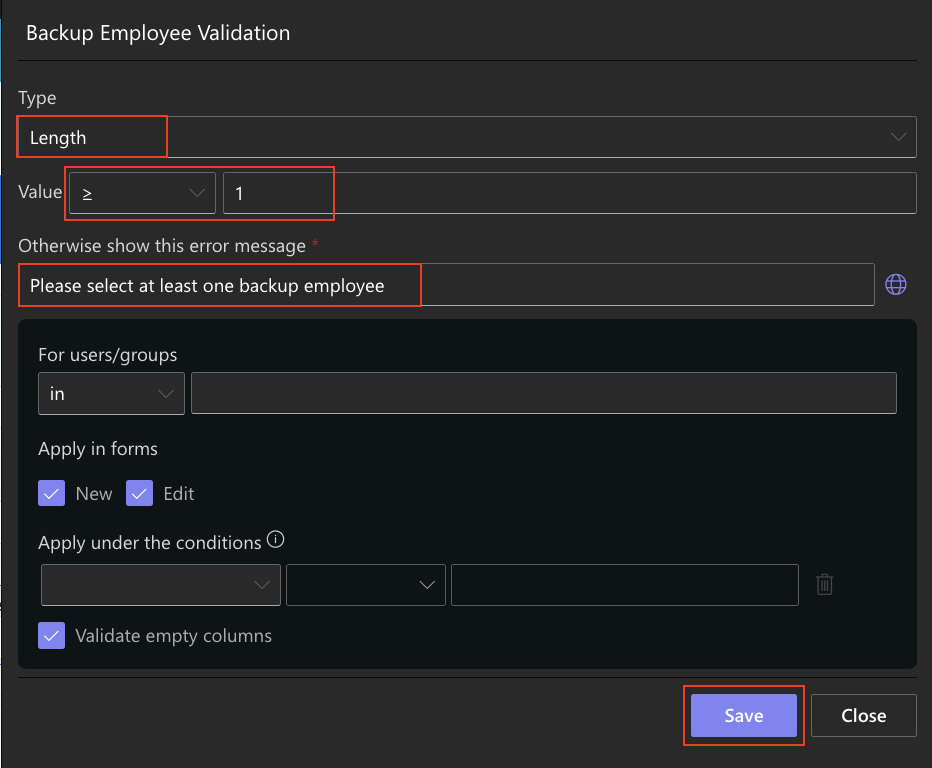
- Select the Backup Employee column.
- Add a new Validation Rule.
- Enter the rule name: Backup Employee Validation
- Set Type to Length.
- Configure the rule to require at least one selected value.
- Backup Employee ≥ 1
- Enter the following error message:
- Please select at least one backup employee.
- Save the rule.
- Publish the form
- Open the form and leave the Backup Employee column empty.
The validation message is displayed because no backup employee has been selected.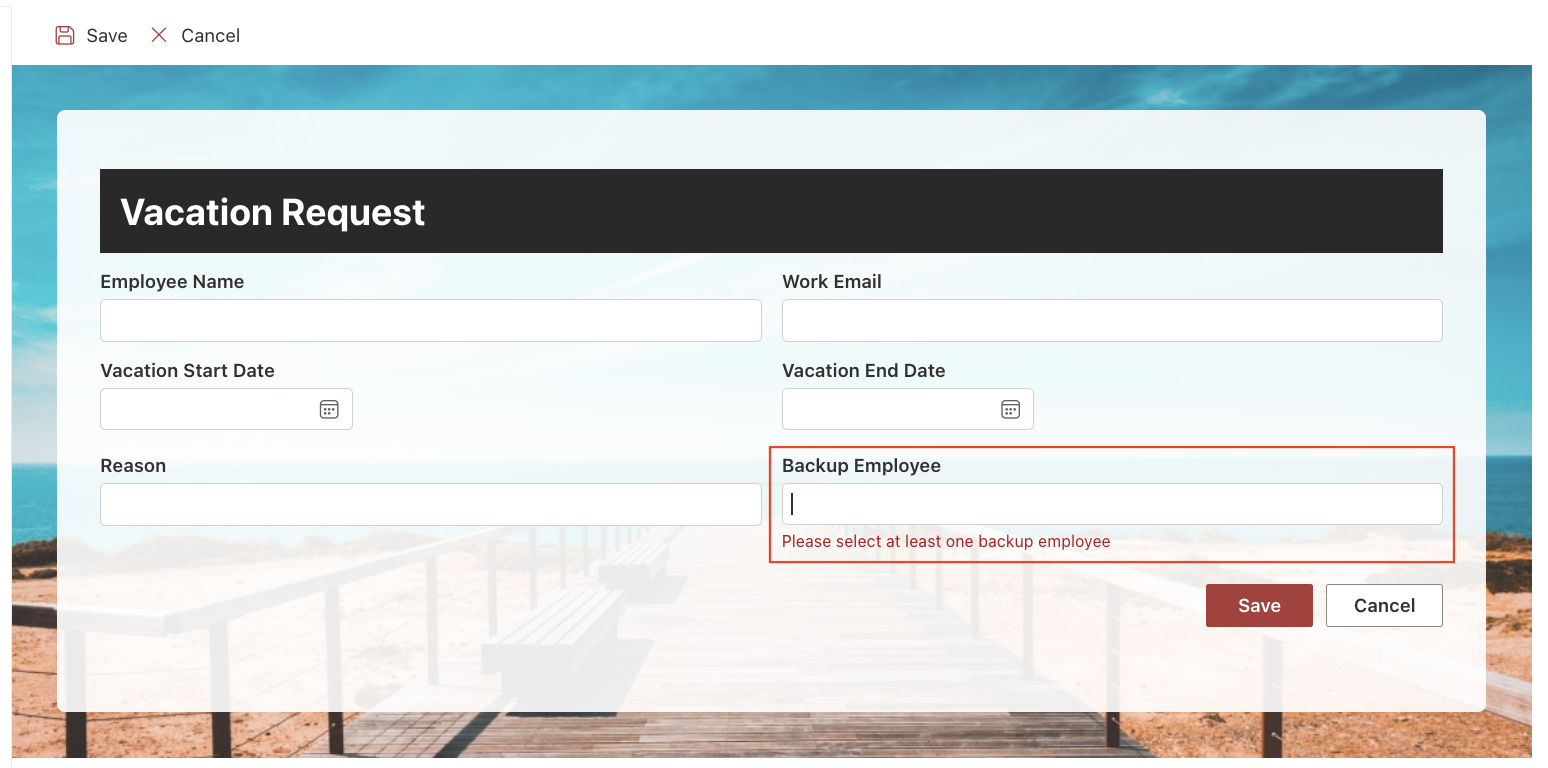
After selecting one or more users, the validation succeeds.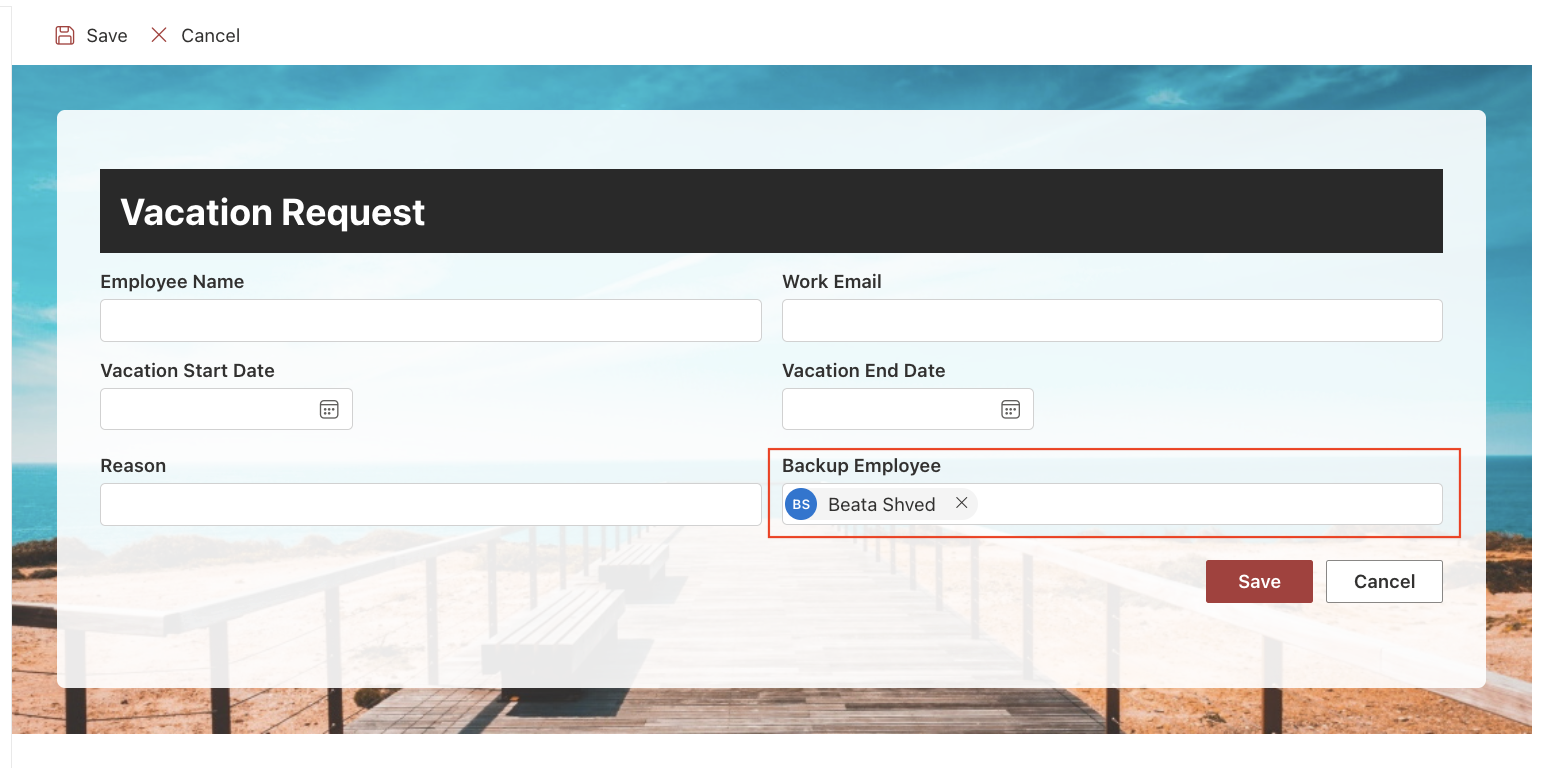
Summary
In this tutorial, you configured all three Validation Rule types using practical examples. You can use the same approach in your own forms to validate user input and enforce your organization's business requirements.