Creating and Configuring Import Profiles
In this tutorial, you will learn how to create and configure an Import Profile and understand how its main settings work together.
An Import Profile is the core of the import process. It defines where data comes from, how often it is retrieved, and what happens with it once it arrives in SharePoint.
Understanding this structure is essential before working with specific import scenarios.
Instructions
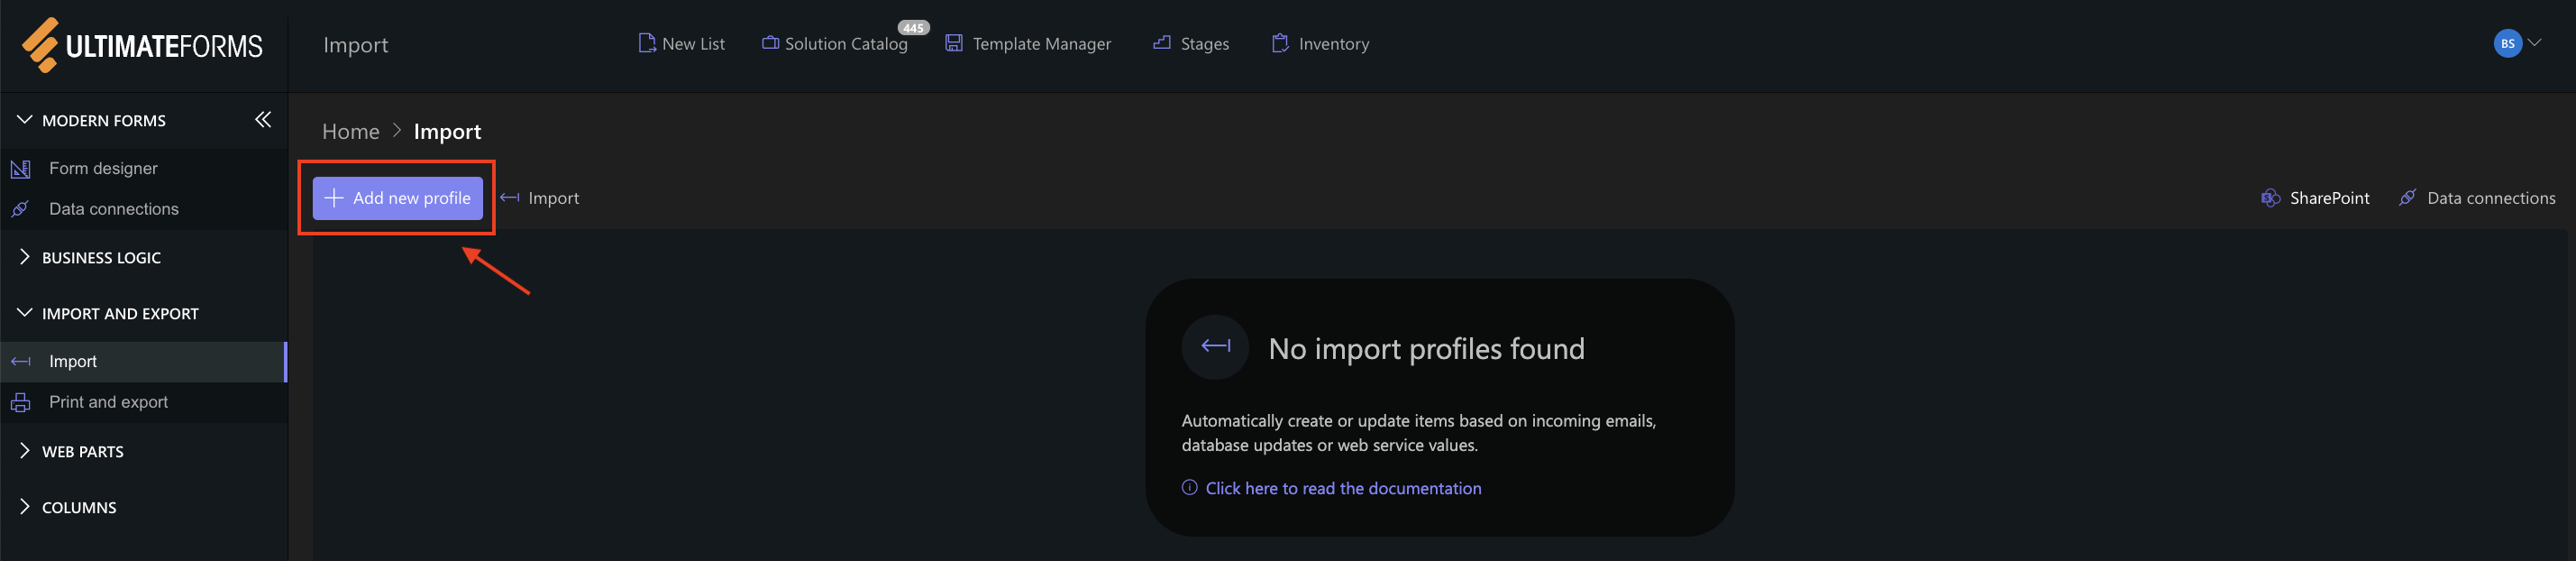
Step 1: Open Import Settings
- Go to your SharePoint list
- Click Design

- Select Import

- Click Add new profile
Step 2: Configure General Settings
The General tab defines the basic profile settings and scheduling behavior.
- Title
Defines the name of the profile. - Description
Optional description of what the profile does. - Start date
Defines the earliest data to import on the first run. - Current date → only new data is imported
- Past date → older data can also be imported
- Polling frequency
Defines how often the system checks for new data (for example, immediately, hourly, daily, weekly or monthly) - Repeat
Adds additional checks within the selected interval. - Notifications
Configure who receives notifications on errors or success.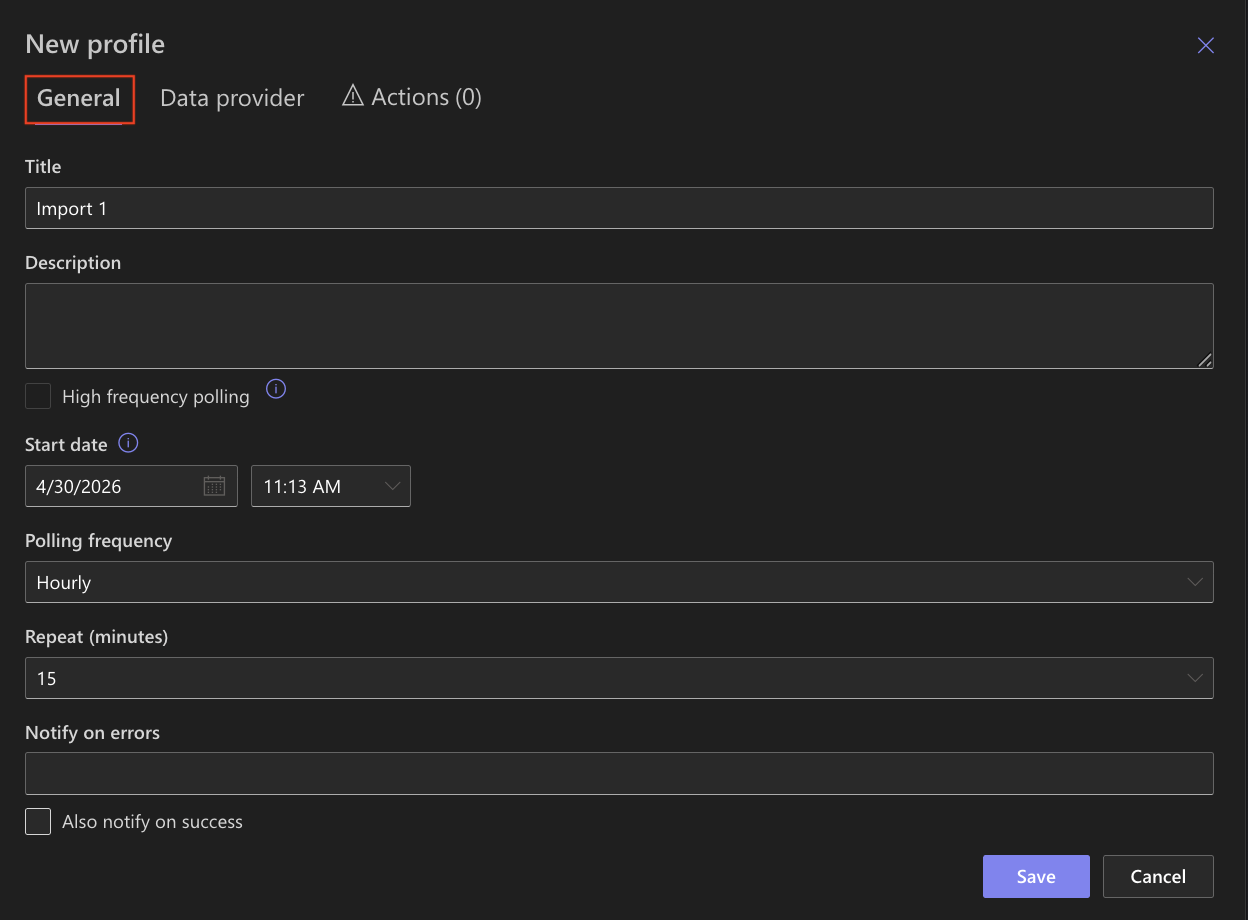
The General tab controls when and how the import runs, forming the foundation of automation.
Step 3: Configure Data Provider
The Data Provider tab defines where the data comes from.
Import supports two main provider types:
1. Email
Used to import data from mailboxes.
Supported protocols include:
- Microsoft 365 (connects directly to your organization’s mailbox)
- POP3 (standard email protocol used by many mail servers)
- Exchange 2007+ (used for Microsoft Exchange environments)
- Gmail (connects to Gmail accounts)
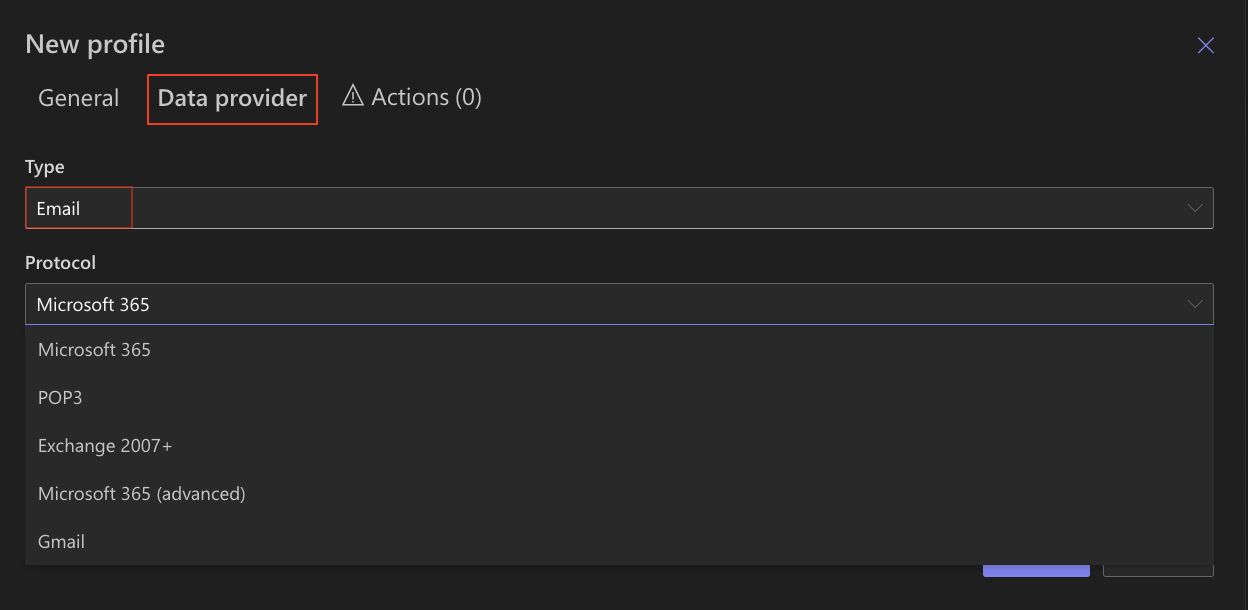
Example: Automatically create a SharePoint item when a new email is received.
2.Application
Used to import data from external systems, databases, and files.
Supported sources include:
- MS SQL (import data from SQL Server tables or views)
- Oracle (connect to Oracle databases)
- MySQL (import data from MySQL databases)
- ODBC / OLE DB (generic connectors for various data sources)
- REST API (retrieve data from web services using HTTP requests)
- SOAP Web Services (structured web service integration)
- Excel files (import data from Excel spreadsheets)
- Delimited text files (CSV/TSV) (import structured text data)
- Twilio (SMS) (import incoming or outgoing text messages)
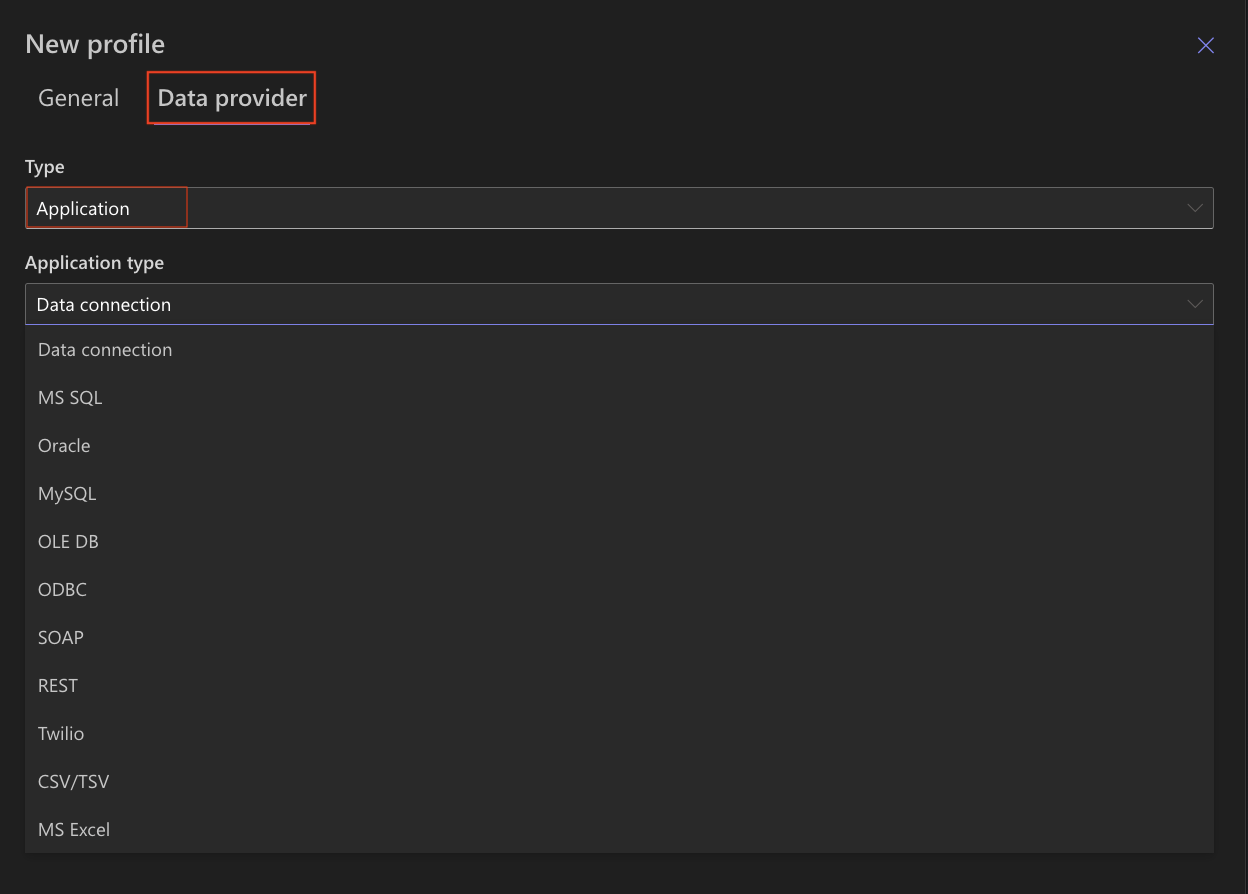
Example: Import product data from a database or synchronize records from an external system.
The Data Provider defines the source of the data. Without it, the profile cannot retrieve any information.
Step 4: Configure Actions
The Actions tab defines what happens with the imported data.
You must configure at least one action.
Available action types:
- Create list item / document
(creates new items from incoming data) - Update list items
(updates existing items based on conditions) - Sync list item / document
(creates or updates items based on a unique key)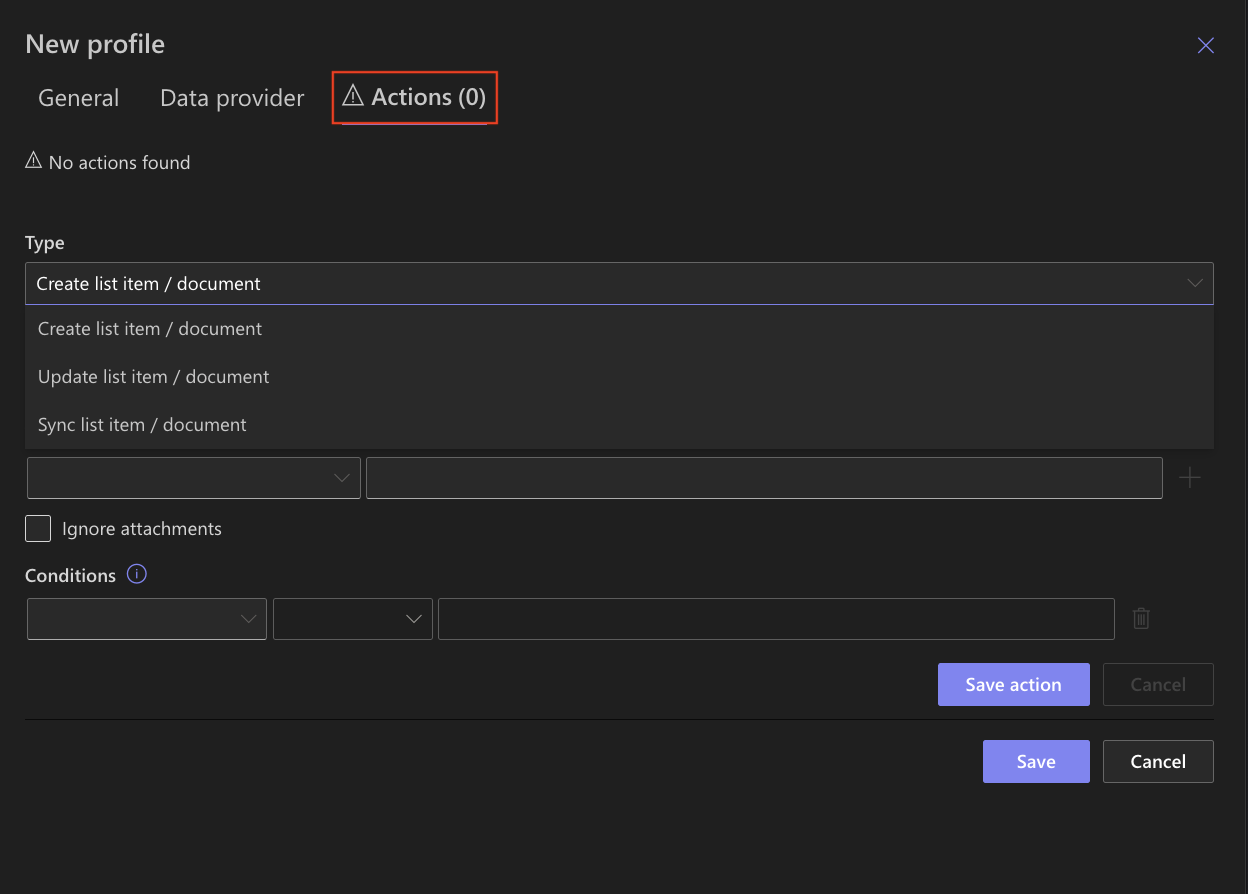
Example: Create new requests from emails or update existing records from a database.
Actions define the purpose of the import — how the incoming data is used in SharePoint.
Step 5: Map Data
Within each action, you map incoming data to SharePoint columns.
Examples:
- Email subject → Title
- Email Body → Description
- Date Sent → Date column
You can use the Value Picker to select fields and apply functions.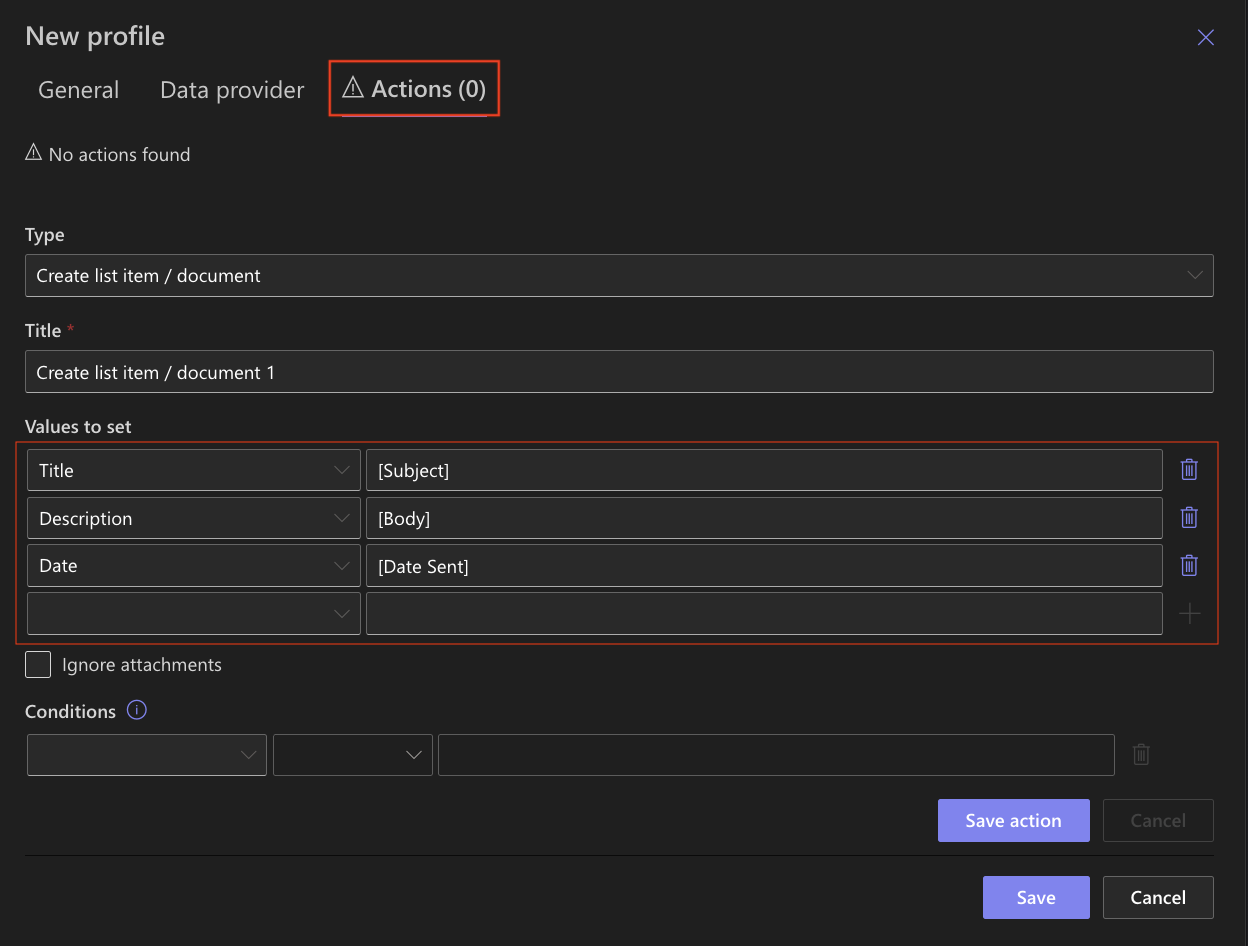
Mapping determines how incoming data is structured and stored in your list.
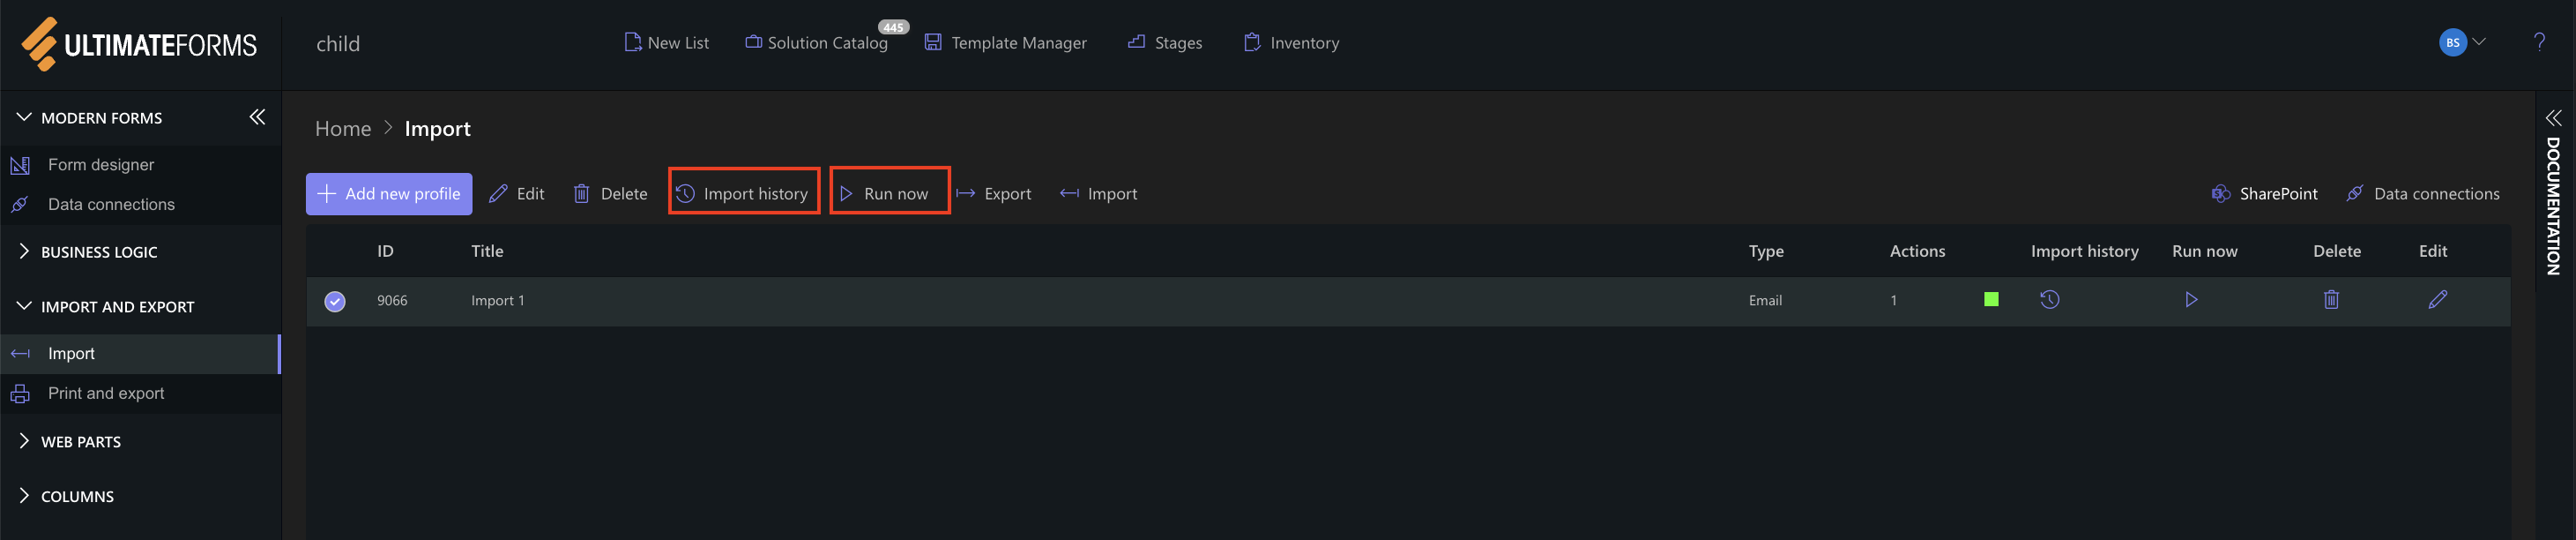
Step 6: Save and Run the Profile
- Click Save
- Run the profile manually or wait for the scheduled execution
- Open Import History to review results
Result
You now have a clear understanding of how an Import Profile is structured and how its main components work together.
By combining provider settings, actions, and mapping, you can control how data is retrieved and processed in SharePoint.
Summary
You learned how to create and configure Import Profiles and understand the role of each main setting.
In the next tutorials, you will apply this knowledge to real scenarios such as importing emails, files, and external system data into SharePoint.