Lookup Filters and Cascading Filters
In this tutorial, you will learn how to configure lookup filters and enhance them with cascading behavior using Ultimate Forms: Filters.
You will build a filtering experience where one filter dynamically affects another. This allows users to narrow down data step by step, ensuring that only relevant options are available based on previous selections.
In this example, you will work with related data such as Organizations and Departments, where selecting an organization automatically limits the available departments. You will then connect these filters to web part on a SharePoint page to enable interactive and intuitive data exploration.
Instructions
Before You Start
You will need to create three SharePoint lists:
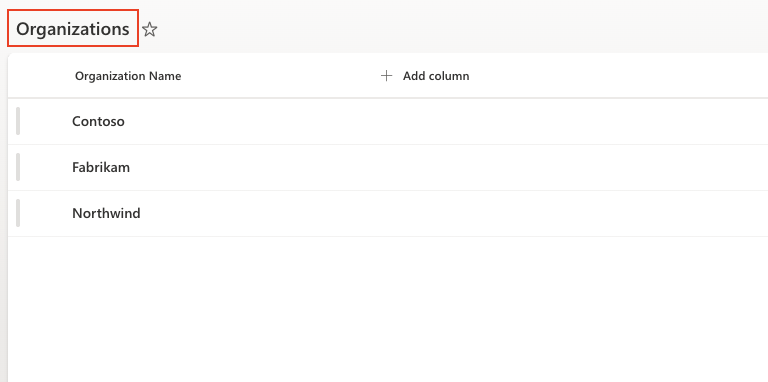
List 1: Organizations
Create a list:
- Name: Organizations
- Columns:
- Title (Organization Name)
- Sample data:
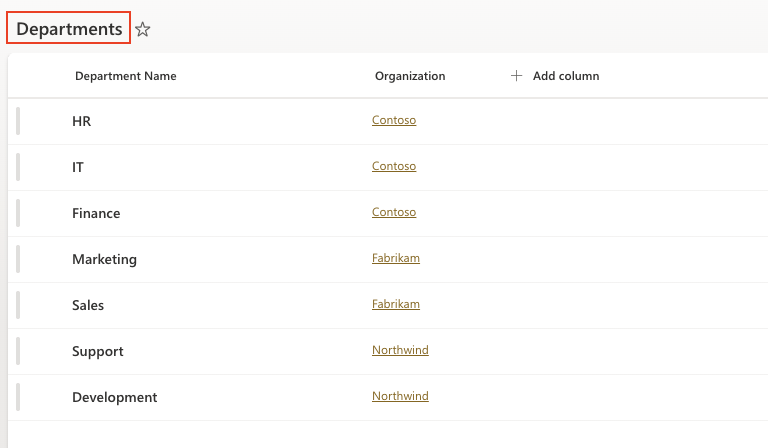
List 2: Departments
Create a second list:
- Name: Departments
- Columns:
- Title (Department Name)
- Organization (Lookup → Organizations)
- Sample data:
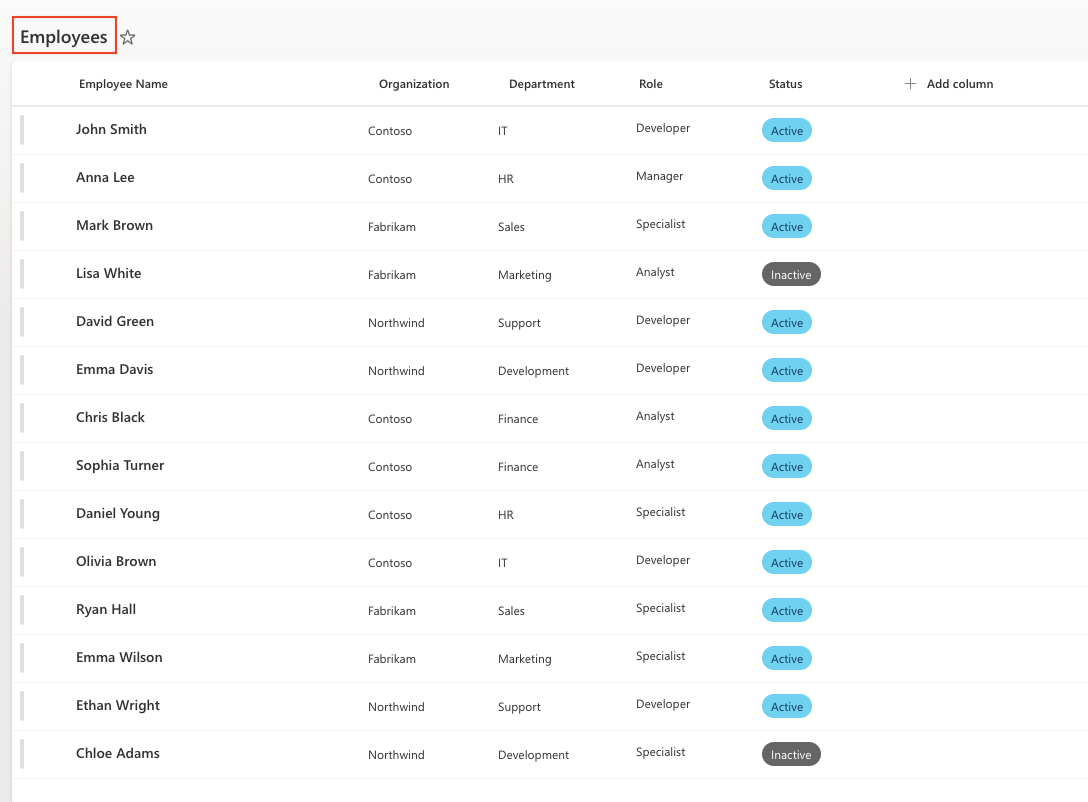
List 3: Employees
Create a third list:
- Name: Employees
- Columns:
- Title (Employee Name)
- Organization (Lookup → Organizations)
- Department (Lookup → Departments; Parent column: Organization)
- Role (Choice: Manager, Developer, Analyst, Specialist)
- Status (Choice: Active, Inactive)
- Sample data:
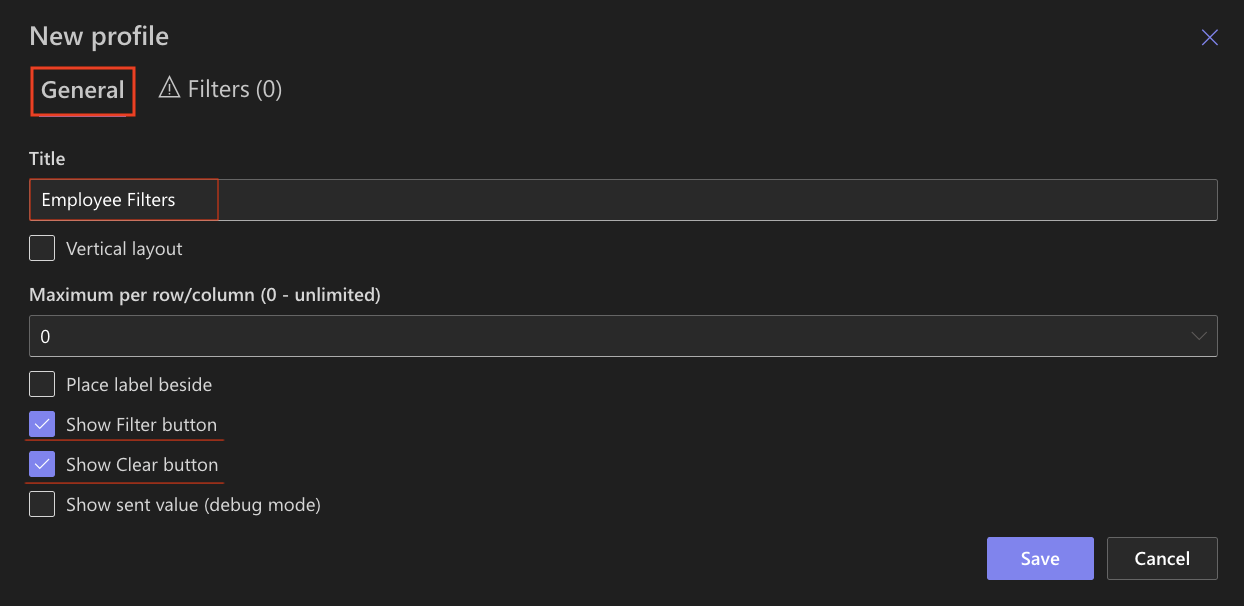
Step 1: Create a Filters profile
- Go to Ultimate Forms → Filters
- Click Add new profile
- Title: Employee Filters
- Show Filter button: Enabled
- Show Clear button: Enabled
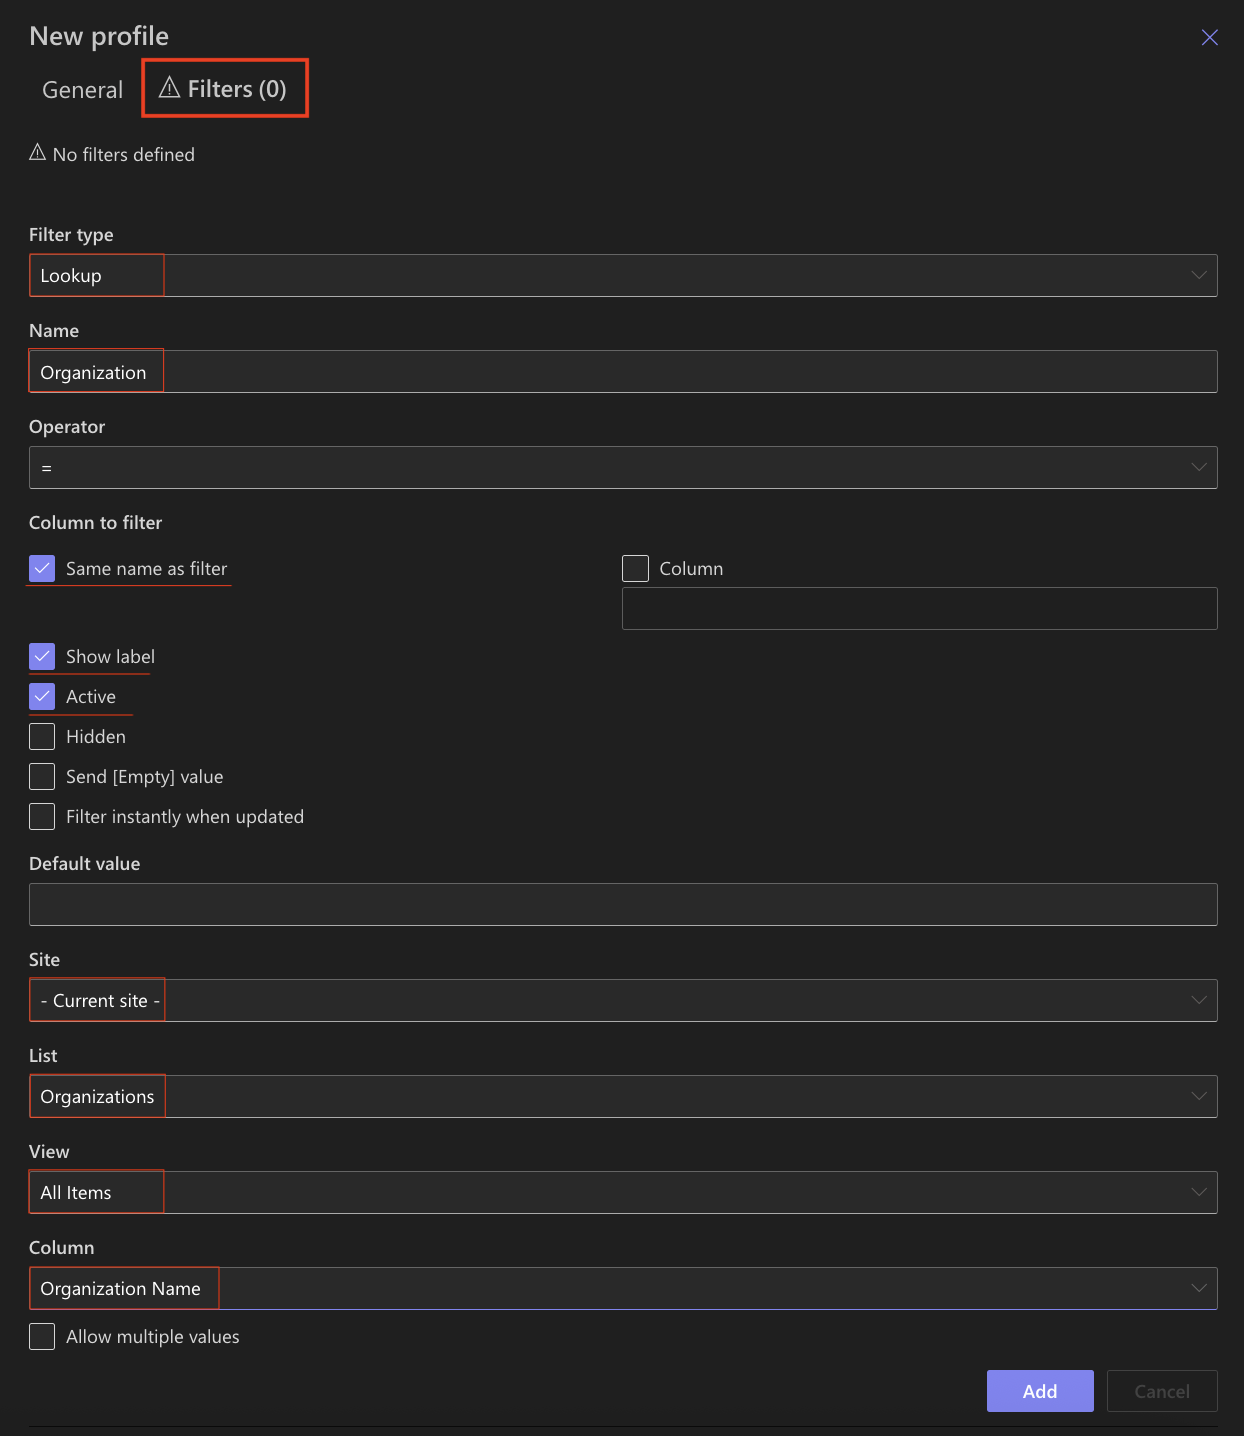
Step 2: Add Organization filter
- Filter type: Lookup
- Name: Organization
- Column to filter: Same name as filter
- Show label: Enabled
- Active: Enabled
Configure:
- Site → current site
- List → Organizations
- View → All Items
- Column → Organization Name
Step 3: Add Department filter
- Filter type: Lookup
- Name: Department
- Column to filter: Same name as filter
- Show label: Enabled
- Active: Enabled
Configure:
- Site → current site
- List → Departments
- View → All Items
- Column → Department Name
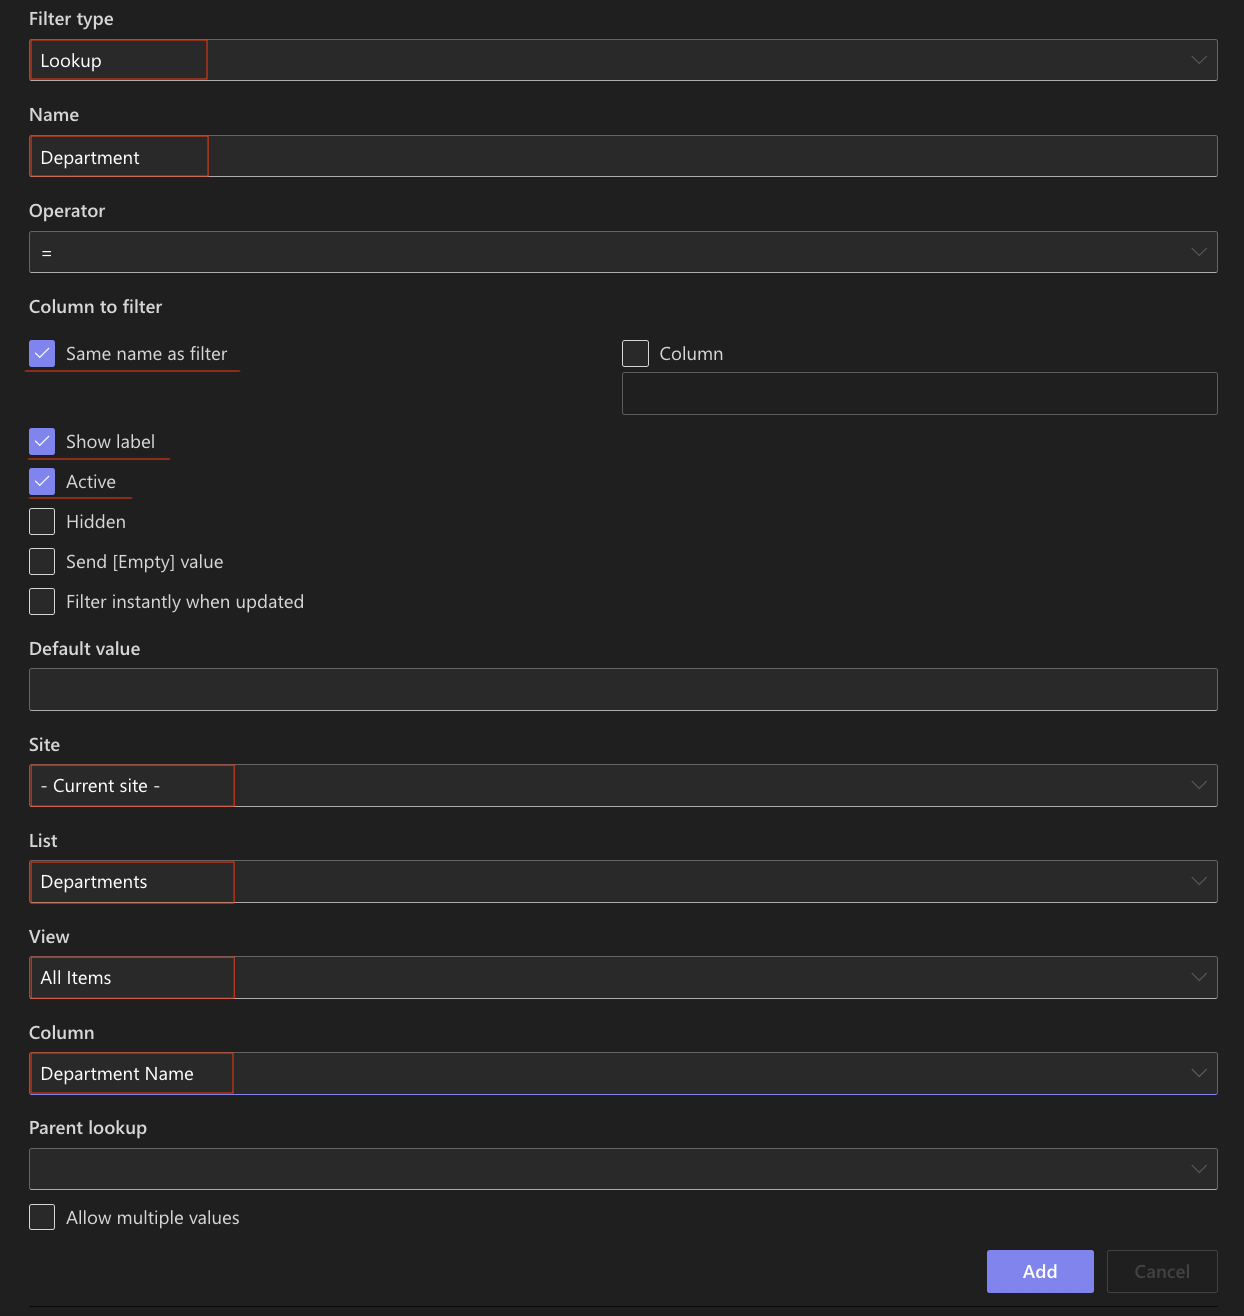
Step 4: Configure cascading behavior
Now connect the filters.
- Open the Department filter
- Set Parent lookup: Organization

This creates a cascading relationship:
- selecting an Organization will filter available Departments
Step 5: Use a page with Rollup
In this tutorial, you will use a page that already contains a Rollup web part displaying data from the Employees list.
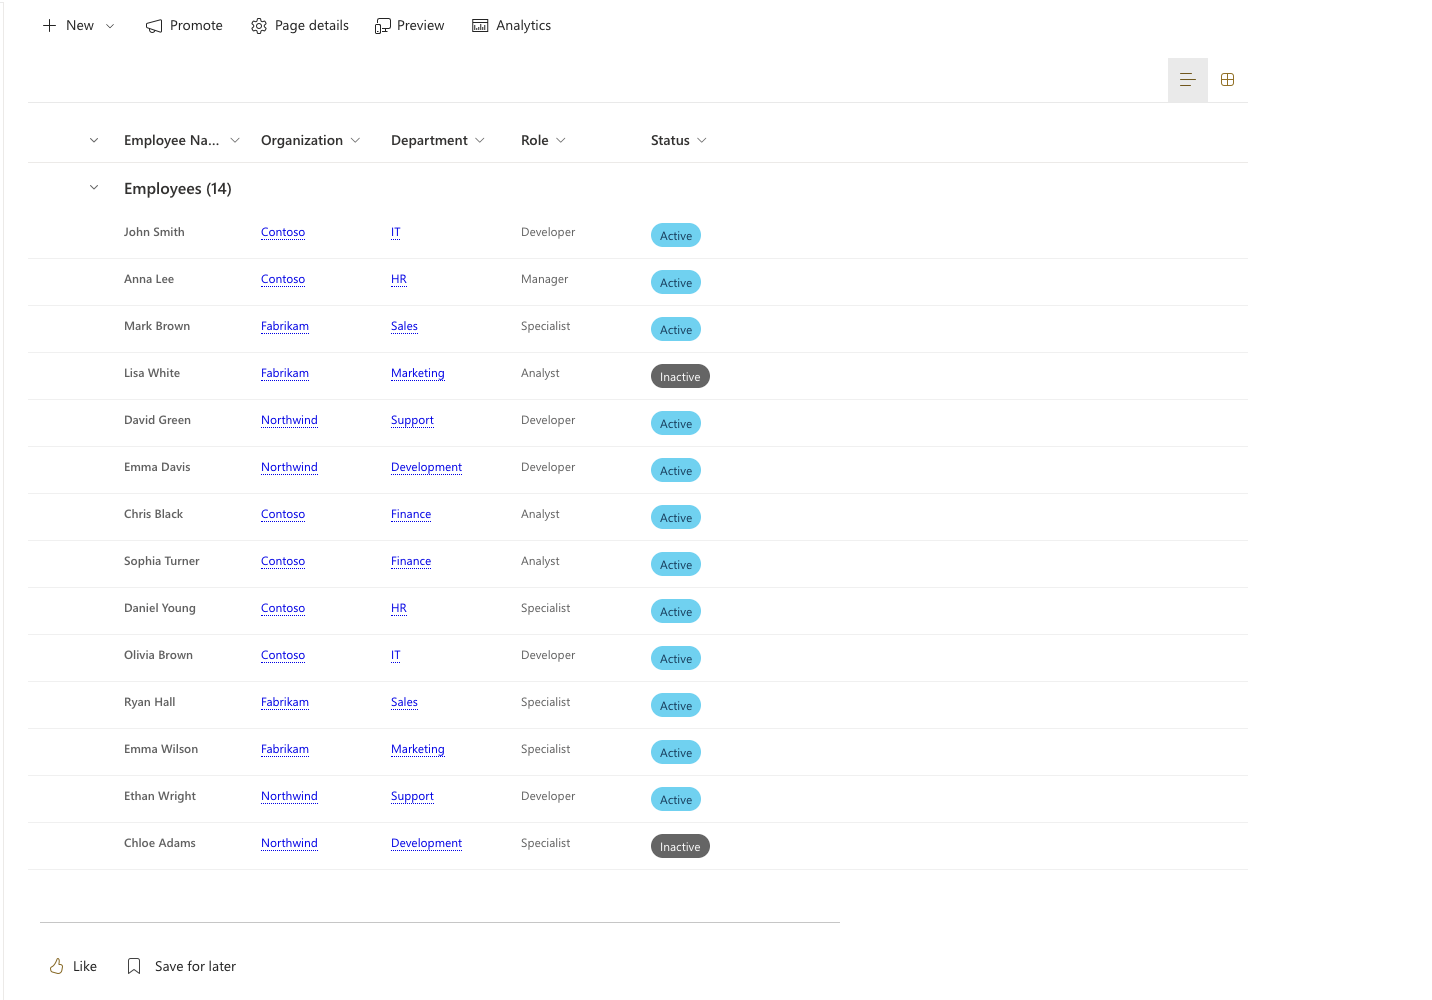
The filters you create will be applied to this Rollup web part.
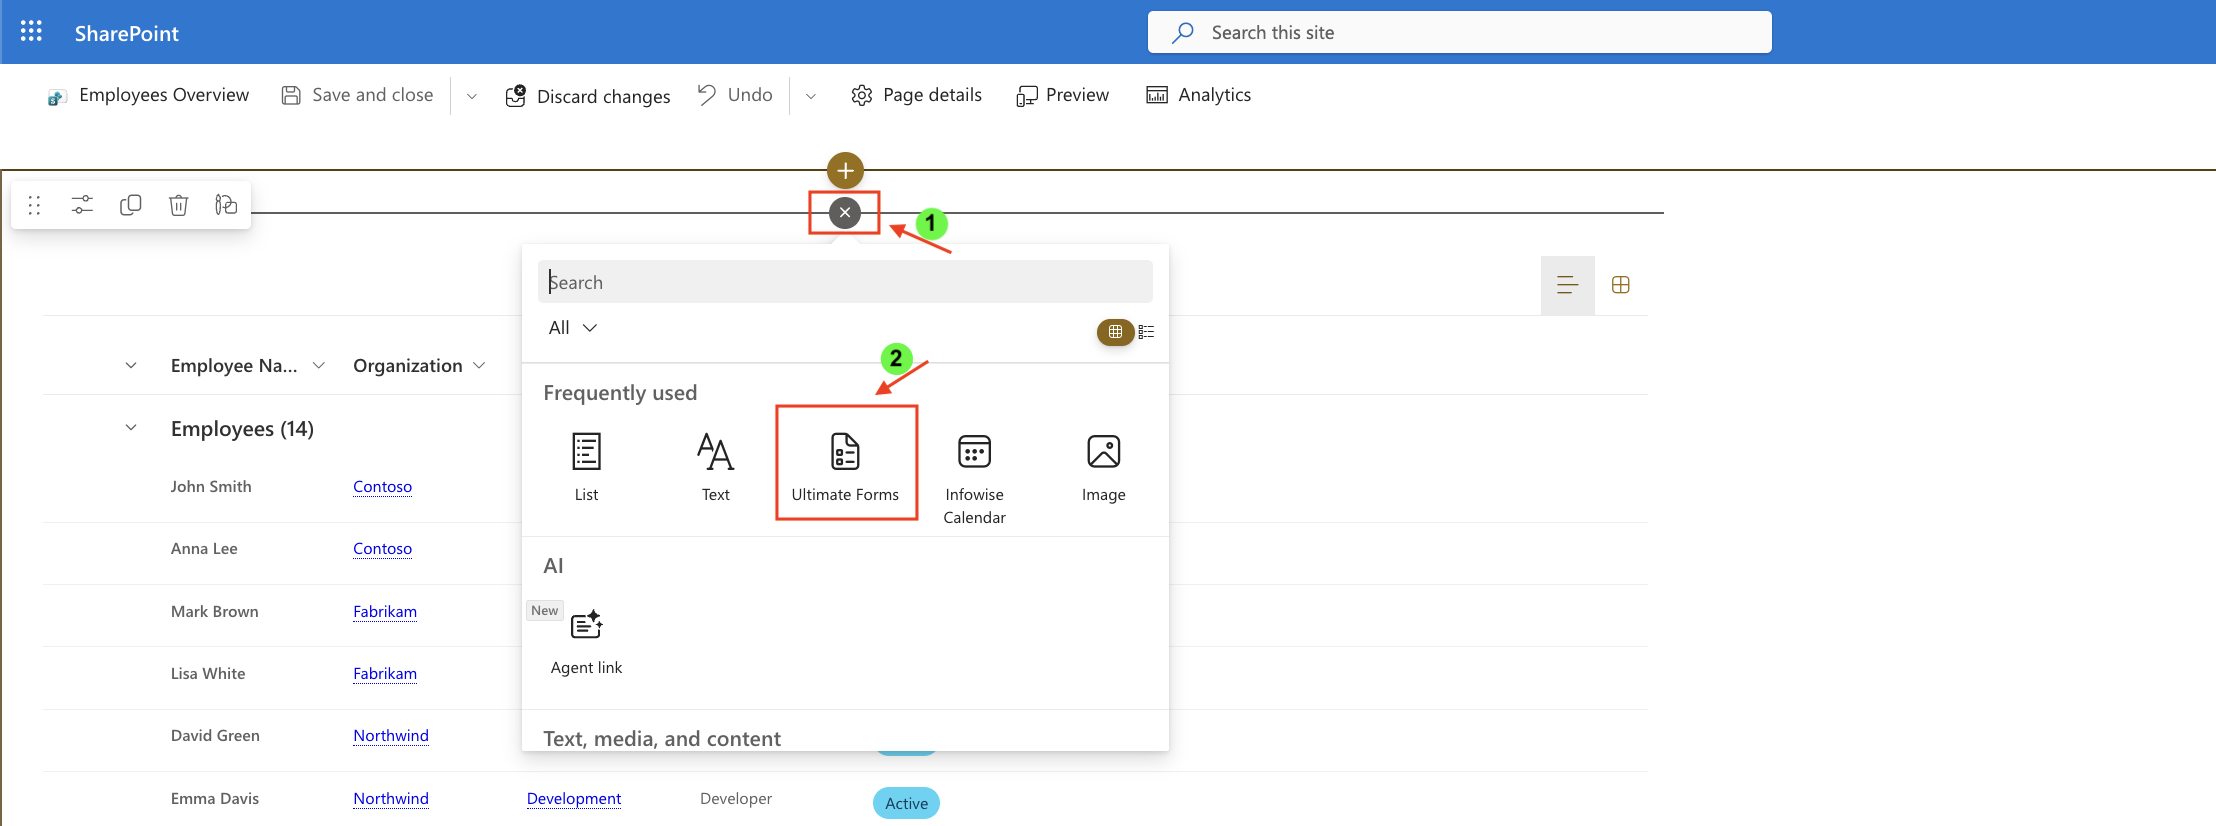
Step 6: Add Filters web part
- Edit the page
- Click the + button and add the Ultimate Forms.
- Once added, click the Edit Properties.
- In the web part properties:
- Set Type to Filter
- Select the profile: Employee Filters
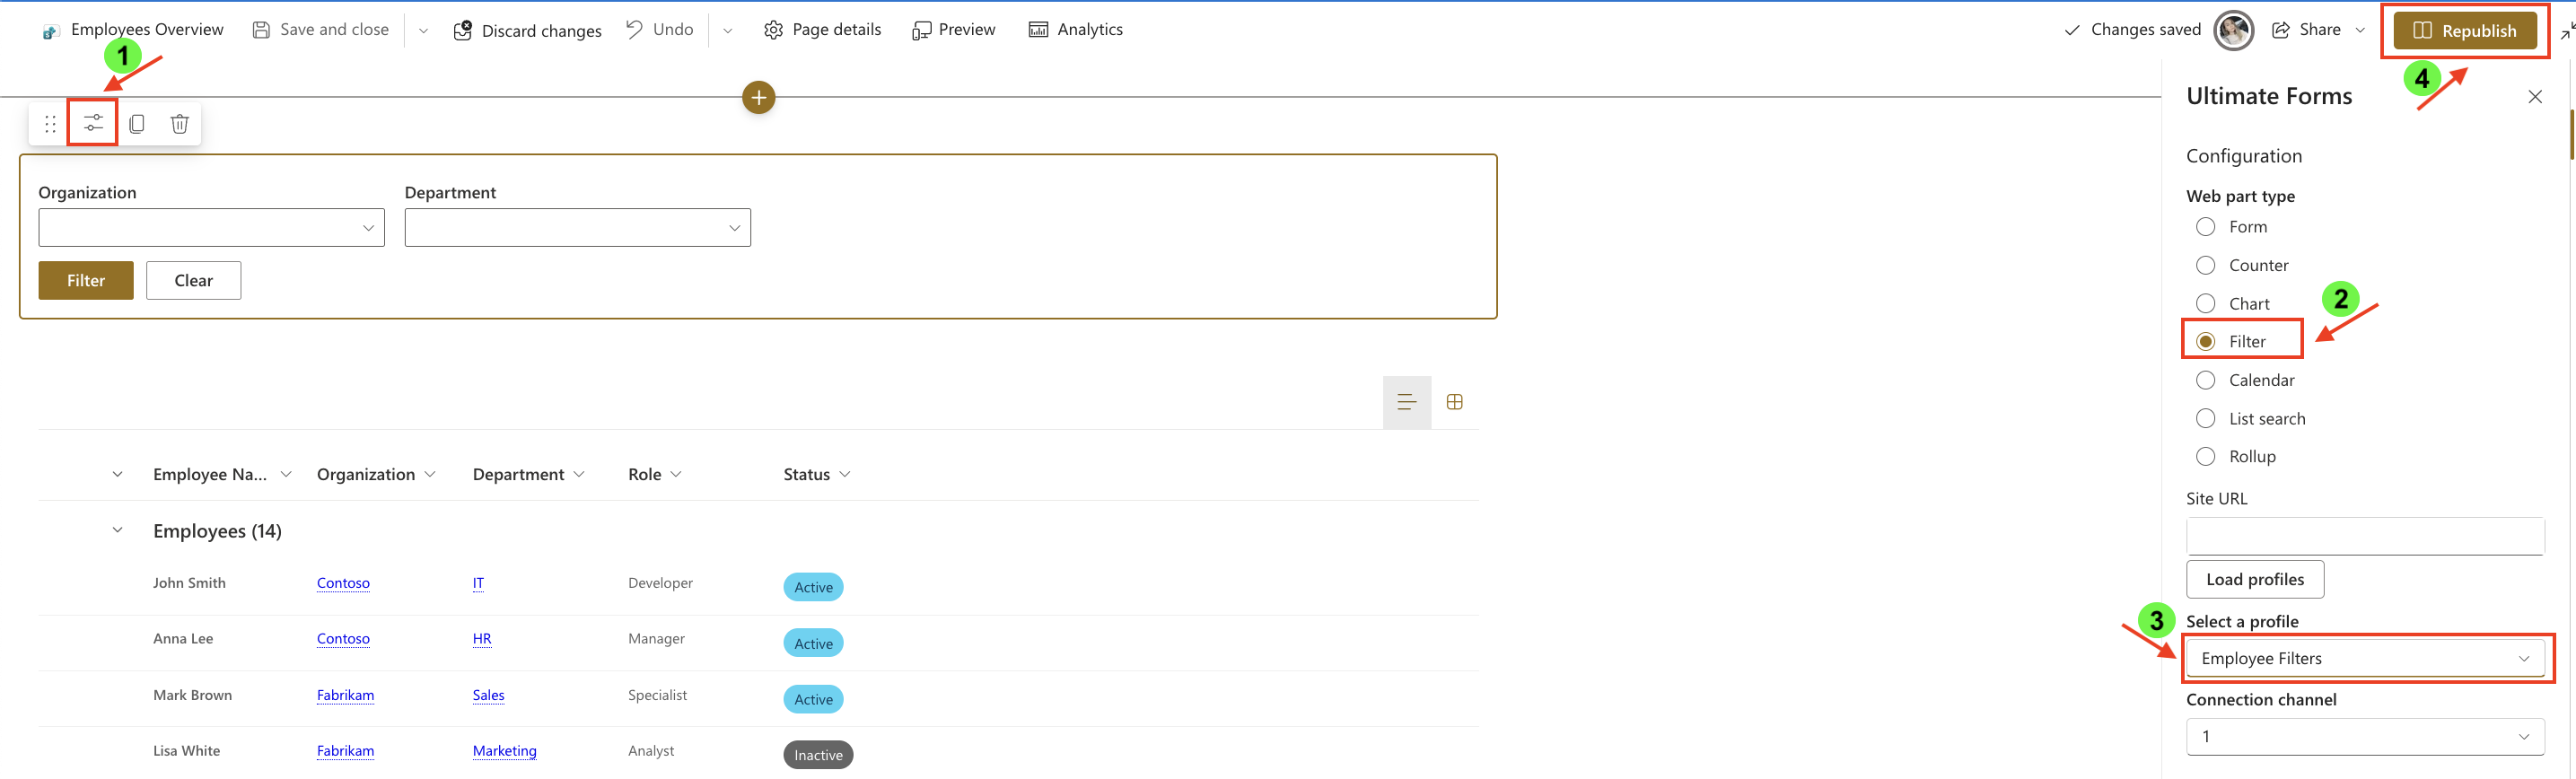
- Republish the page
Step 7: Test cascading filters
Try the following:
- Select Contoso → only HR, IT, Finance appear in Department filter
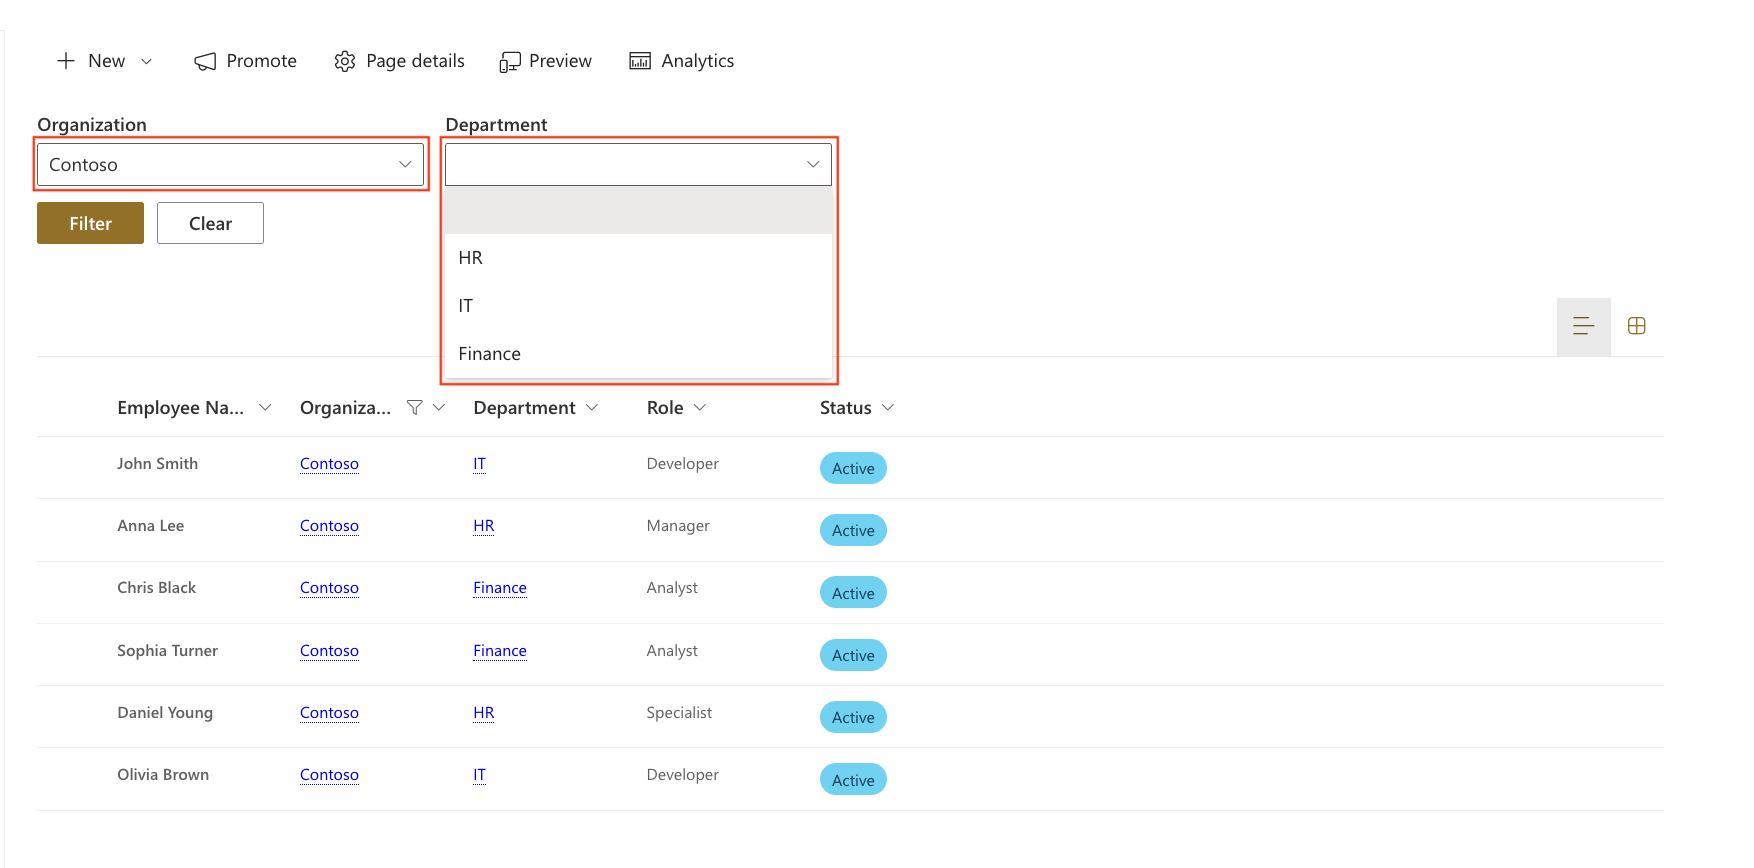
- Select IT → Rollup shows only employees from IT

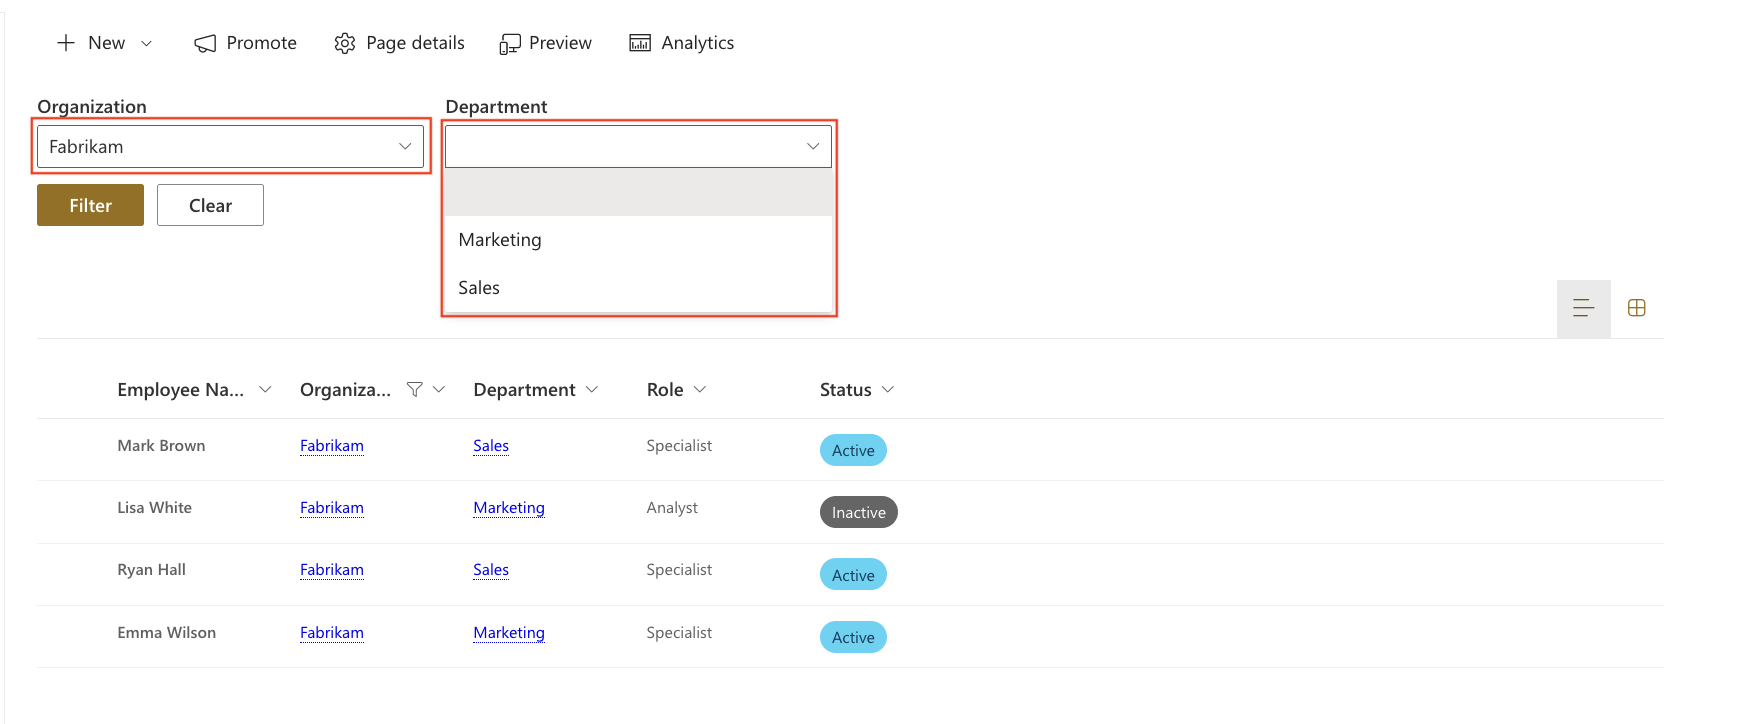
- Change Organization → Department options update automatically
Result
The filters are now connected through a cascading relationship.
Selecting a value in the Organization filter dynamically limits the available Departments, and the Rollup web part updates to display only relevant Employees.
This creates a guided and intuitive filtering experience.
Summary
In this tutorial, you created lookup filters with cascading behavior using Ultimate Forms: Filters.
You configured dependencies between filters and connected them to web parts, allowing users to interactively refine data on the page.