Default Values and Dynamic Rules
Form Designer allows you to configure column behavior without code using rules.
Rules help automate data entry, personalize forms, and control how columns behave depending on user roles or conditions.
There are two types of rules:
- Default value – sets the initial value of the column when the form opens.
- Dynamic rule – sets values to columns dynamically and automatically. You can base the new value on static values, other column values, functions and expressions and subject to conditions..
In this tutorial, we will configure rules for the Support Request list using real examples.
Instructions
Step 1: Open Form Designer
- Open the Support Request list.
- Go to Form Designer.
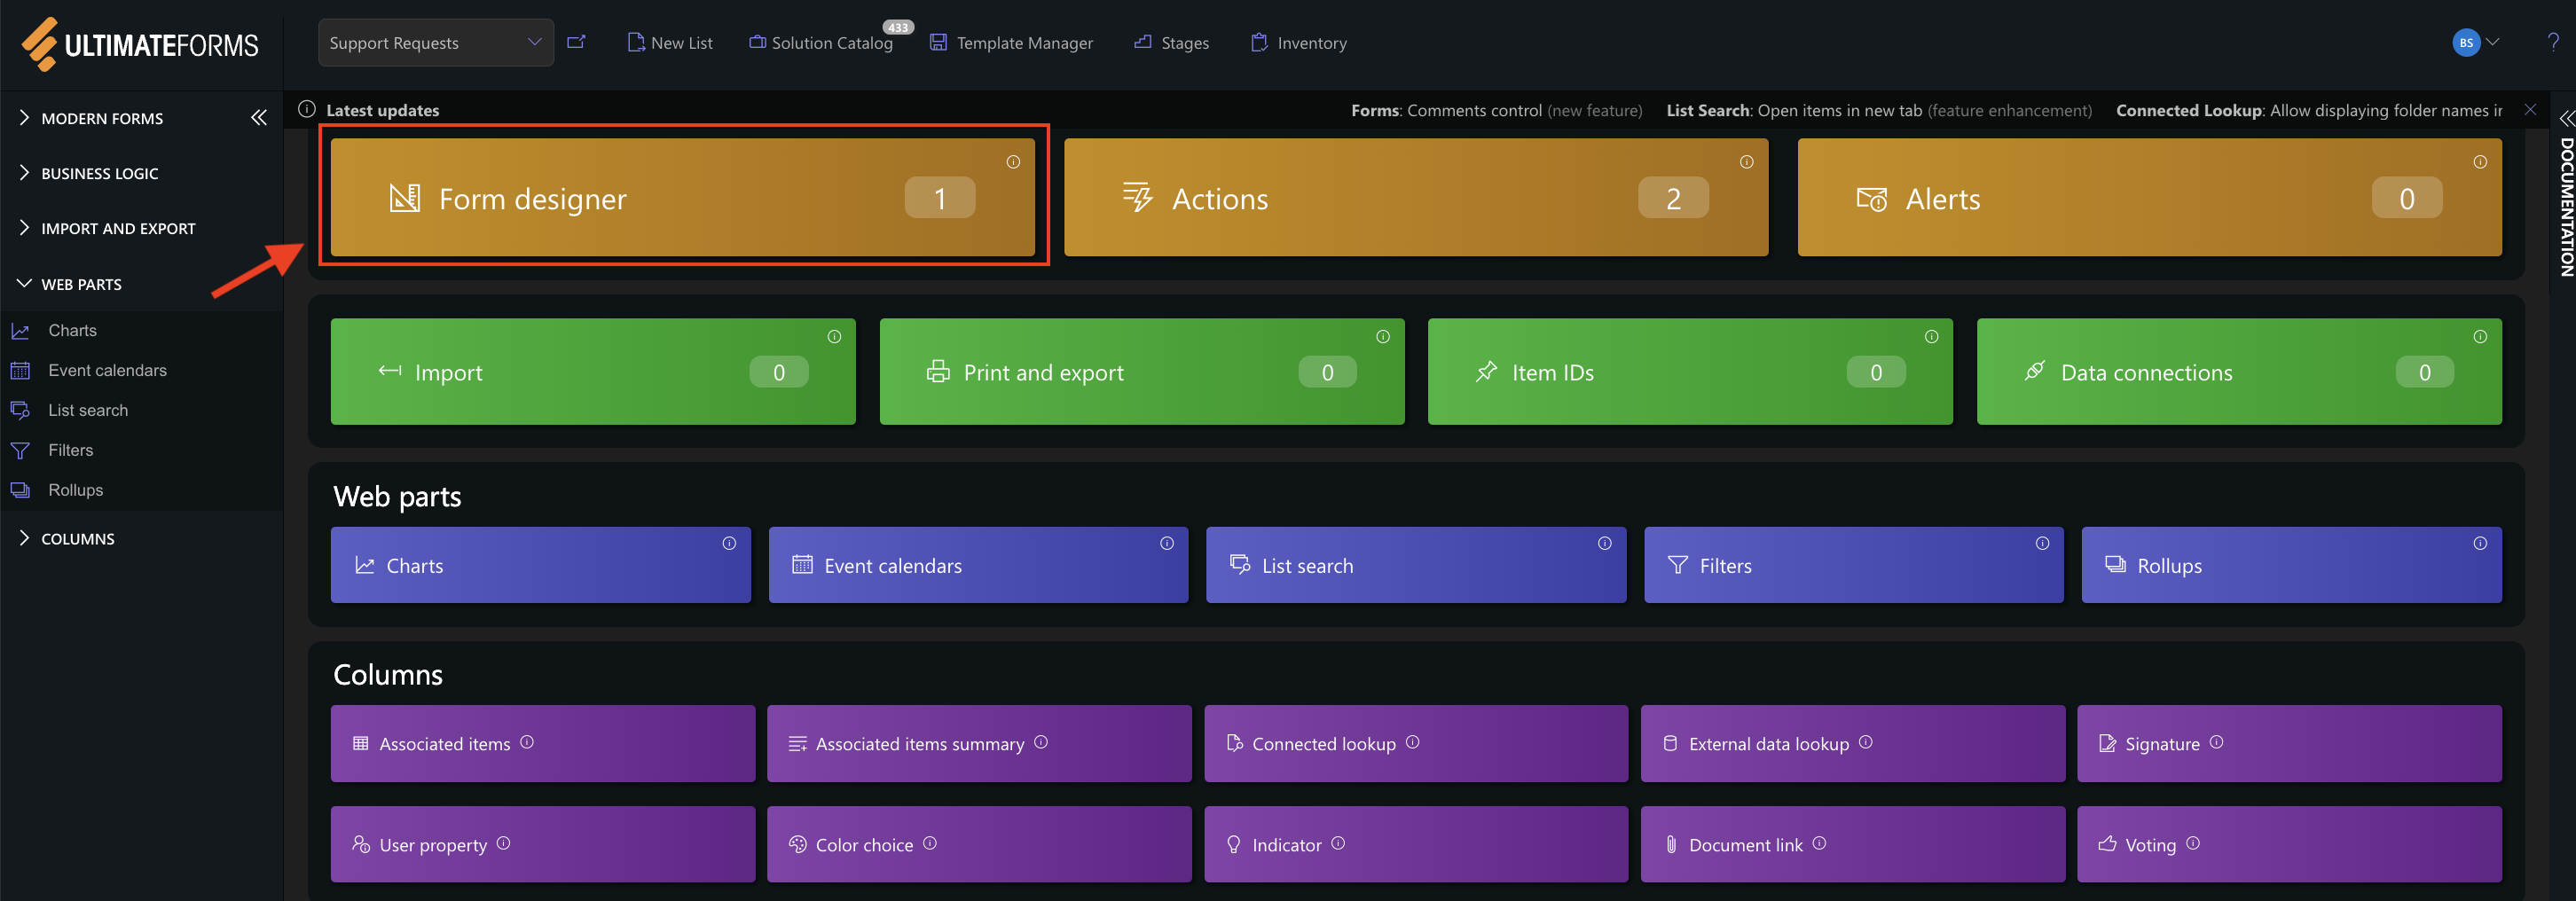
- Select the column you want to configure.
- Open the VALUES panel.
- Click Add new rule.
Default Values
Default values pre-fill columns when a new form opens.
They reduce repetitive data entry and ensure consistency.
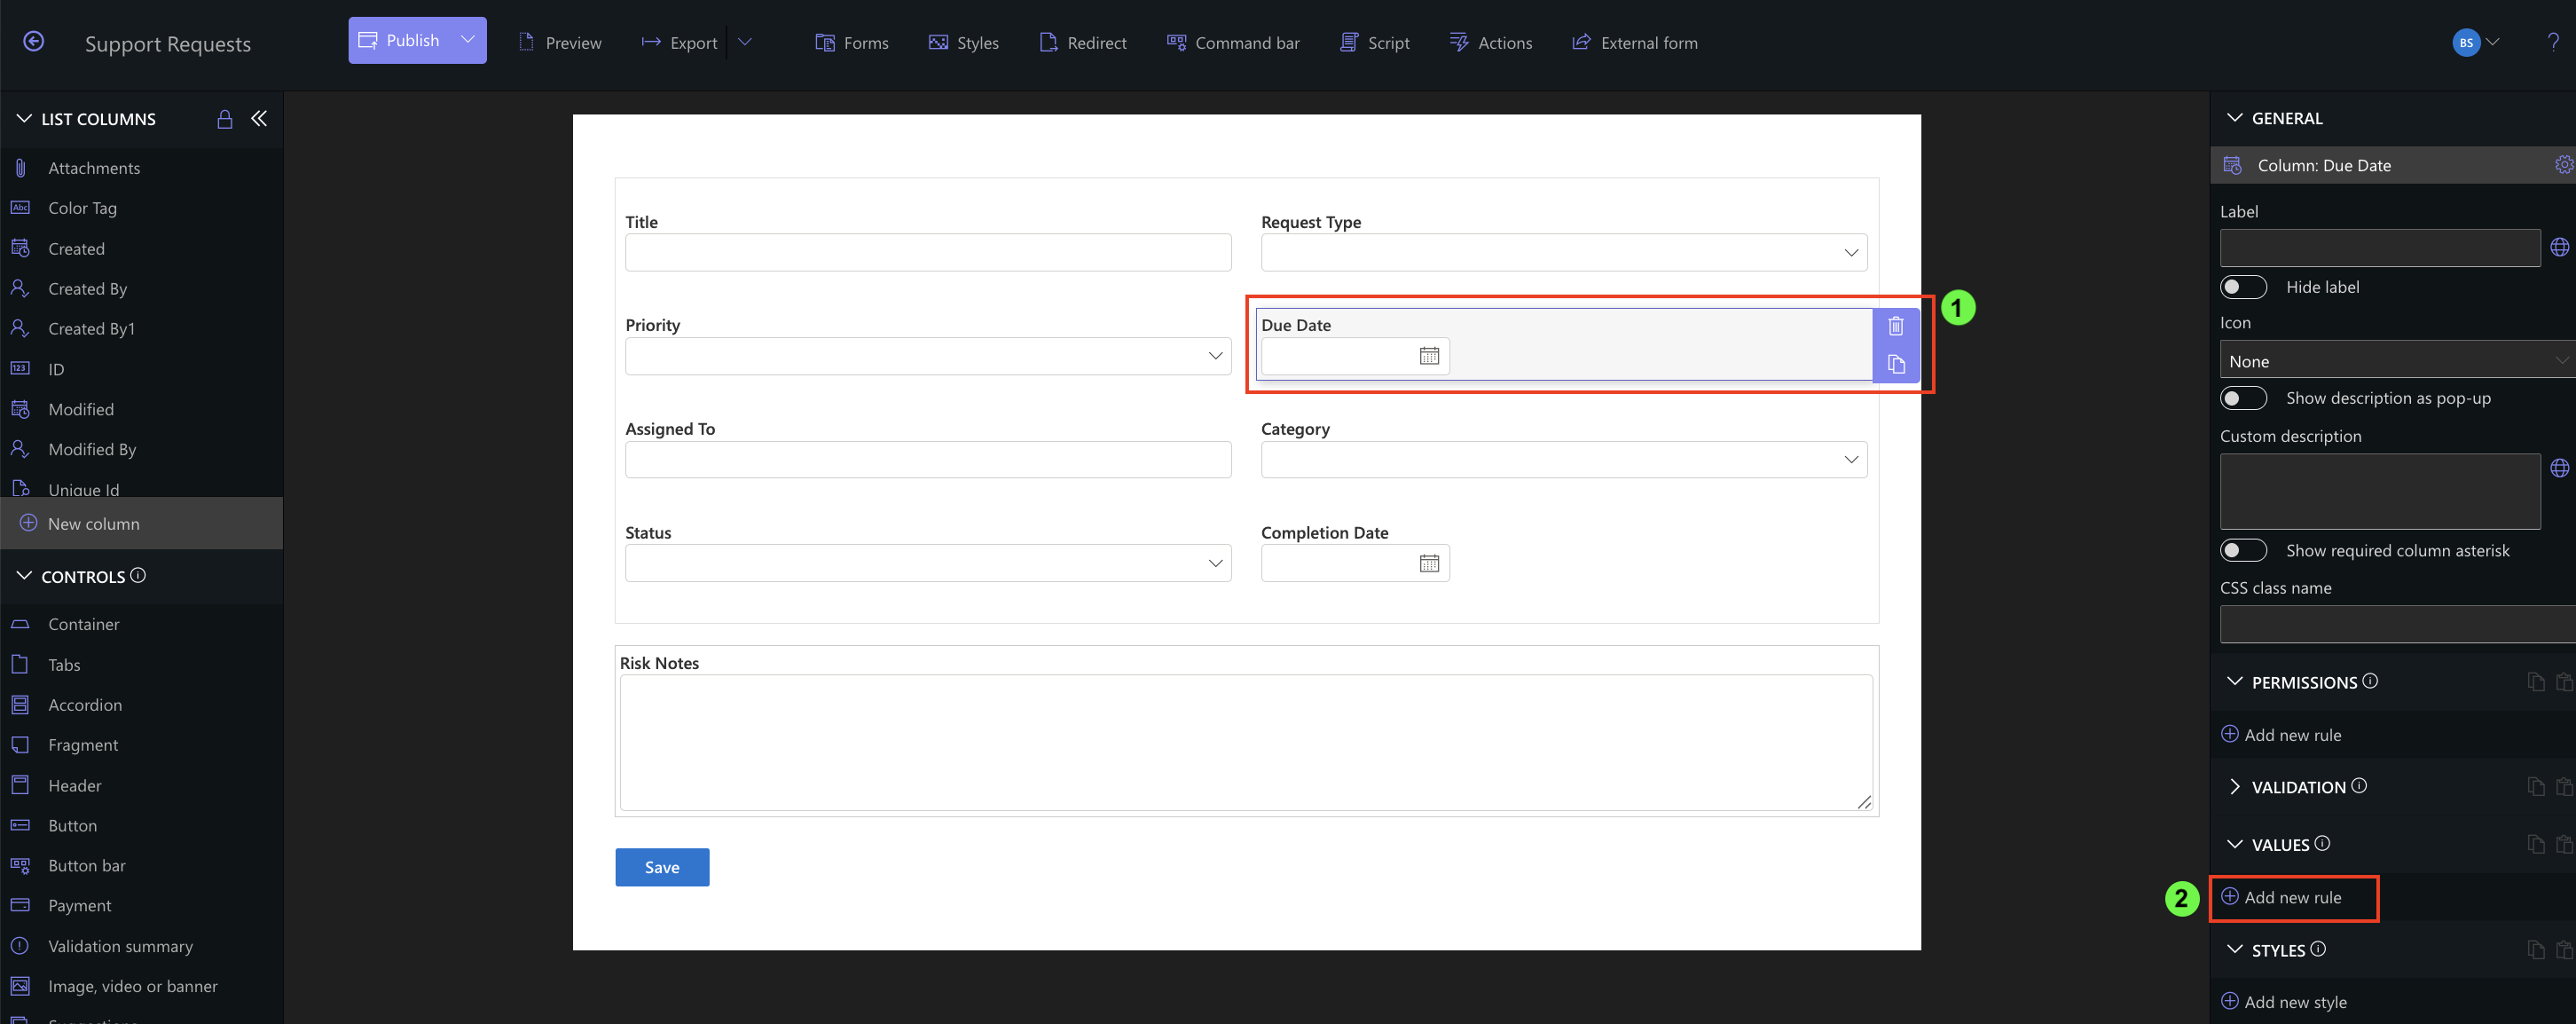
Step 2: Set Default Due Date (Today + 3 days)
Column: Due Date
- Add a new rule → Default value
- Value: [Today]+3
- For users/groups: Everyone
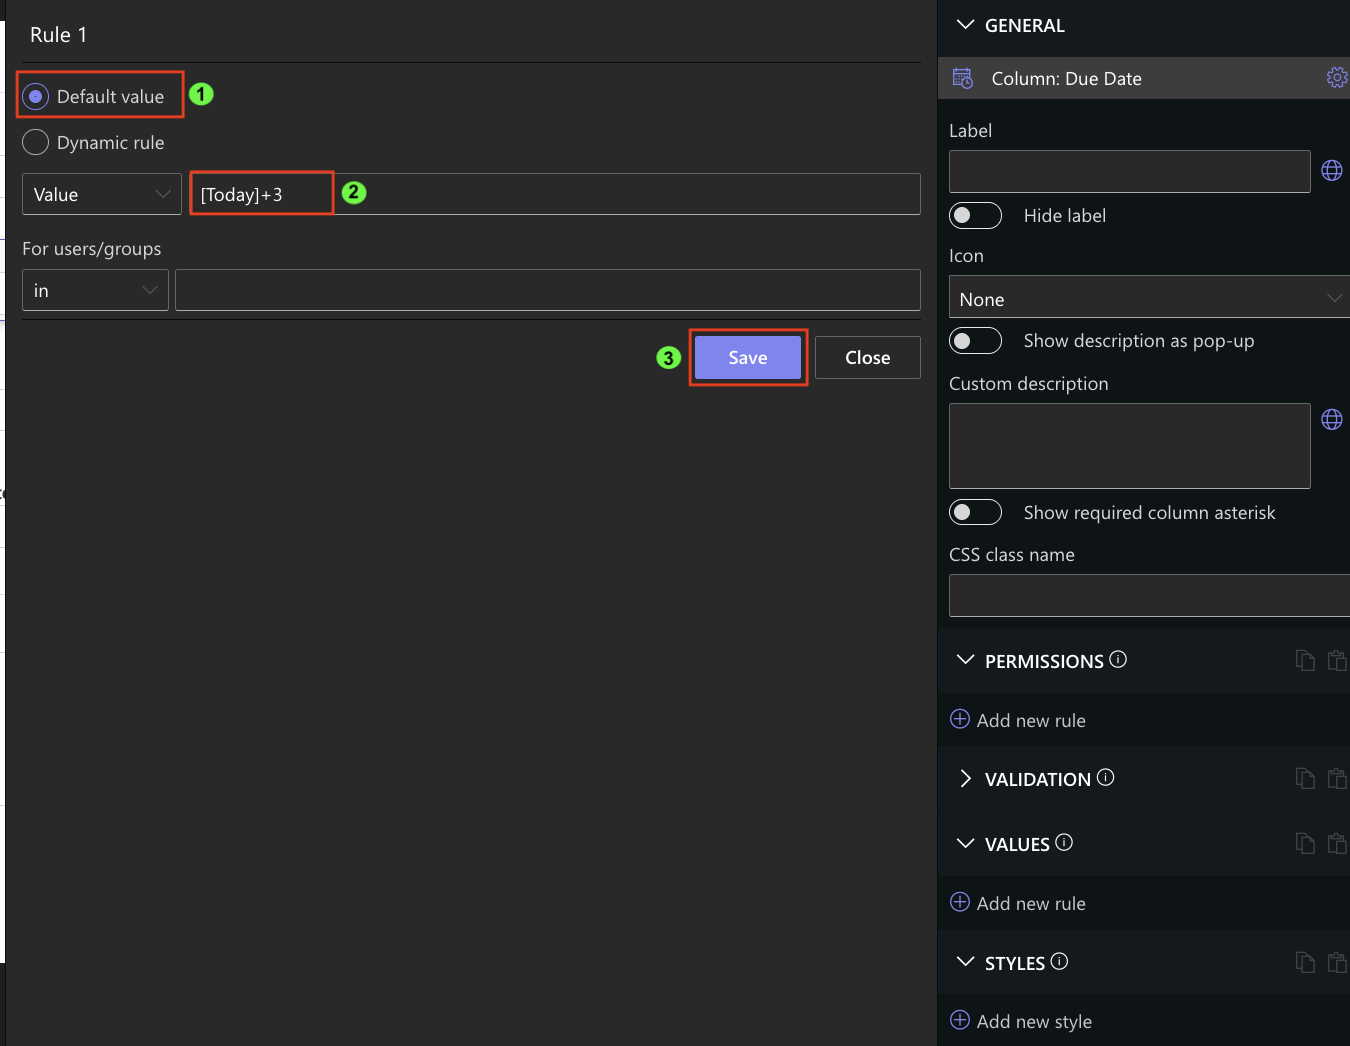
Result: Every new Support Request automatically receives a due date 3 days from today.
Step 3: Set Default Assigned To = Current User
Column: Assigned To
- Add rule → Default value
- Value: [Me]
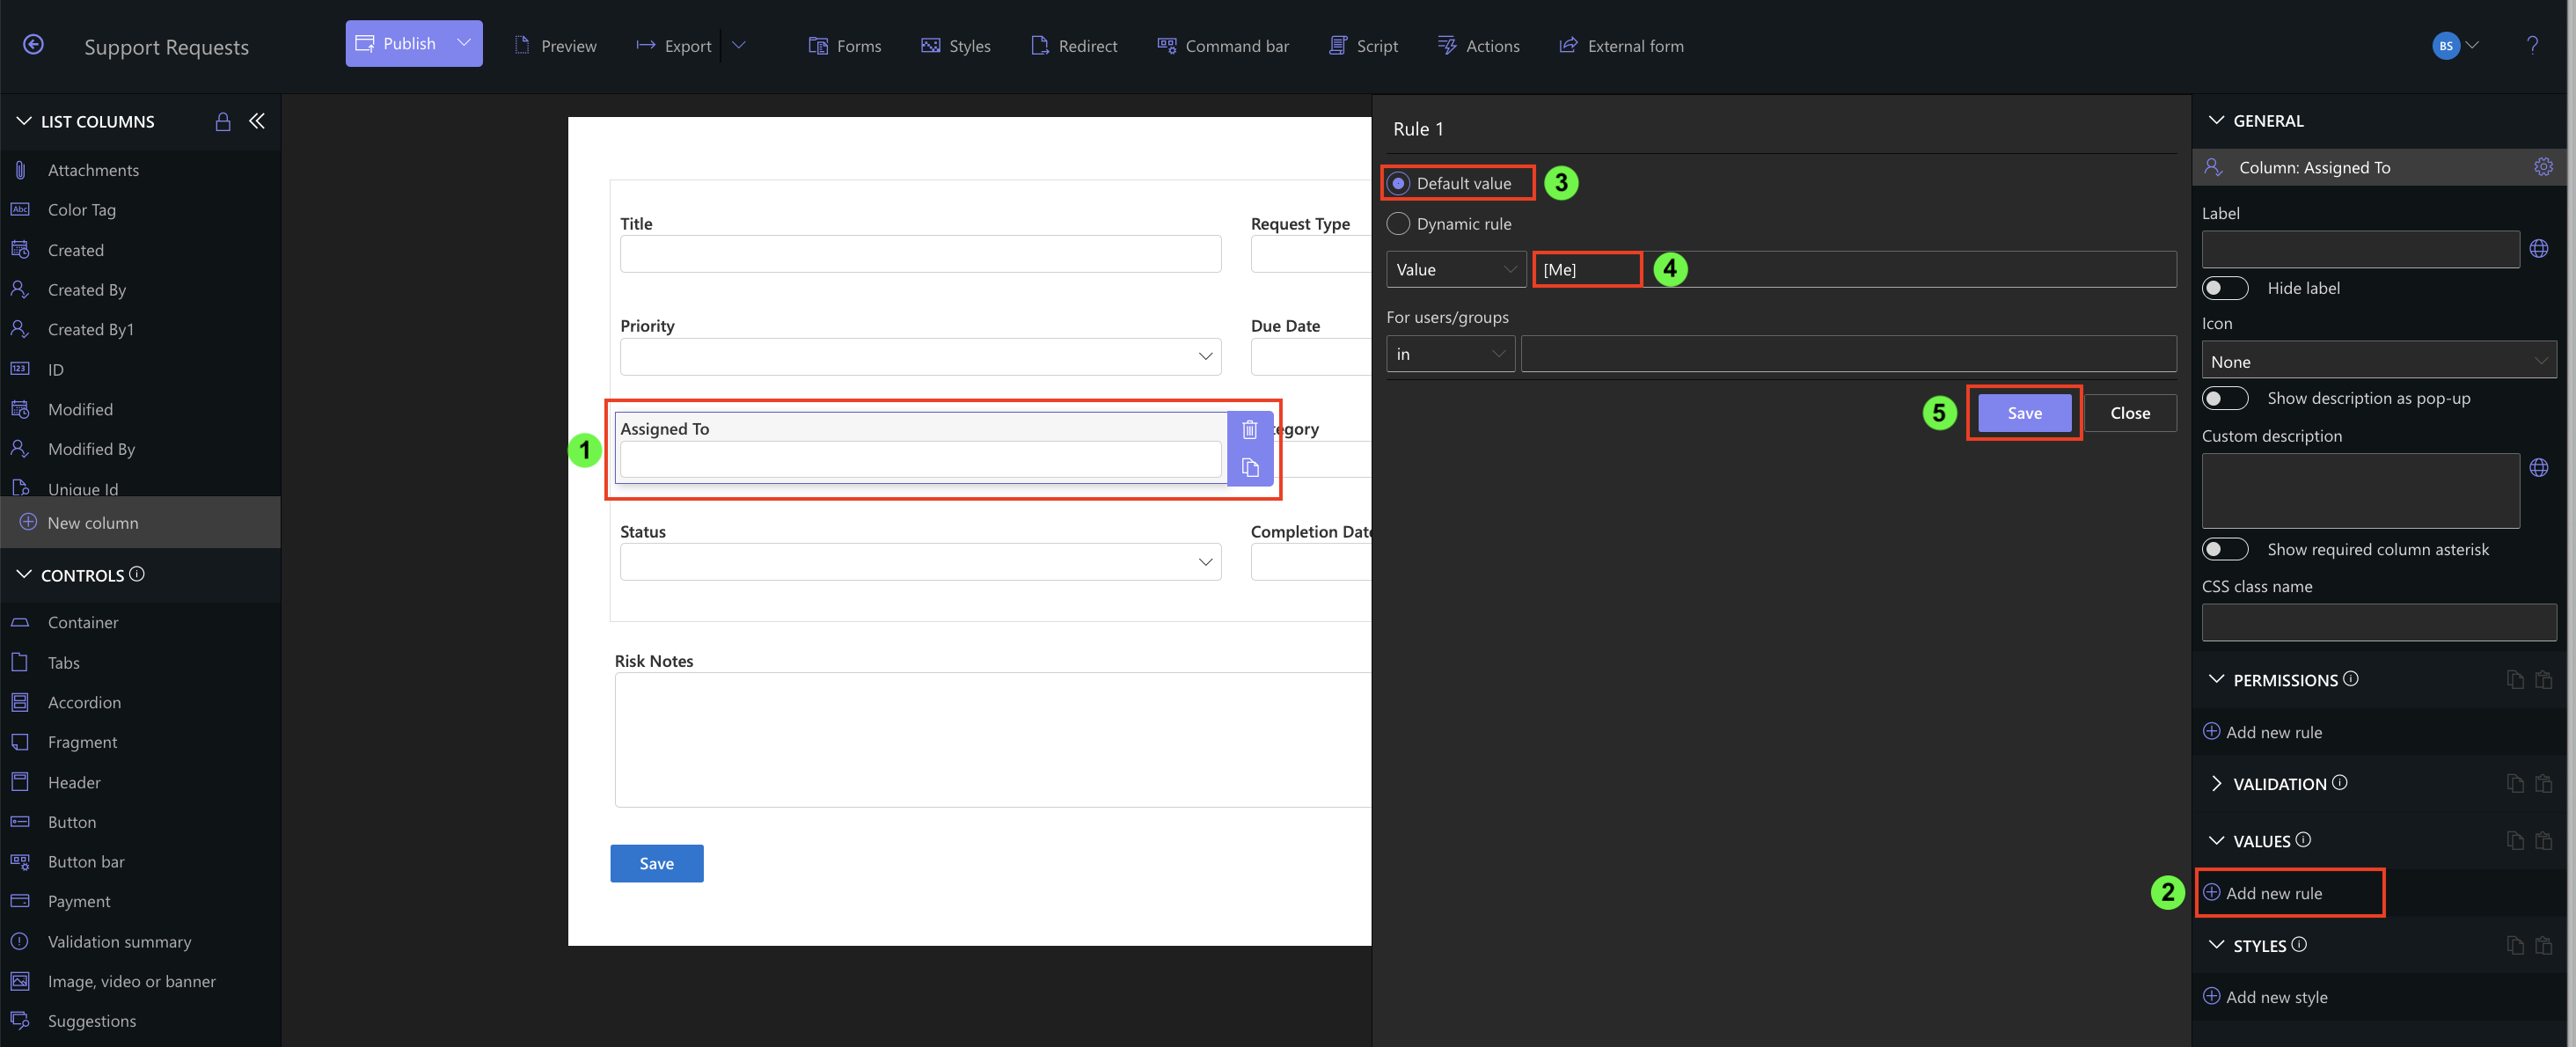
Result: The user creating the request is assigned automatically.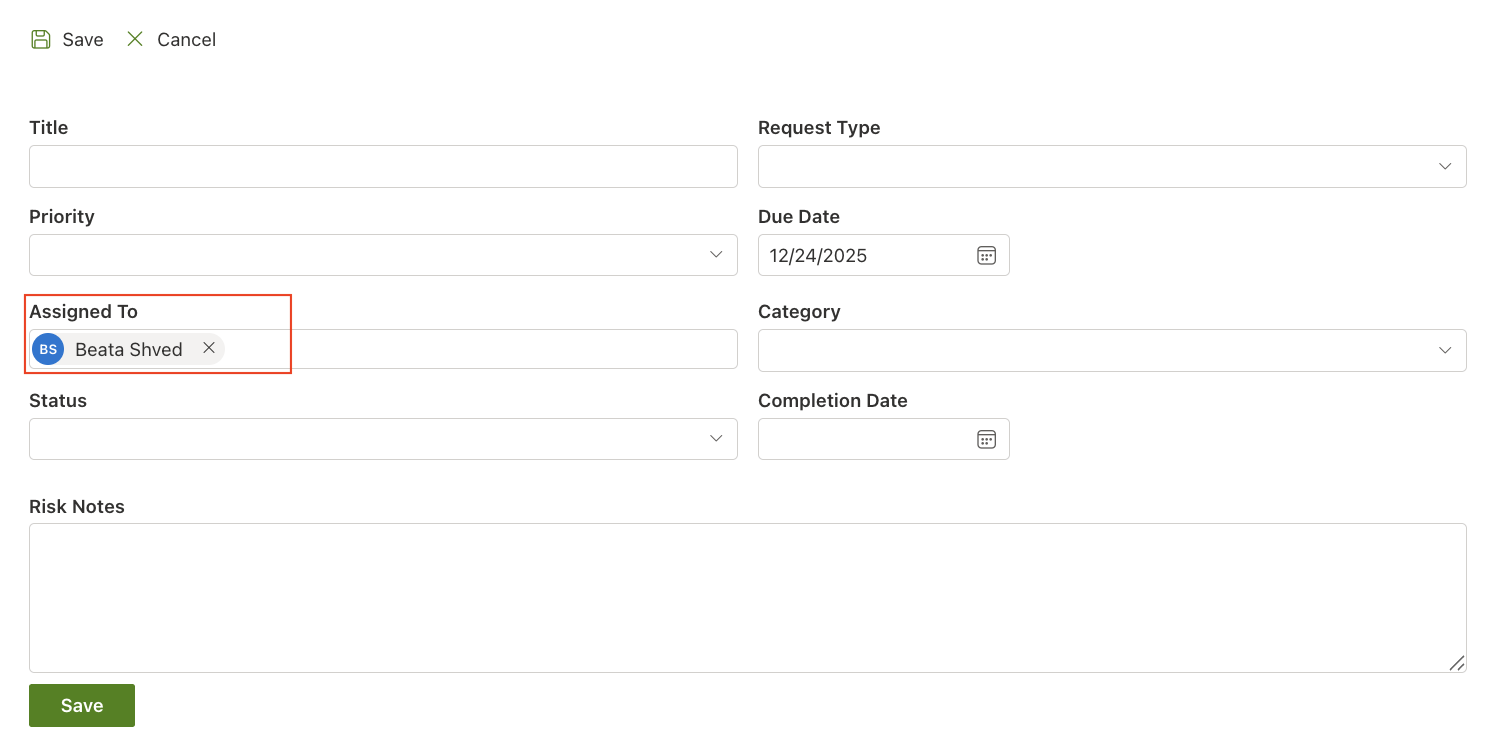
Step 4: Set Default Priority for Managers Only
Column: Priority
- Add rule → Default value
- Value: High
- For users/groups → Select SharePoint group: Managers
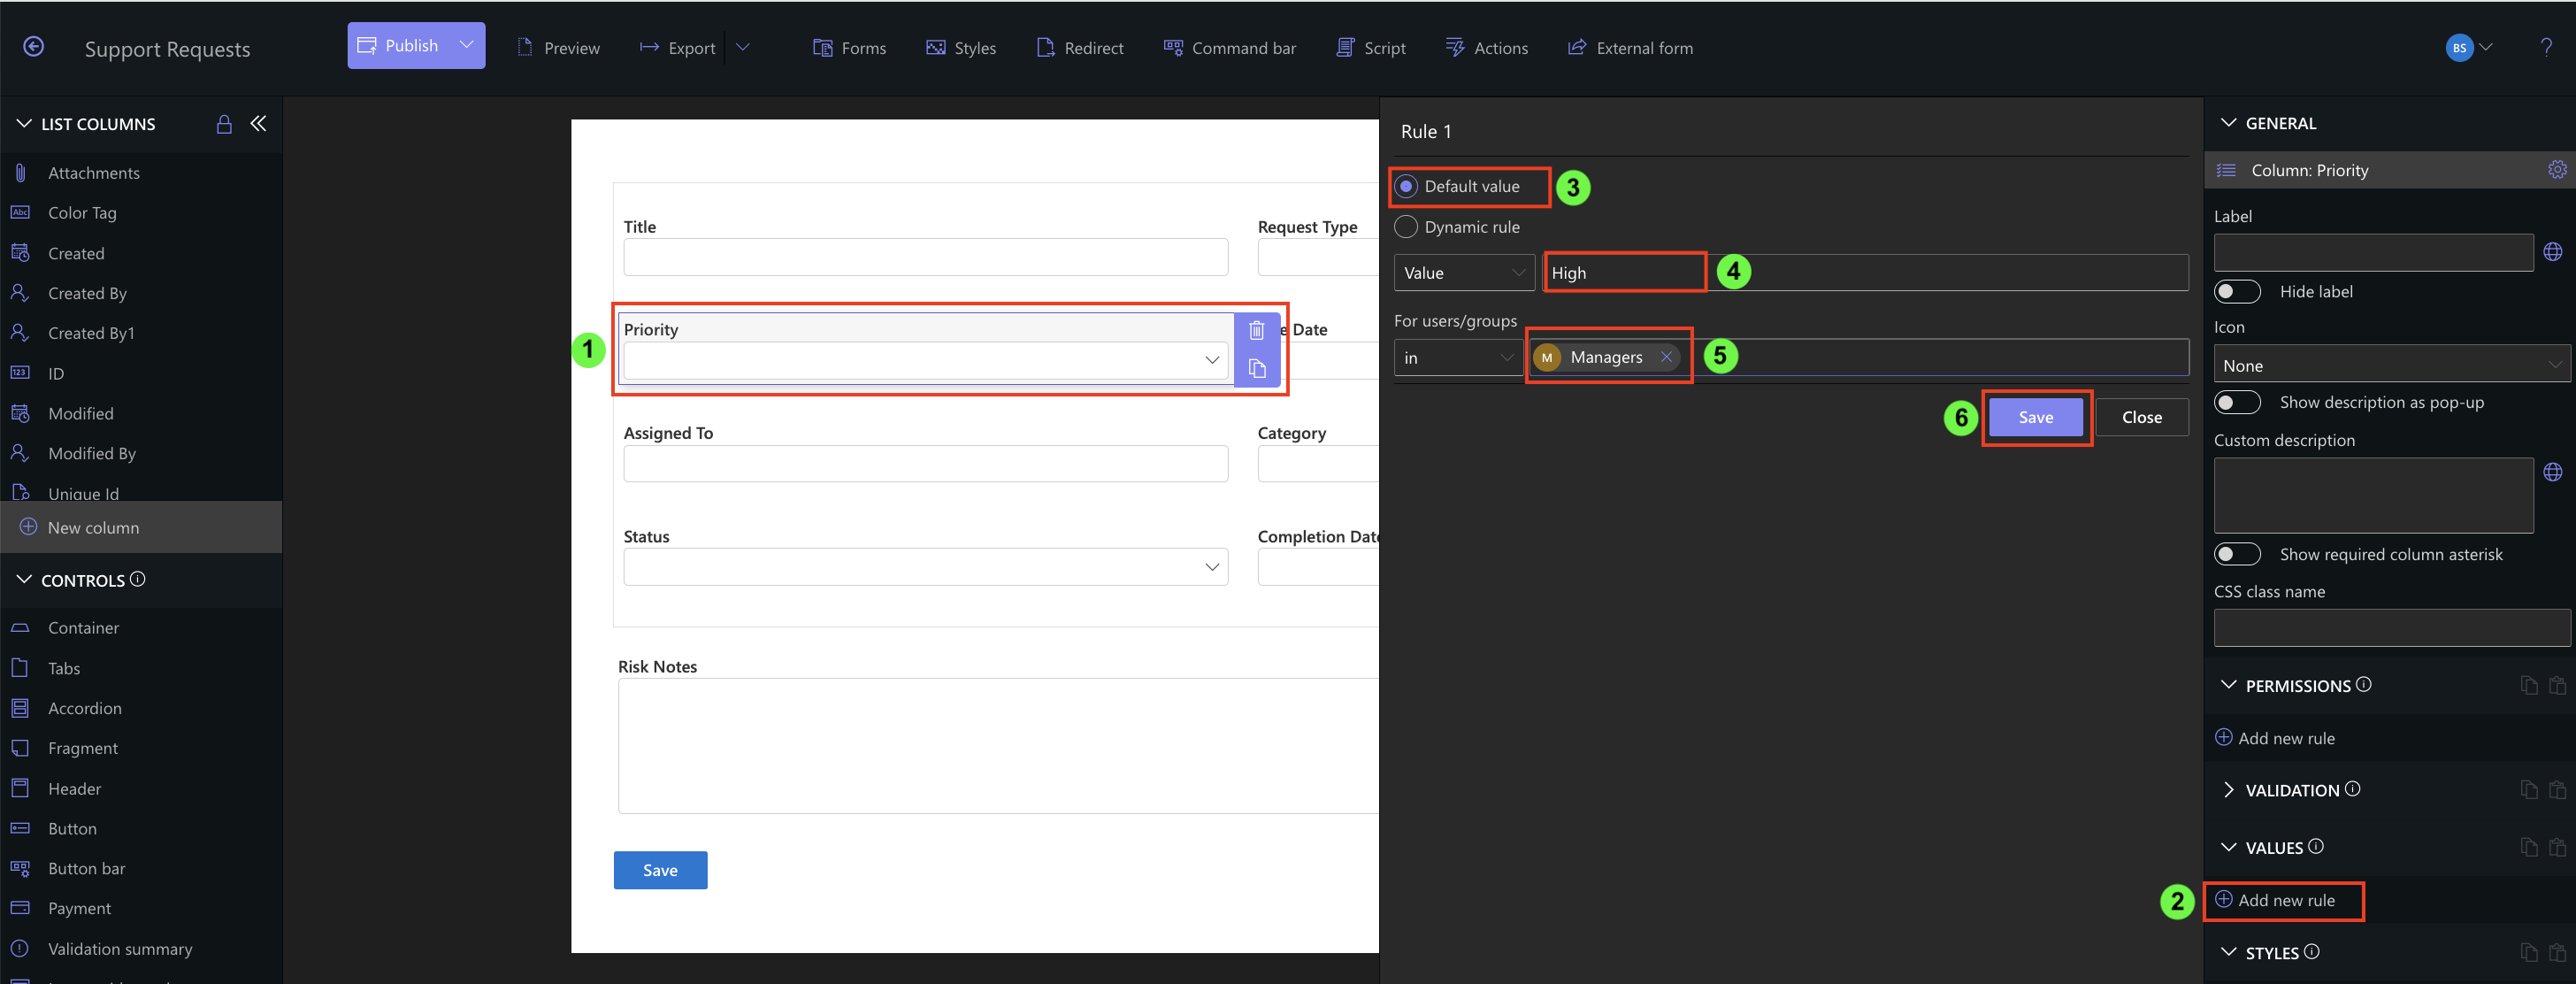
Result: Managers see "High" as the default priority, other users do not.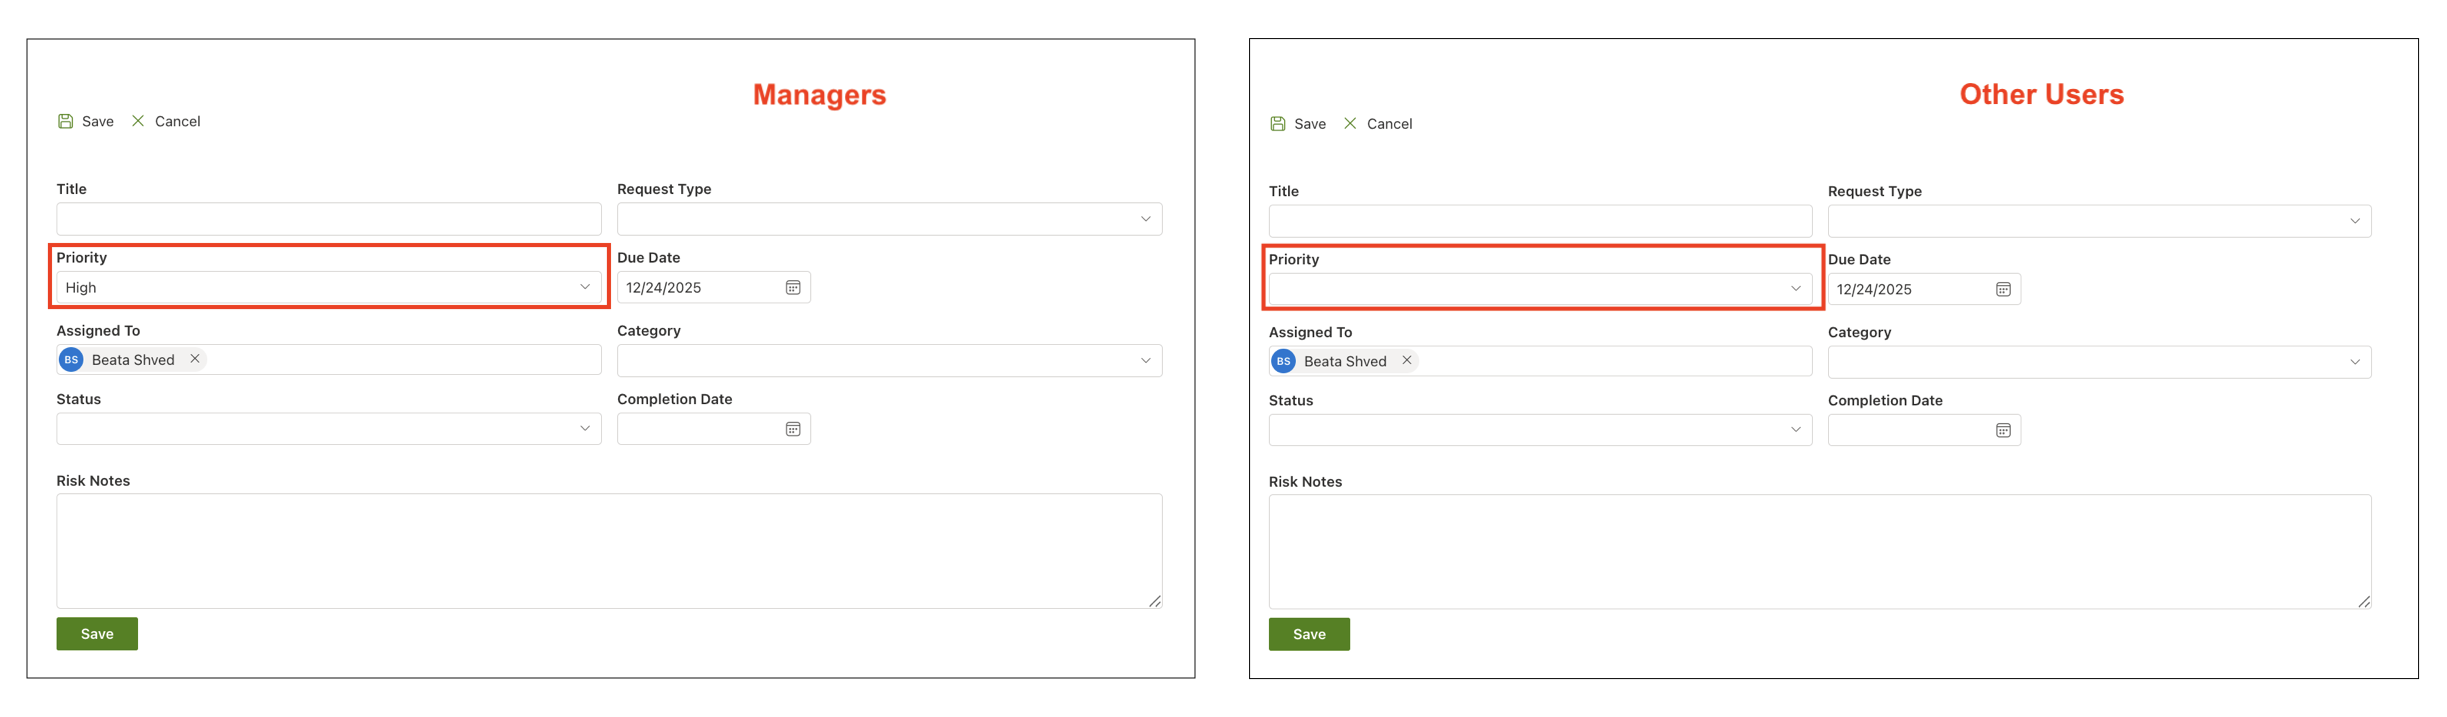
Dynamic Rules
Dynamic rules change column values automatically based on conditions.
Step 5: Auto-set Priority When Category = High Risk
Column: Priority
- Add rule → Dynamic rule
- Value: High
- Apply under the conditions:
- Category = High Risk
- Apply in forms: New + Edit

Result: When the user selects “High Risk”, Priority updates to “High”.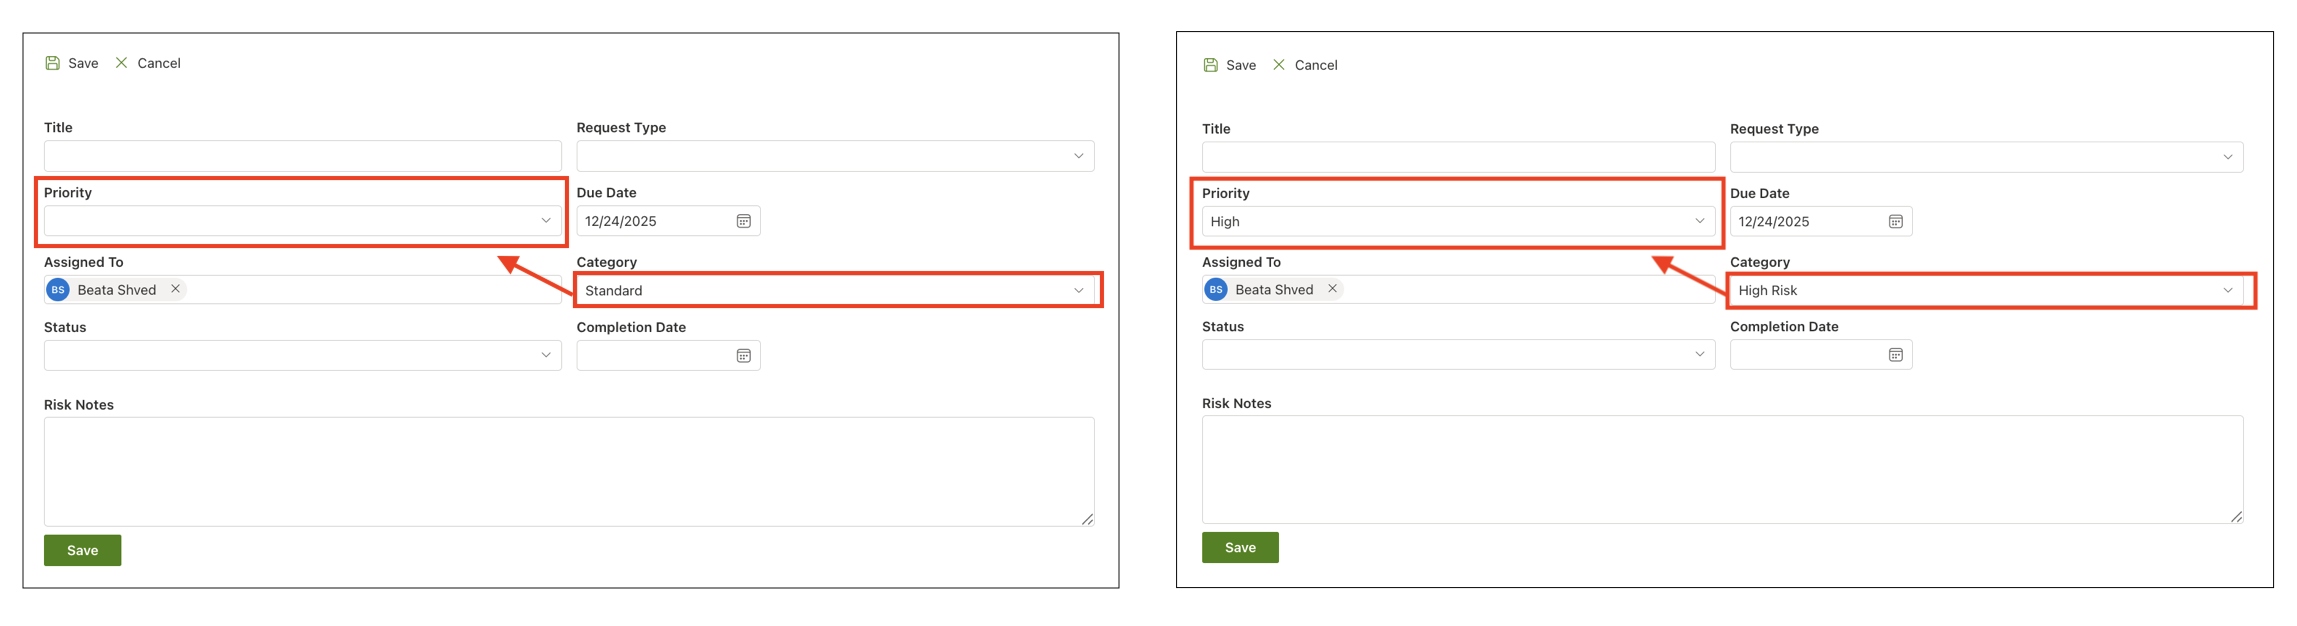
Step 6: Auto-fill Risk Notes for High Risk Requests
Column: Risk Notes
- Add rule → Dynamic rule
- Value: Please provide detailed risk explanation.
- Condition: Category = High Risk
Result: Helpful instructions appear automatically for high-risk submissions.
Step 7: Auto-fill Completion Date When Status = Completed
Column: Completion Date
- Rule type → Dynamic rule
- Value: [Today]
- Apply in: Edit only
- Condition: Status equals Completed
Result: When the request is marked Completed, Completion Date fills automatically.
Summary
In this tutorial, you learned how to pre-fill columns, apply user-specific defaults, and update values dynamically based on conditions and expressions—enhancing accuracy, reducing manual input, and creating a more responsive form experience.