Configuring List Search for SharePoint On-Premises
List Search works slightly differently in SharePoint On-Premises compared to the Microsoft 365 version. Instead of configuring a profile in the Ultimate Forms Design screen, most settings are applied directly in the Web Part Properties on the SharePoint page.
In this tutorial, you will learn how to add the List Search web part to a SharePoint page and configure it to search through multiple lists.
Instructions
Step 1: Add a New Wiki Page
- Go to Site Content → Site Pages.
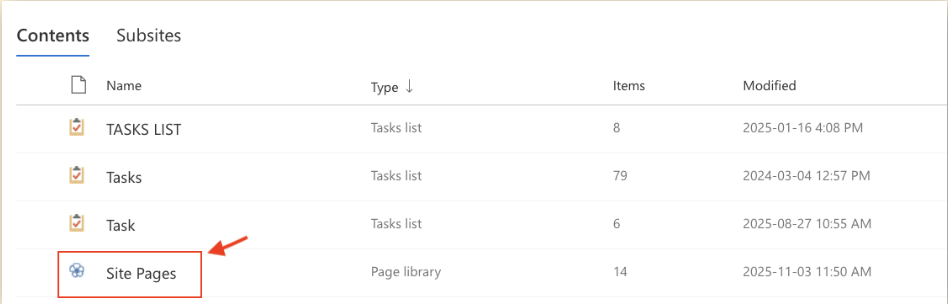
- Click New → Wiki Page.

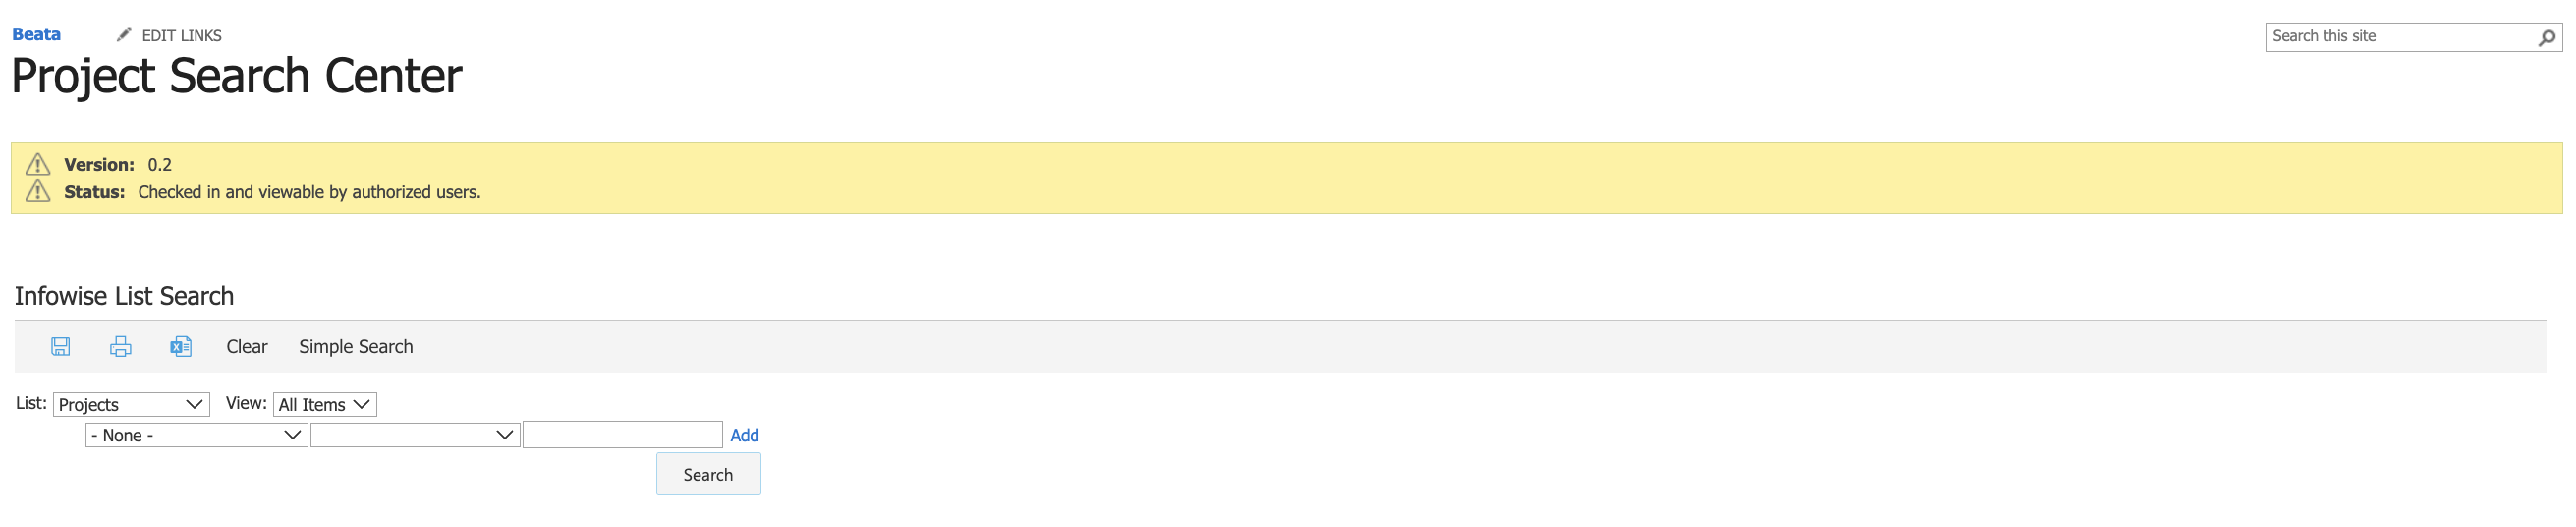
- Enter a page name, for example: Project Search Center.

- Click Create.
You will be redirected to a blank Classic page.
Step 2: Add the List Search Web Part
- At the top ribbon, select the Insert tab.
- Click Web Part → Infowise → Infowise List Search.
- Choose Infowise List Search.
- Click Add.
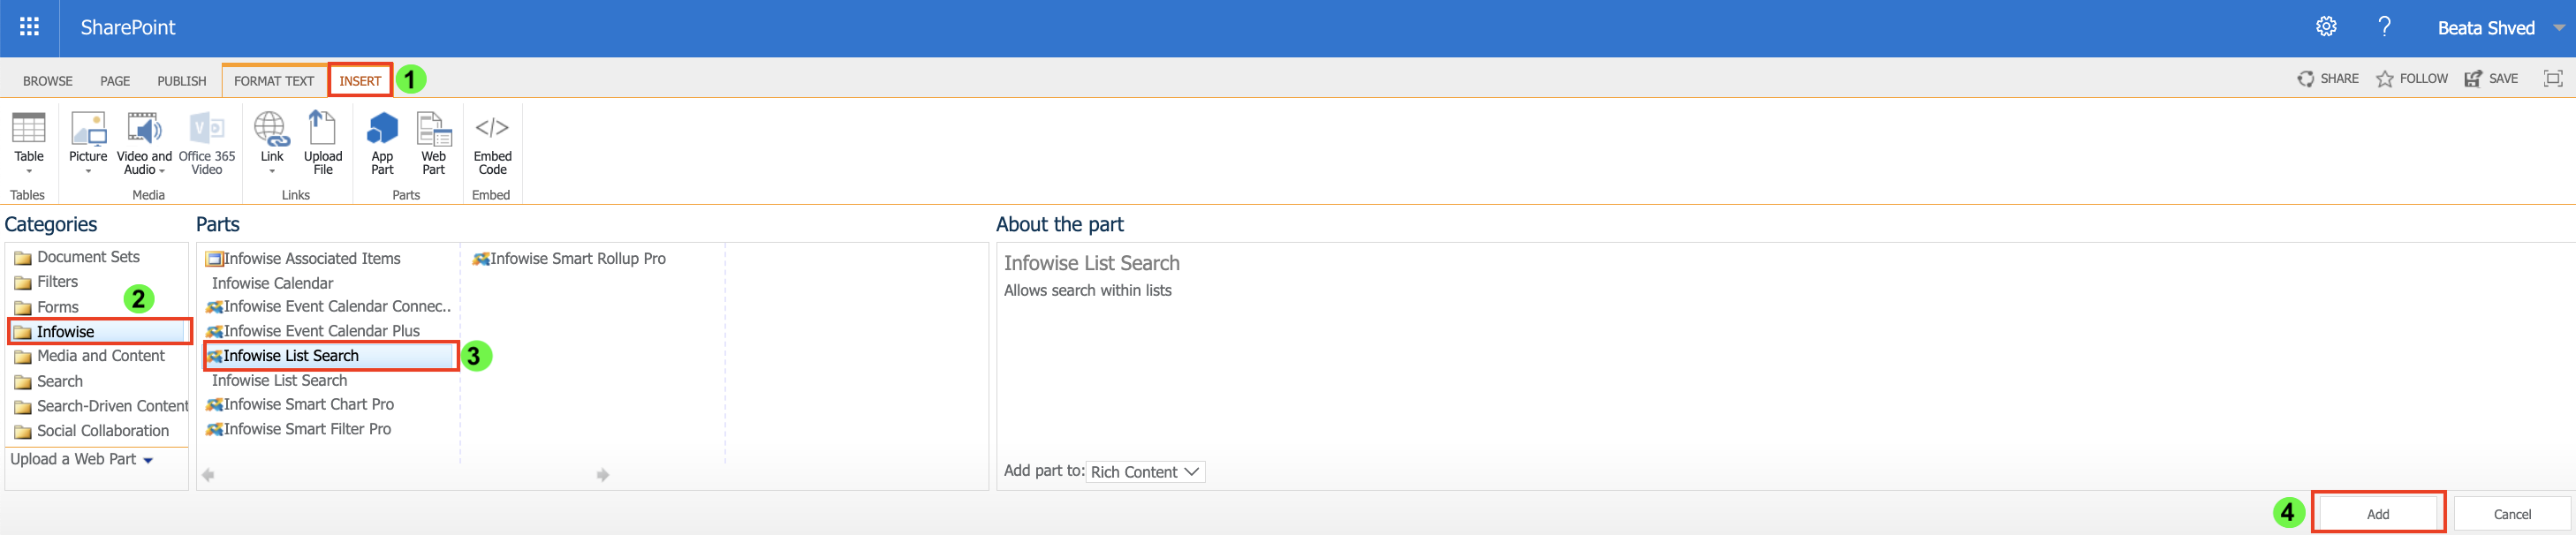
The web part will appear on the page.
Step 3: Configure the Web Part
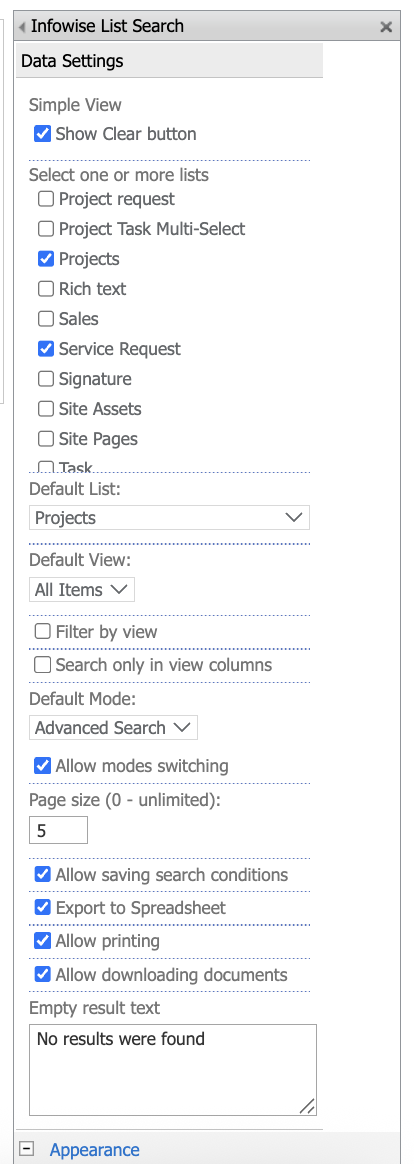
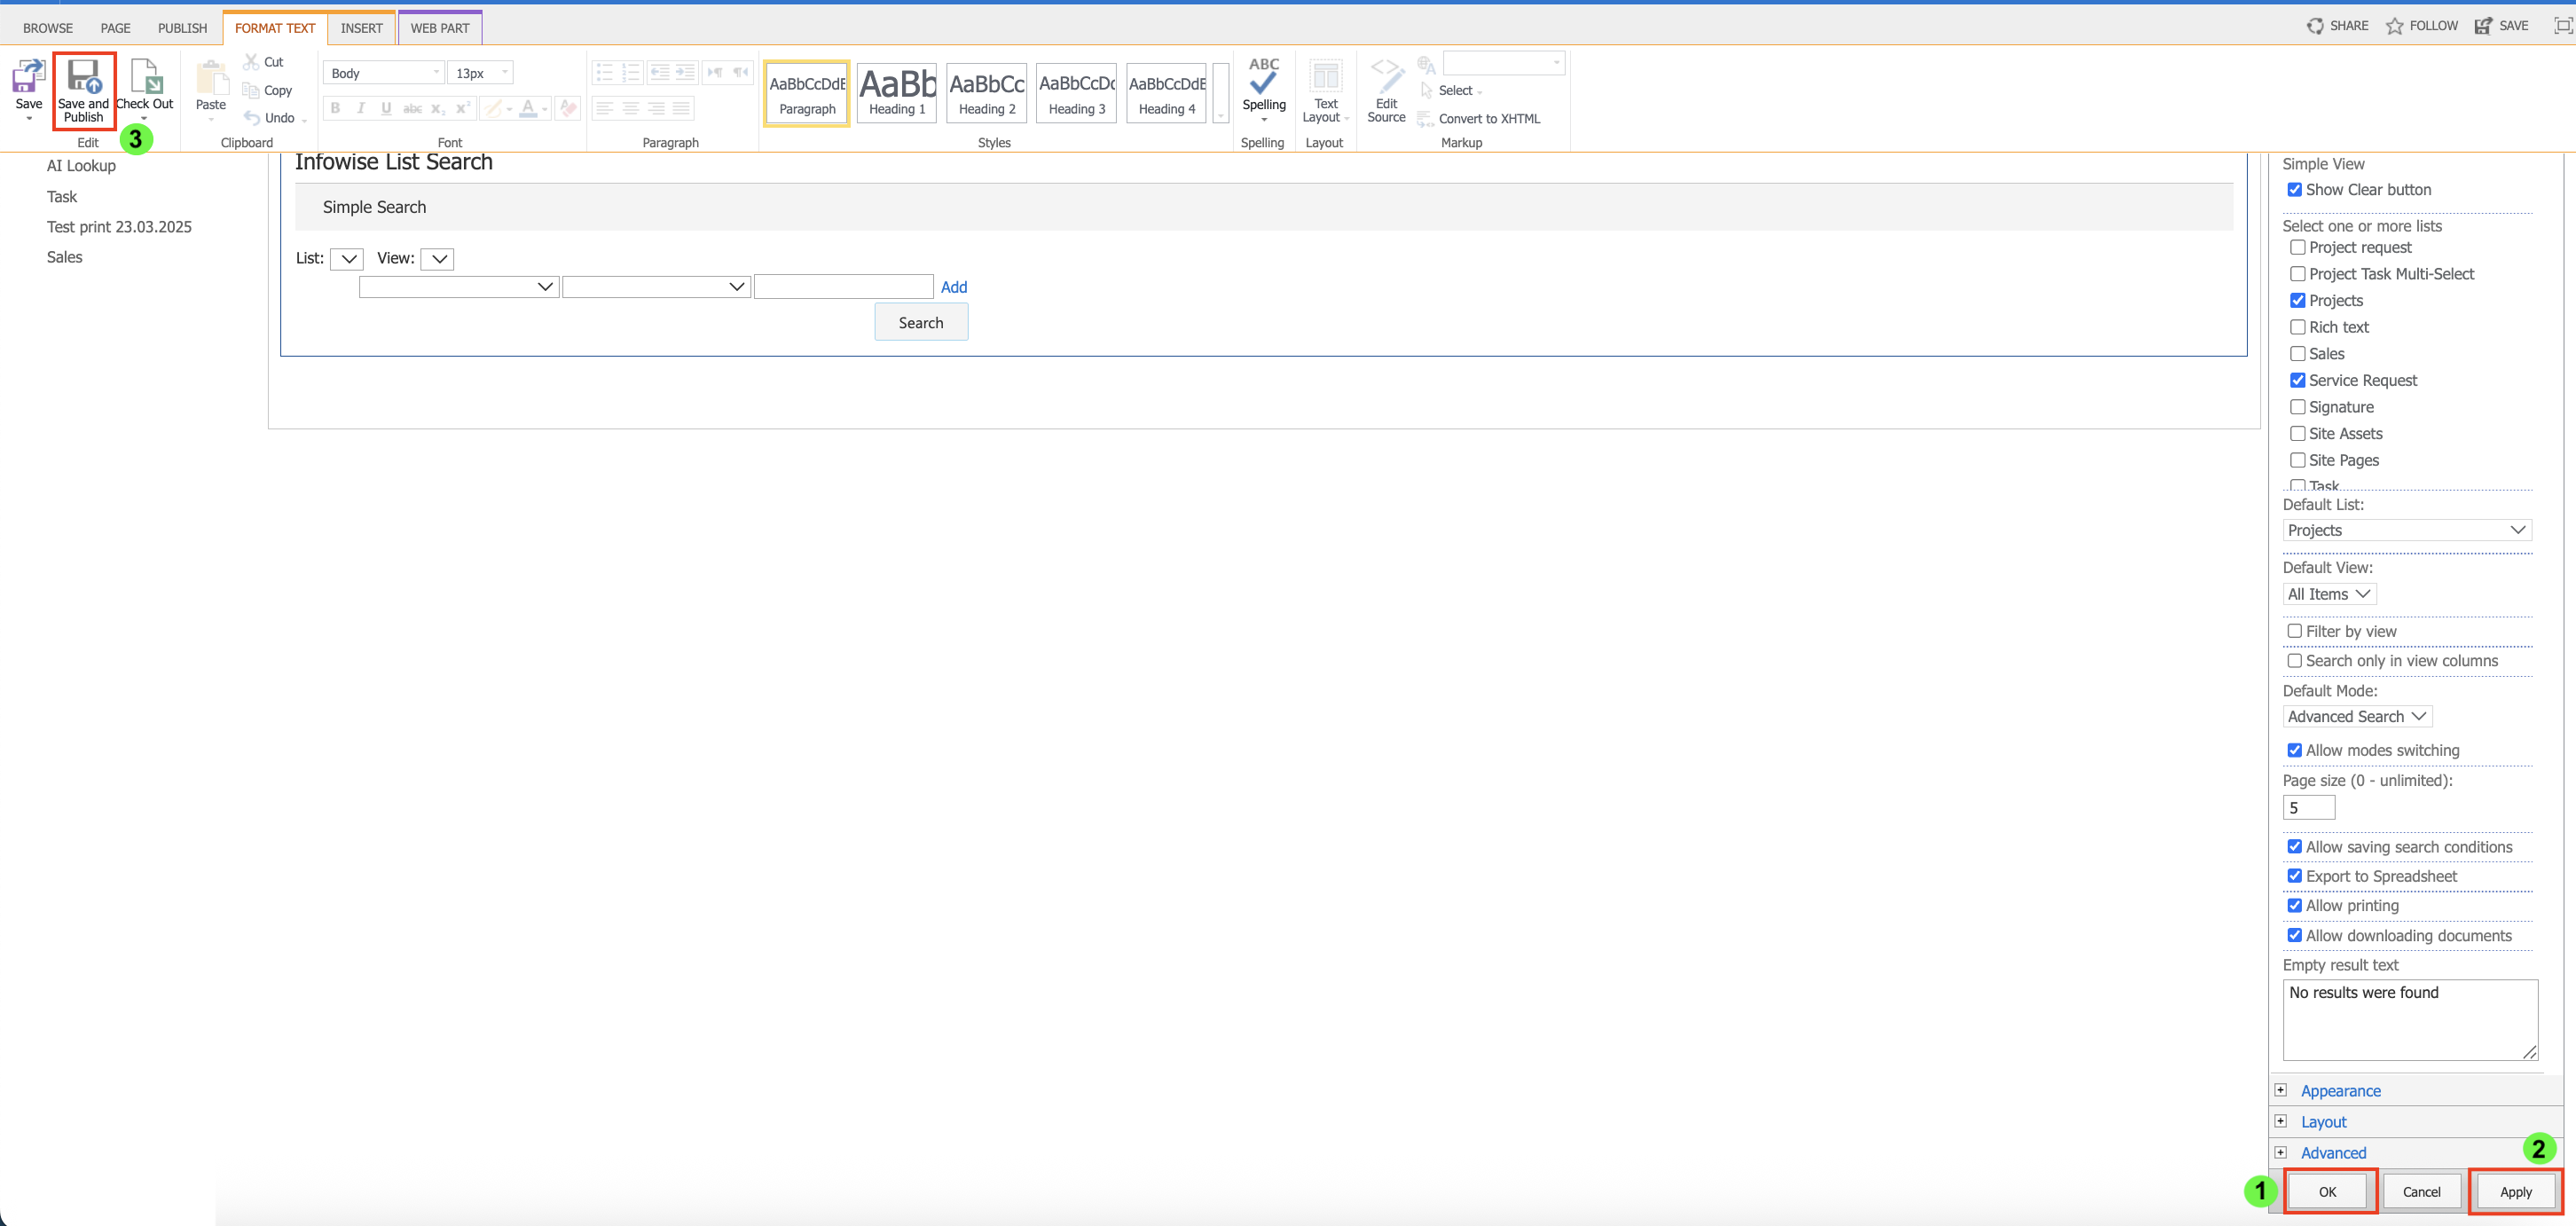
- Click the small Edit Web Part.
- The settings panel will open on the right.
- Show Clear button - Displays a Clear button that resets the search panel and results.
- Select one or more lists - These lists will appear in the list selector inside the search web part.
- Default List - Select the list that loads automatically when the page opens.
- Default View - Choose a view of the Default List to display initially, such as All Items.
- Default Mode - Choose which search interface appears by default:
- Simple Search — basic keyword search
- Advanced Search — multi-condition filterin
- Enable Allow modes switching if users should be able to switch between Simple and Advanced at any time.
- Page size - Defines how many results appear per page.
- User Options - Enable any additional functionality you want users to have:
- Allow saving search conditions
- Export to Spreadsheet
- Allow printing
- Allow downloading documents
- These features apply directly in the results pane of the web part.
- Empty result text - Enter a custom message displayed when no results are found.
Step 4: Apply and Save
- Click OK → Apply → Save and Publish Page.
- The List Search web part is now fully configured for On-Premises.
Step 5: Using List Search in On-Premises
Once configured, List Search supports:
- Basic Search - Keyword-based search across selected lists.
- Advanced Search - Multiple conditions, AND/OR logic.
- Switching between lists - Using the list dropdown inside the web part.
- Working with results - Open, edit, delete items, view context menu, run Infowise Actions.
- Export / Print / Download (If enabled in the configuration)
Functionality is similar to Microsoft 365, but configuration is done fully through the web part settings.
Summary
You now know how to configure the List Search web part in SharePoint On-Premises and make it ready for users to run searches and work with results directly from the page.