Form Designer - Make a Basic Form
In this tutorial, we’ll walk you through the process of creating a basic form in SharePoint using Ultimate Forms: Forms. You will learn how to access the Form Designer, choose the desired list or library, and start customizing your form’s layout and functionality. We’ll guide you step-by-step through adding essential columns, arranging them for better usability, and applying formatting for a professional look.
We will also cover additional customization options, such as grouping columns into sections, adding instructions for end users, and adjusting form widths for optimal display. By the end of this tutorial, you will have a fully functional, visually appealing form ready to capture and manage data efficiently.
Whether you’re just getting started or looking to refresh your knowledge, this lesson provides all the fundamentals you need to design forms tailored to your organization’s needs confidently.
Instructions
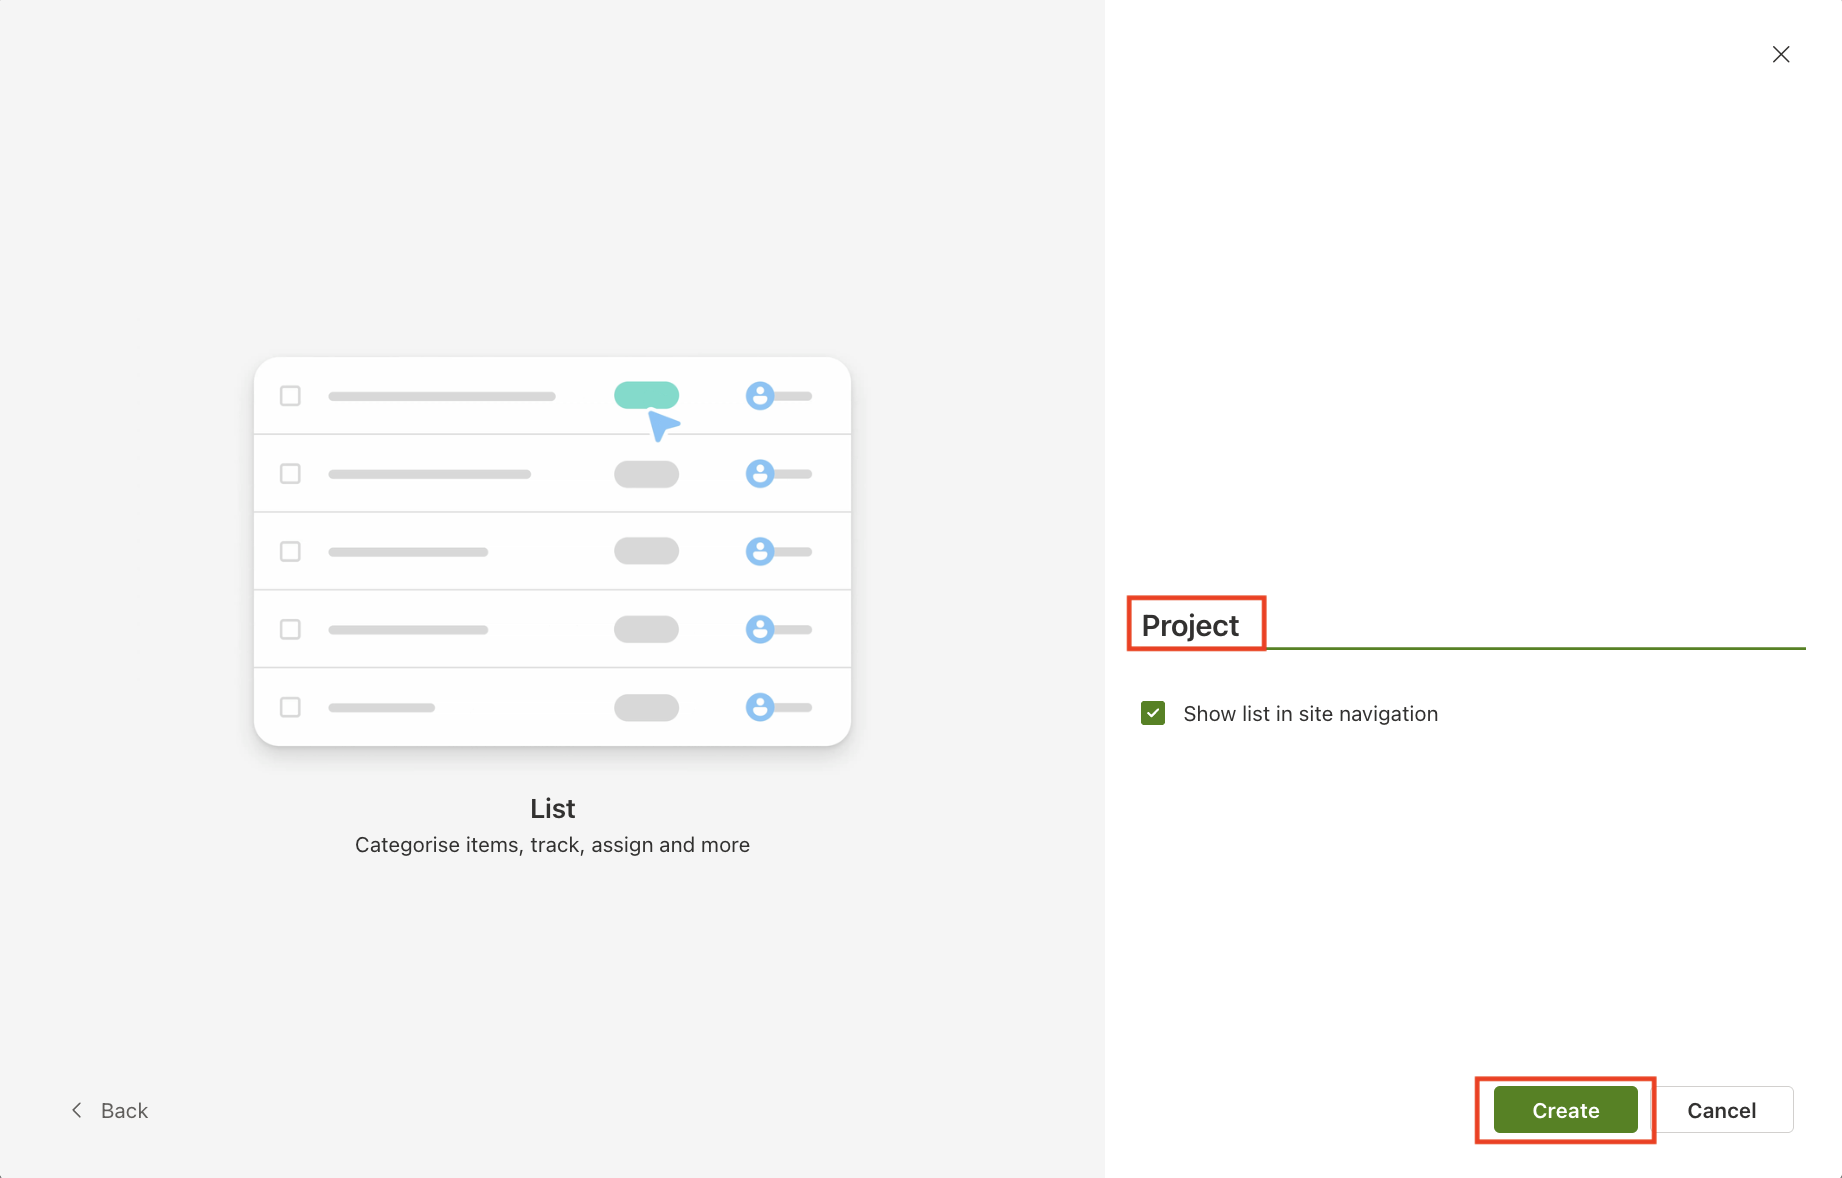
Step 1: Create the “Projects” List
- In SharePoint, create a custom list named Projects
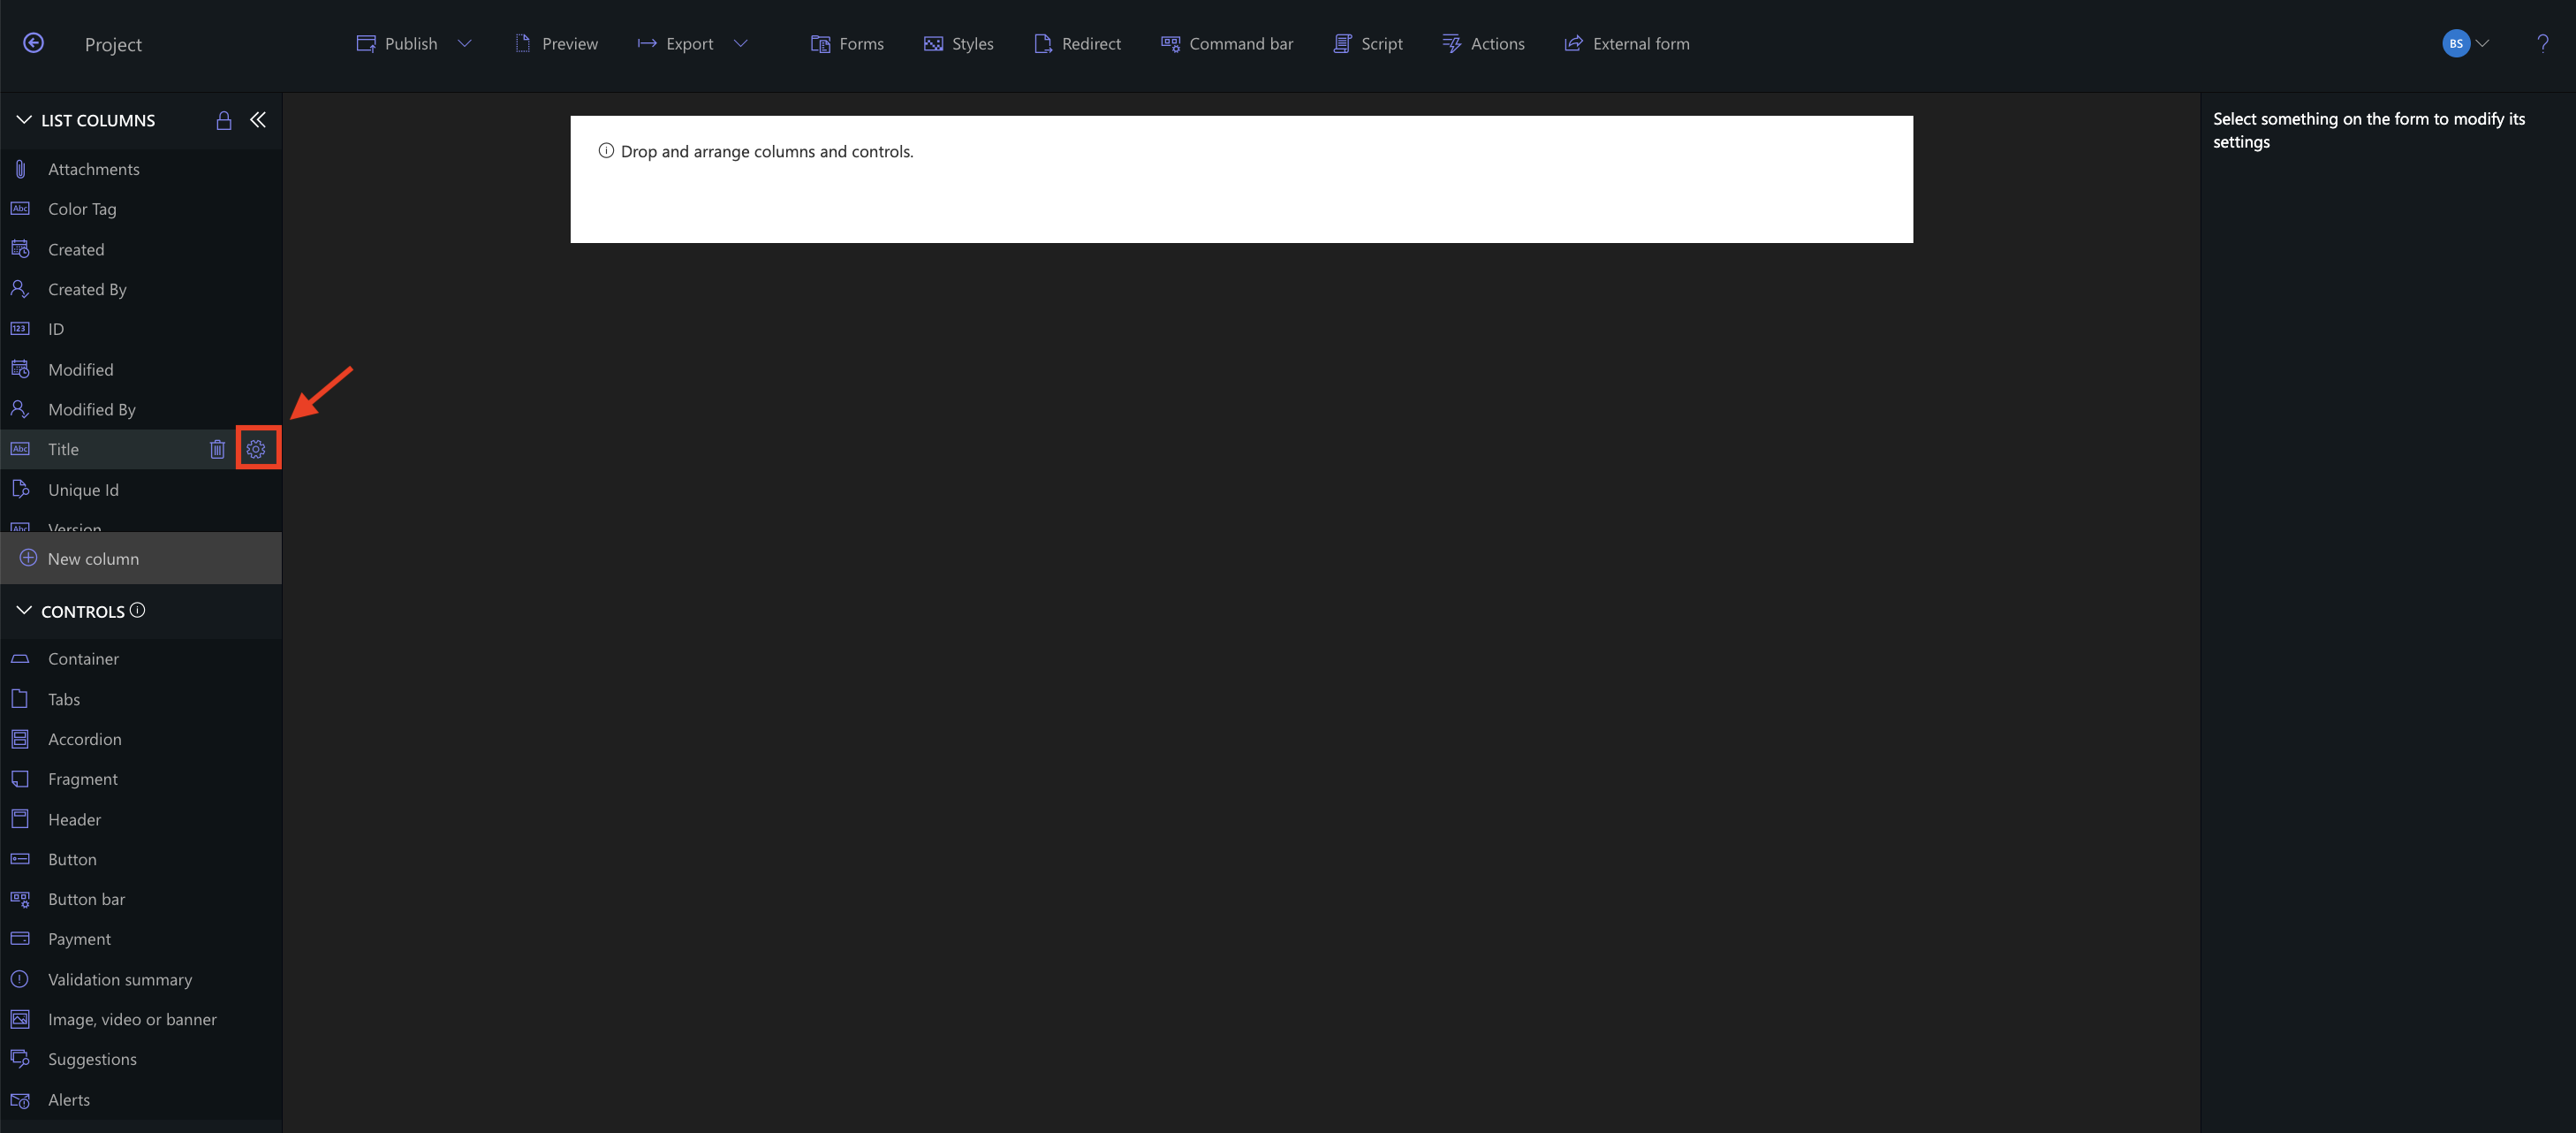
- Open the list and click Design → Form Designer
- In Form Designer, locate the default Title column on the canvas, click it, and change its Display Name to Project
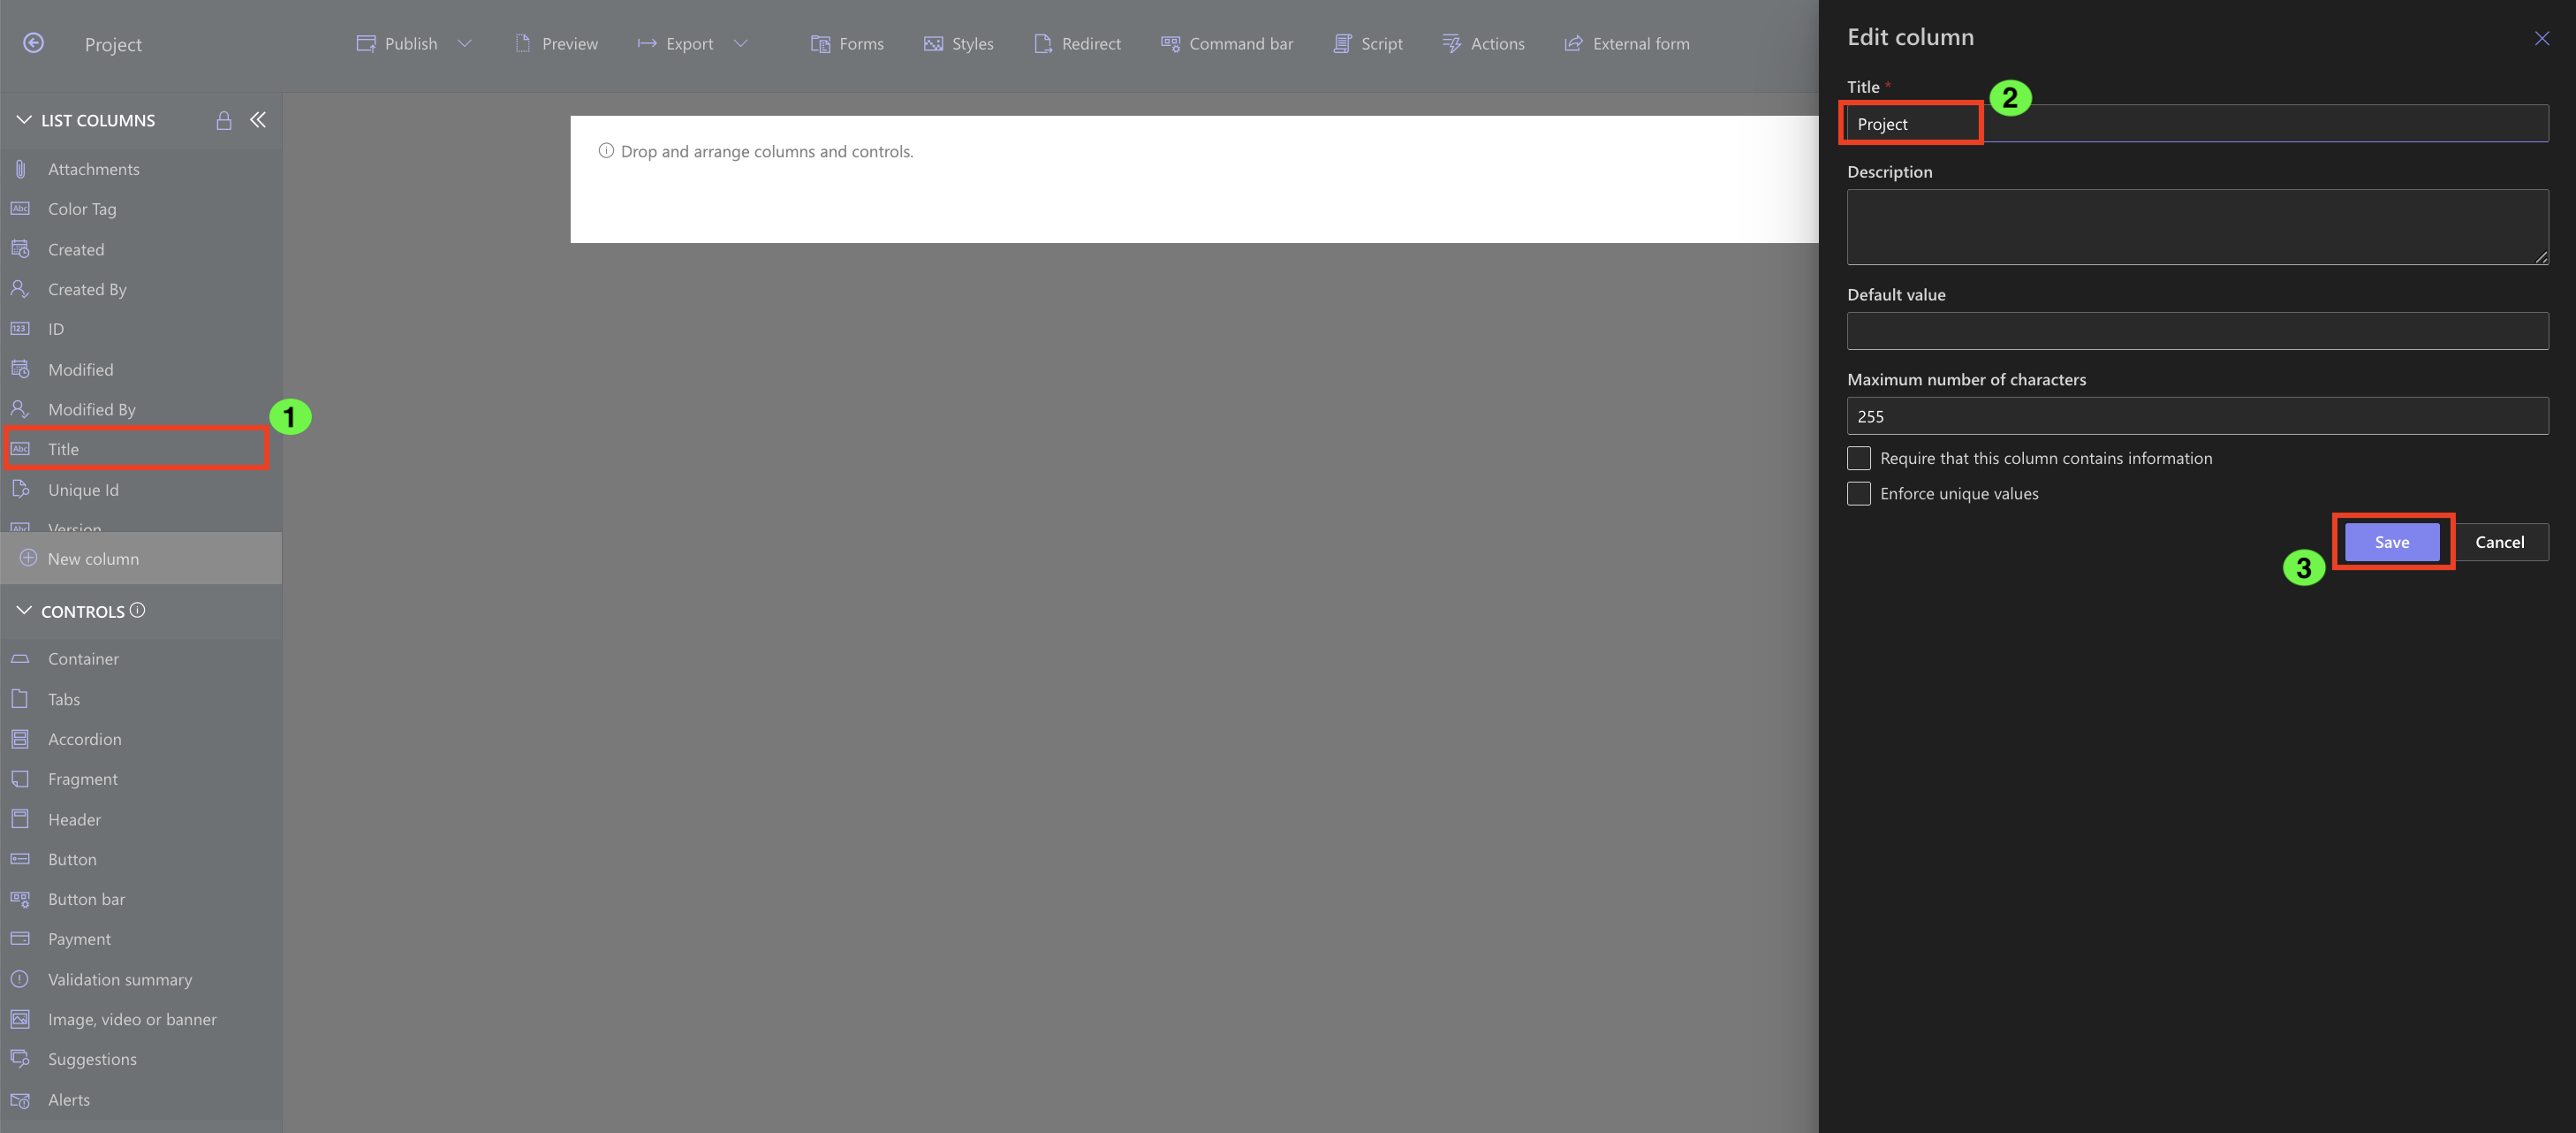
- Click Save
Note: All column creation and editing is done in Form Designer, but you can also do it via List Settings.
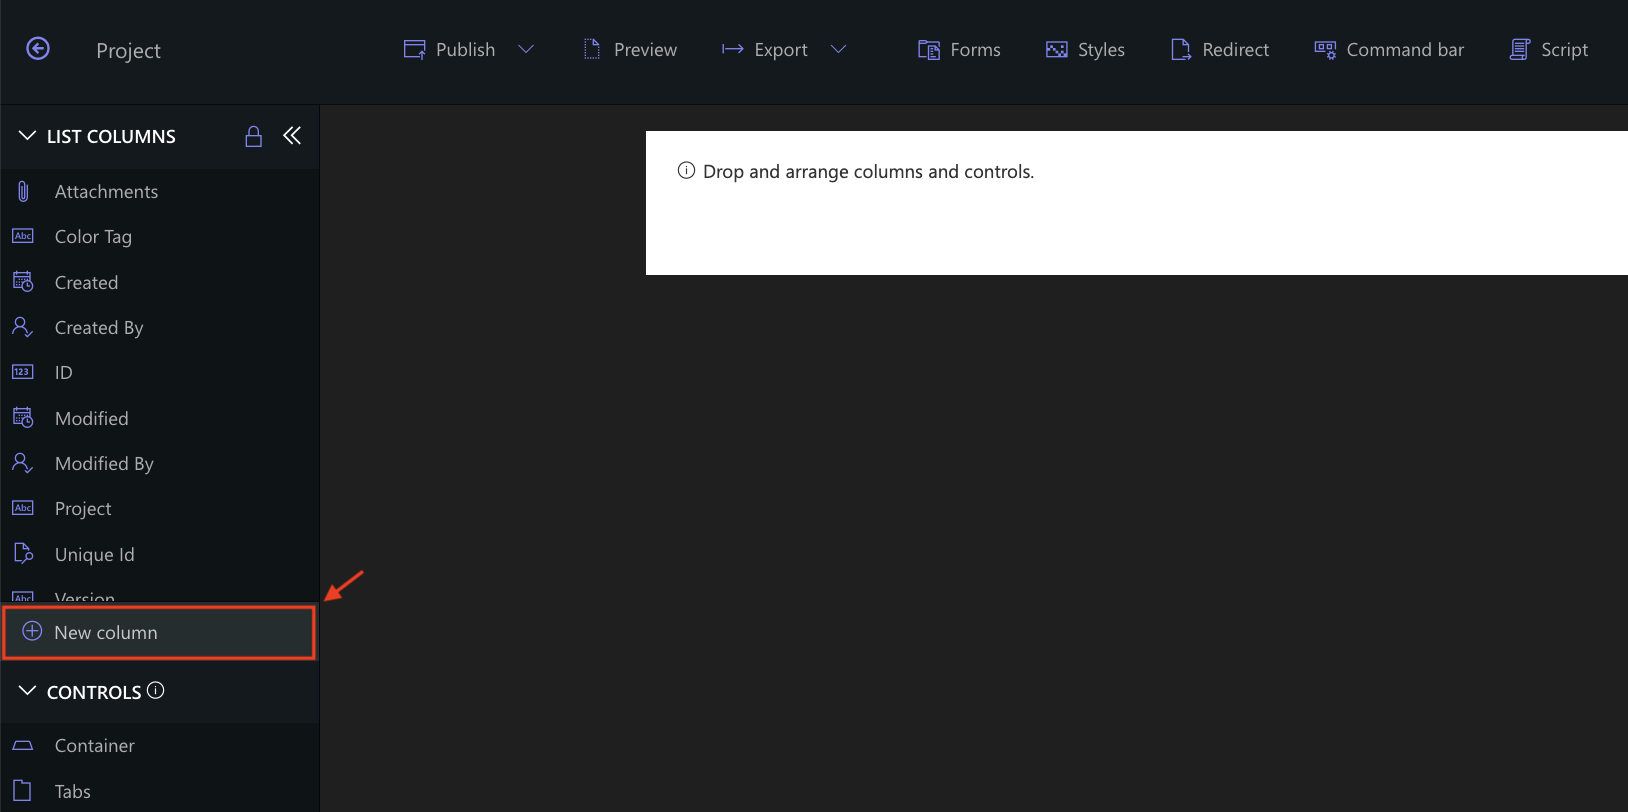
Step 2: Add Key Columns (via Form Designer)
Add the following columns directly inside Form Designer using Add New Column (choose type, configure settings, Save):
| Column Name | Type | Settings |
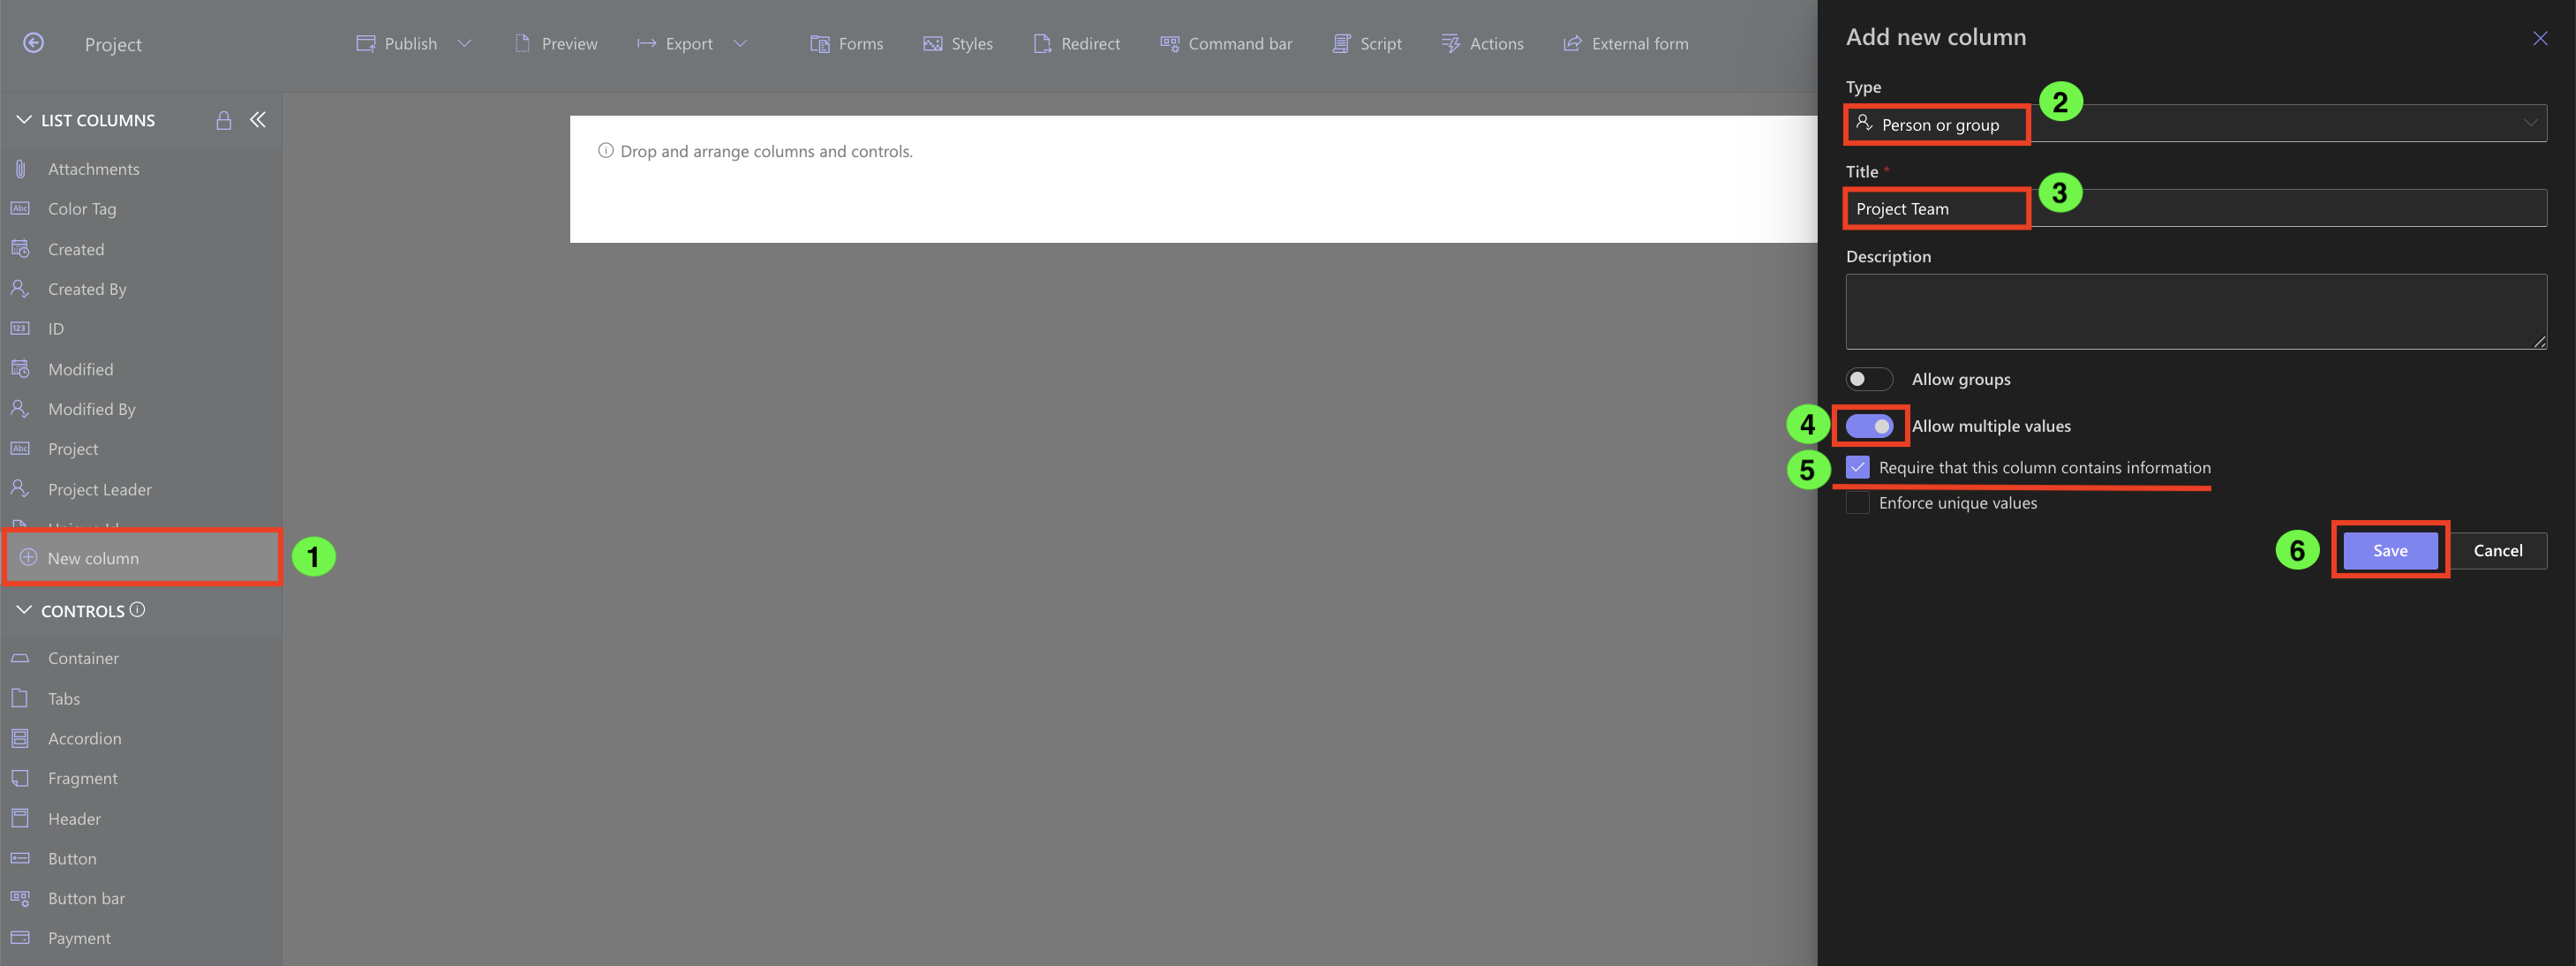
| Project Leader | Person or Group | Required |
| Project Team | Person or Group | Required, Allow multiple selections |
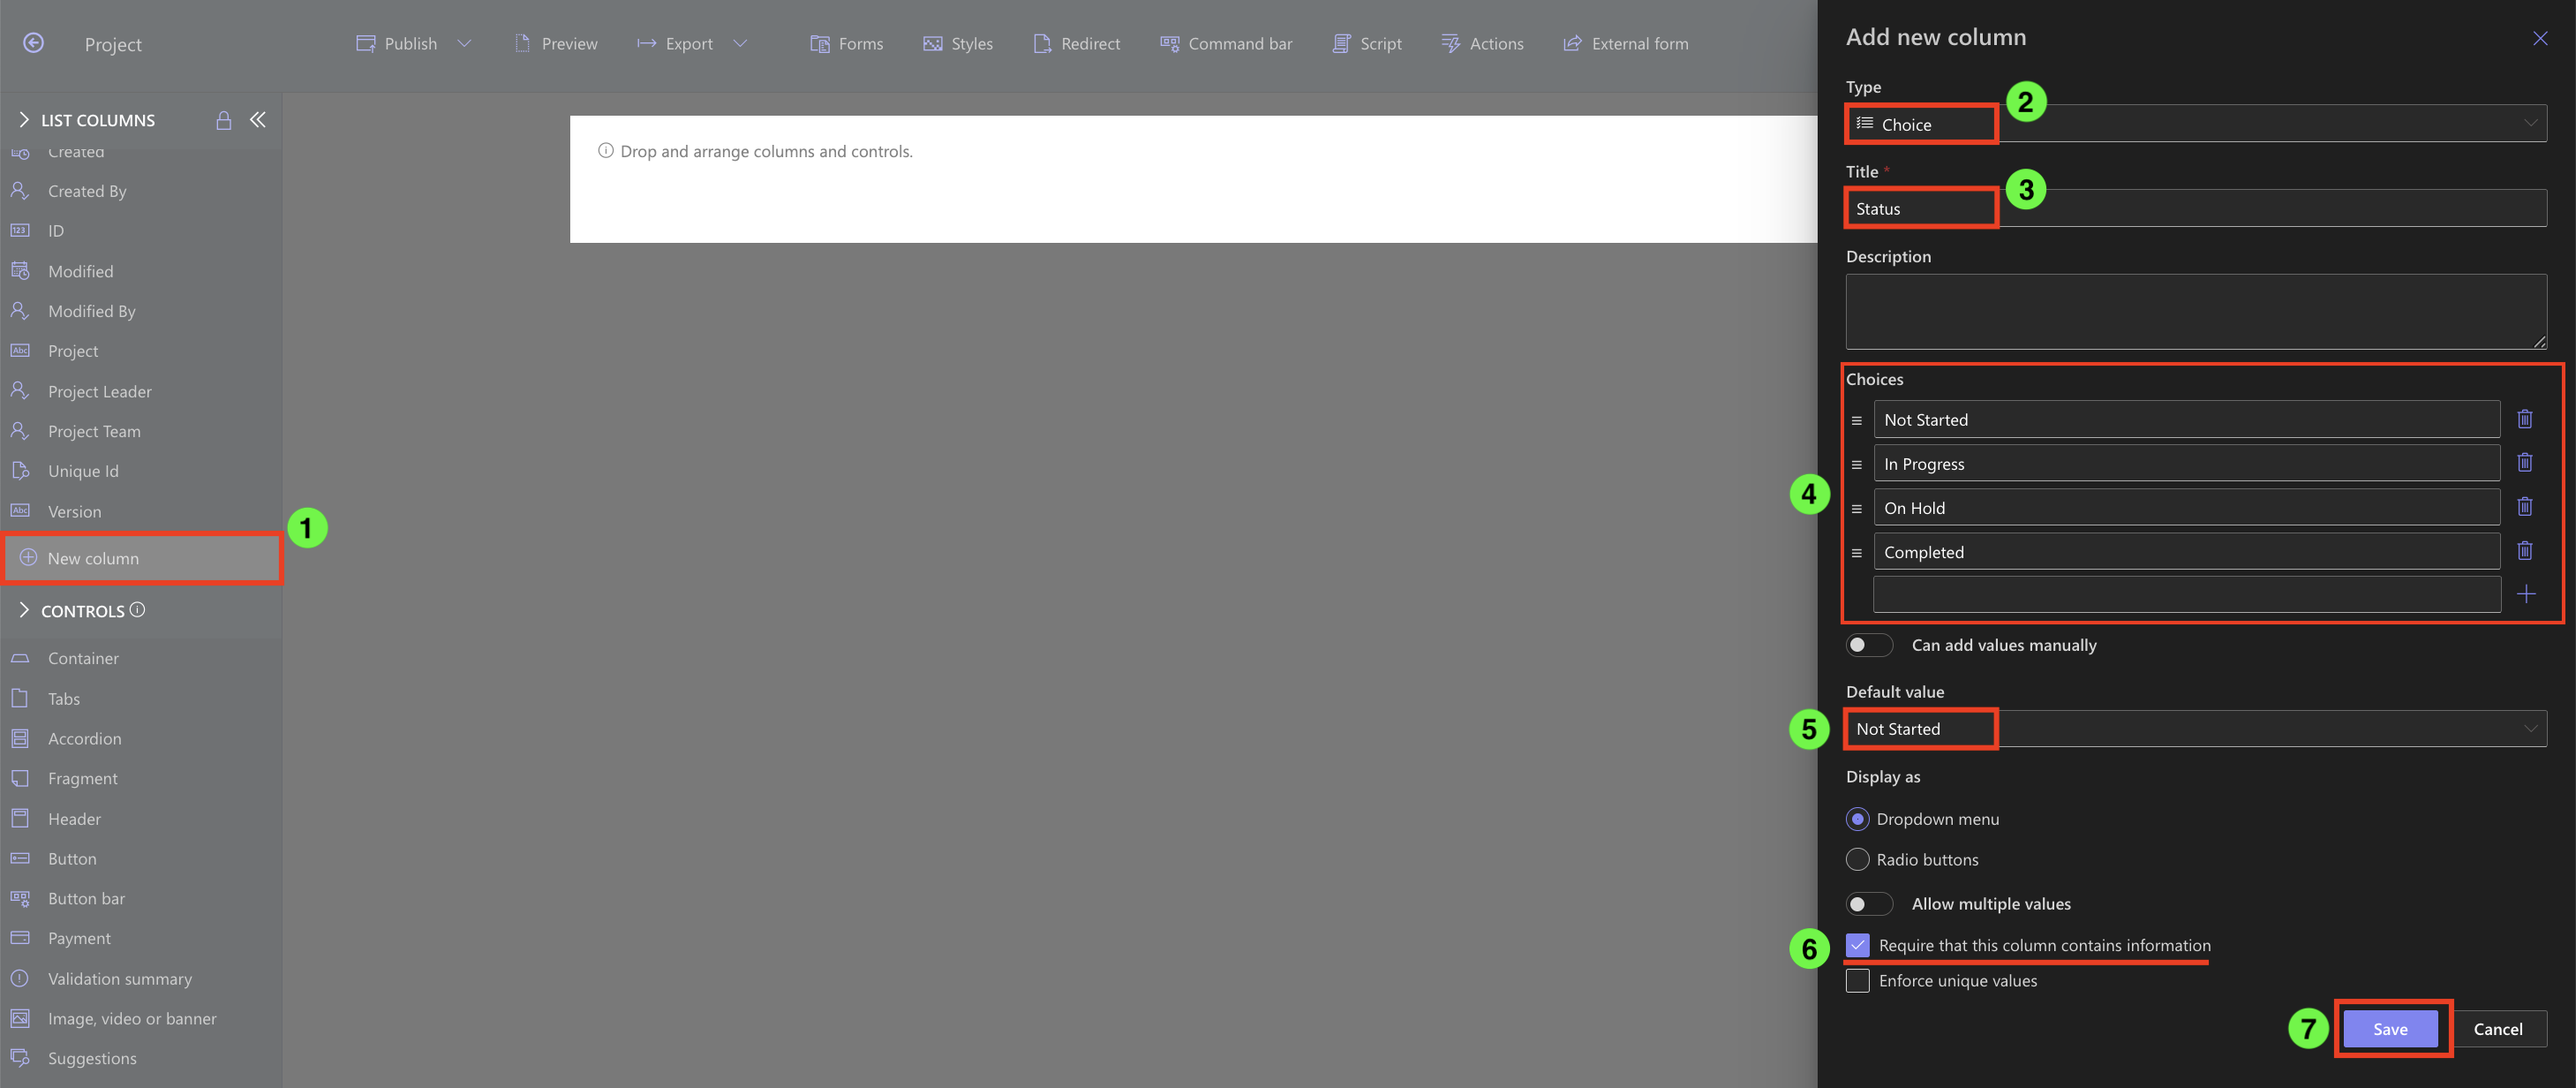
| Status | Choice |
Required, Default: Not Started; Choices: Not Started, In Progress, On Hold, Completed |
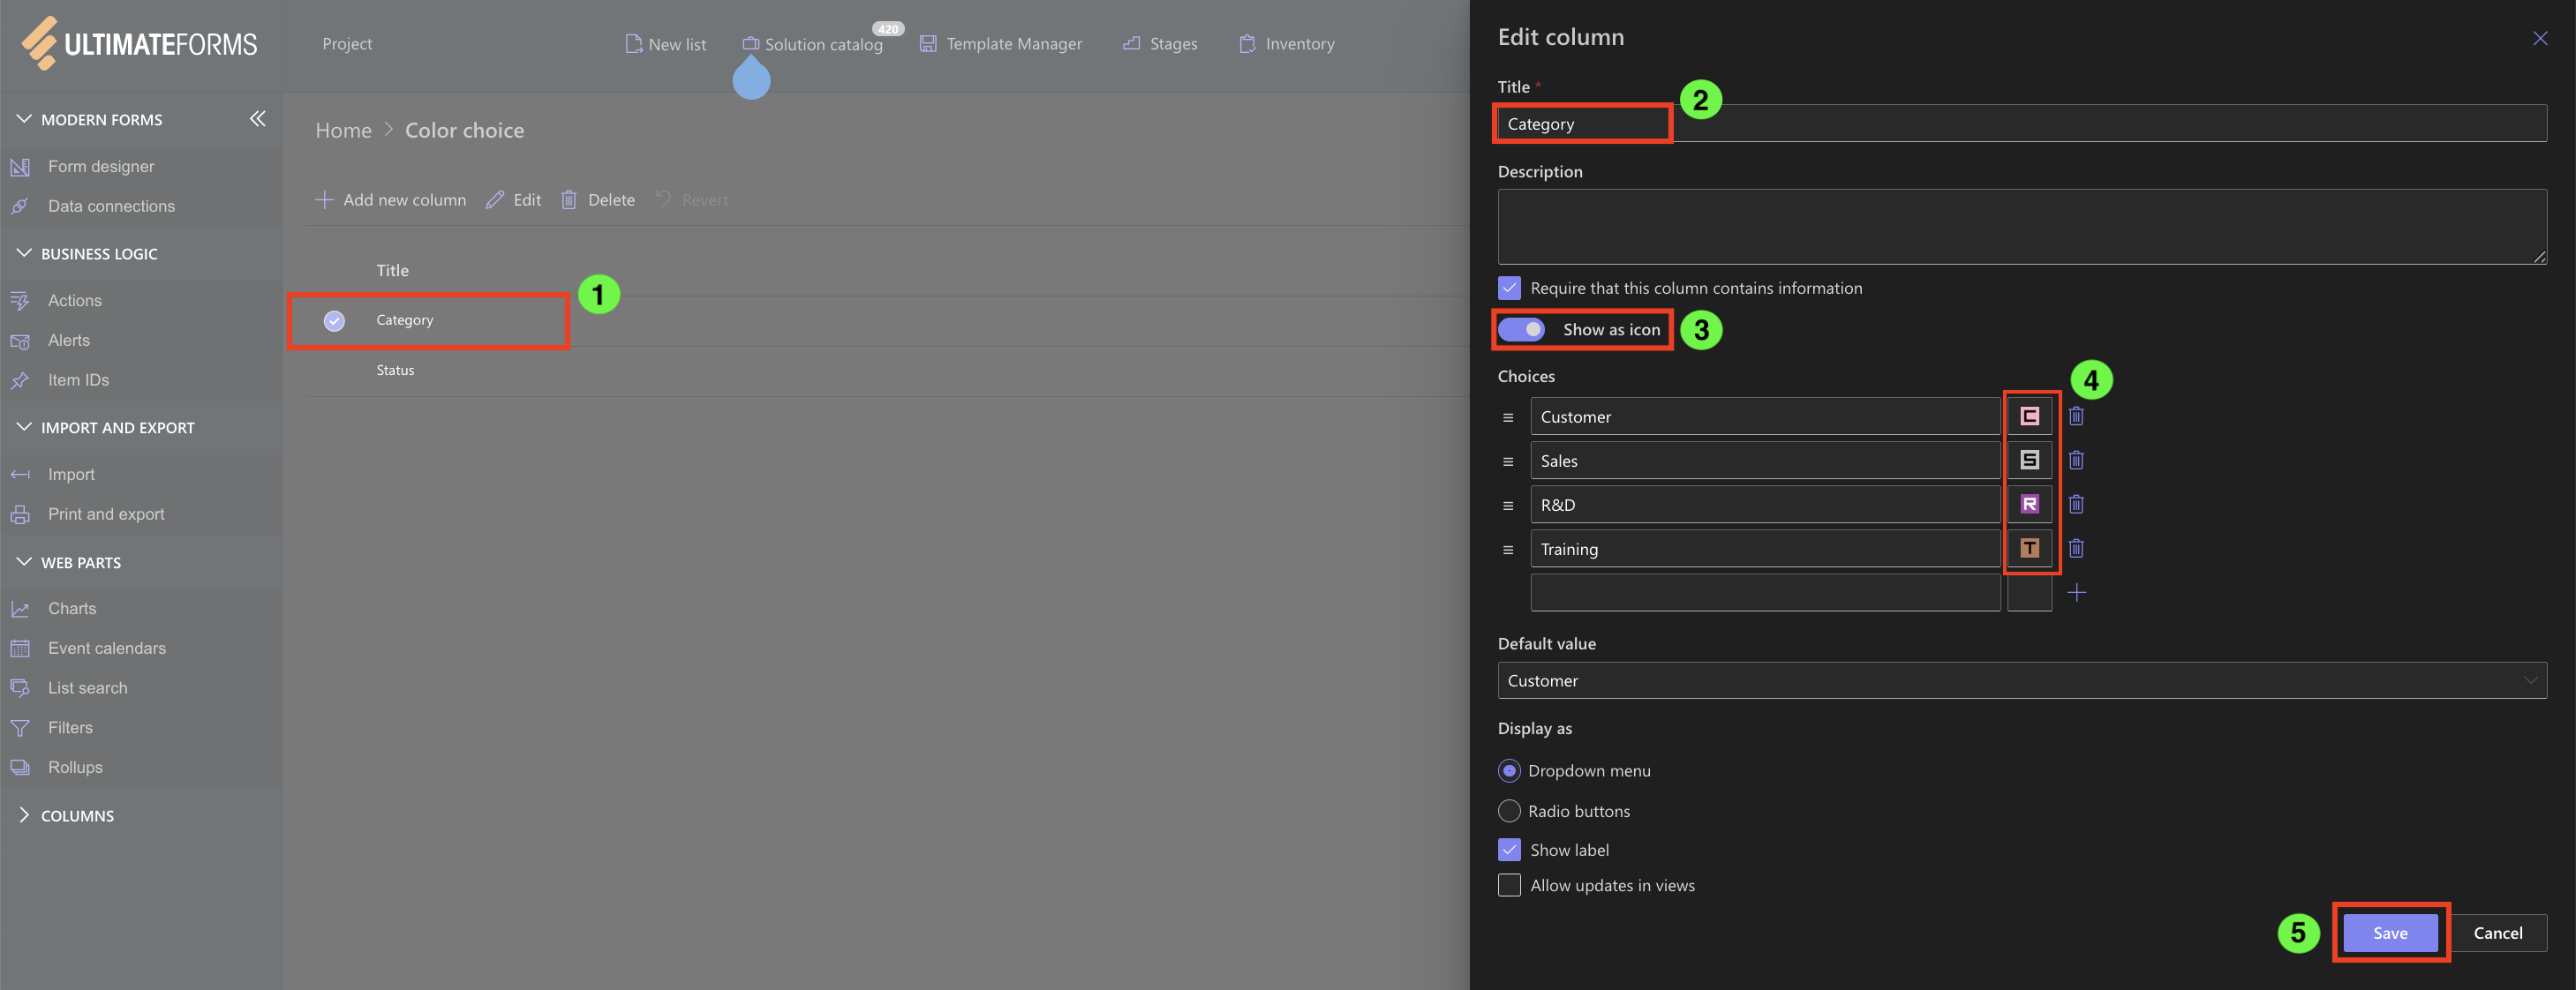
| Category | Choice |
Required, Default: Customer; Choices: Customer, Sales, R&D, Training |
| Training Date | Date and Time | (optional) |
| Description | Multiple lines | Required, Rich text |
| Percent Complete | Number | (optional) |
| Manager Notes | Multiple Lines | (optional), Rich text |
How to add each column (quick reference):
- Click + Add New Column
- Select column Type (Person, Choice, Date, Multiple lines, Number, etc.)
- Enter Name, set Required, default value, choice options, etc..
- Click Save — the column is created and appears on the form
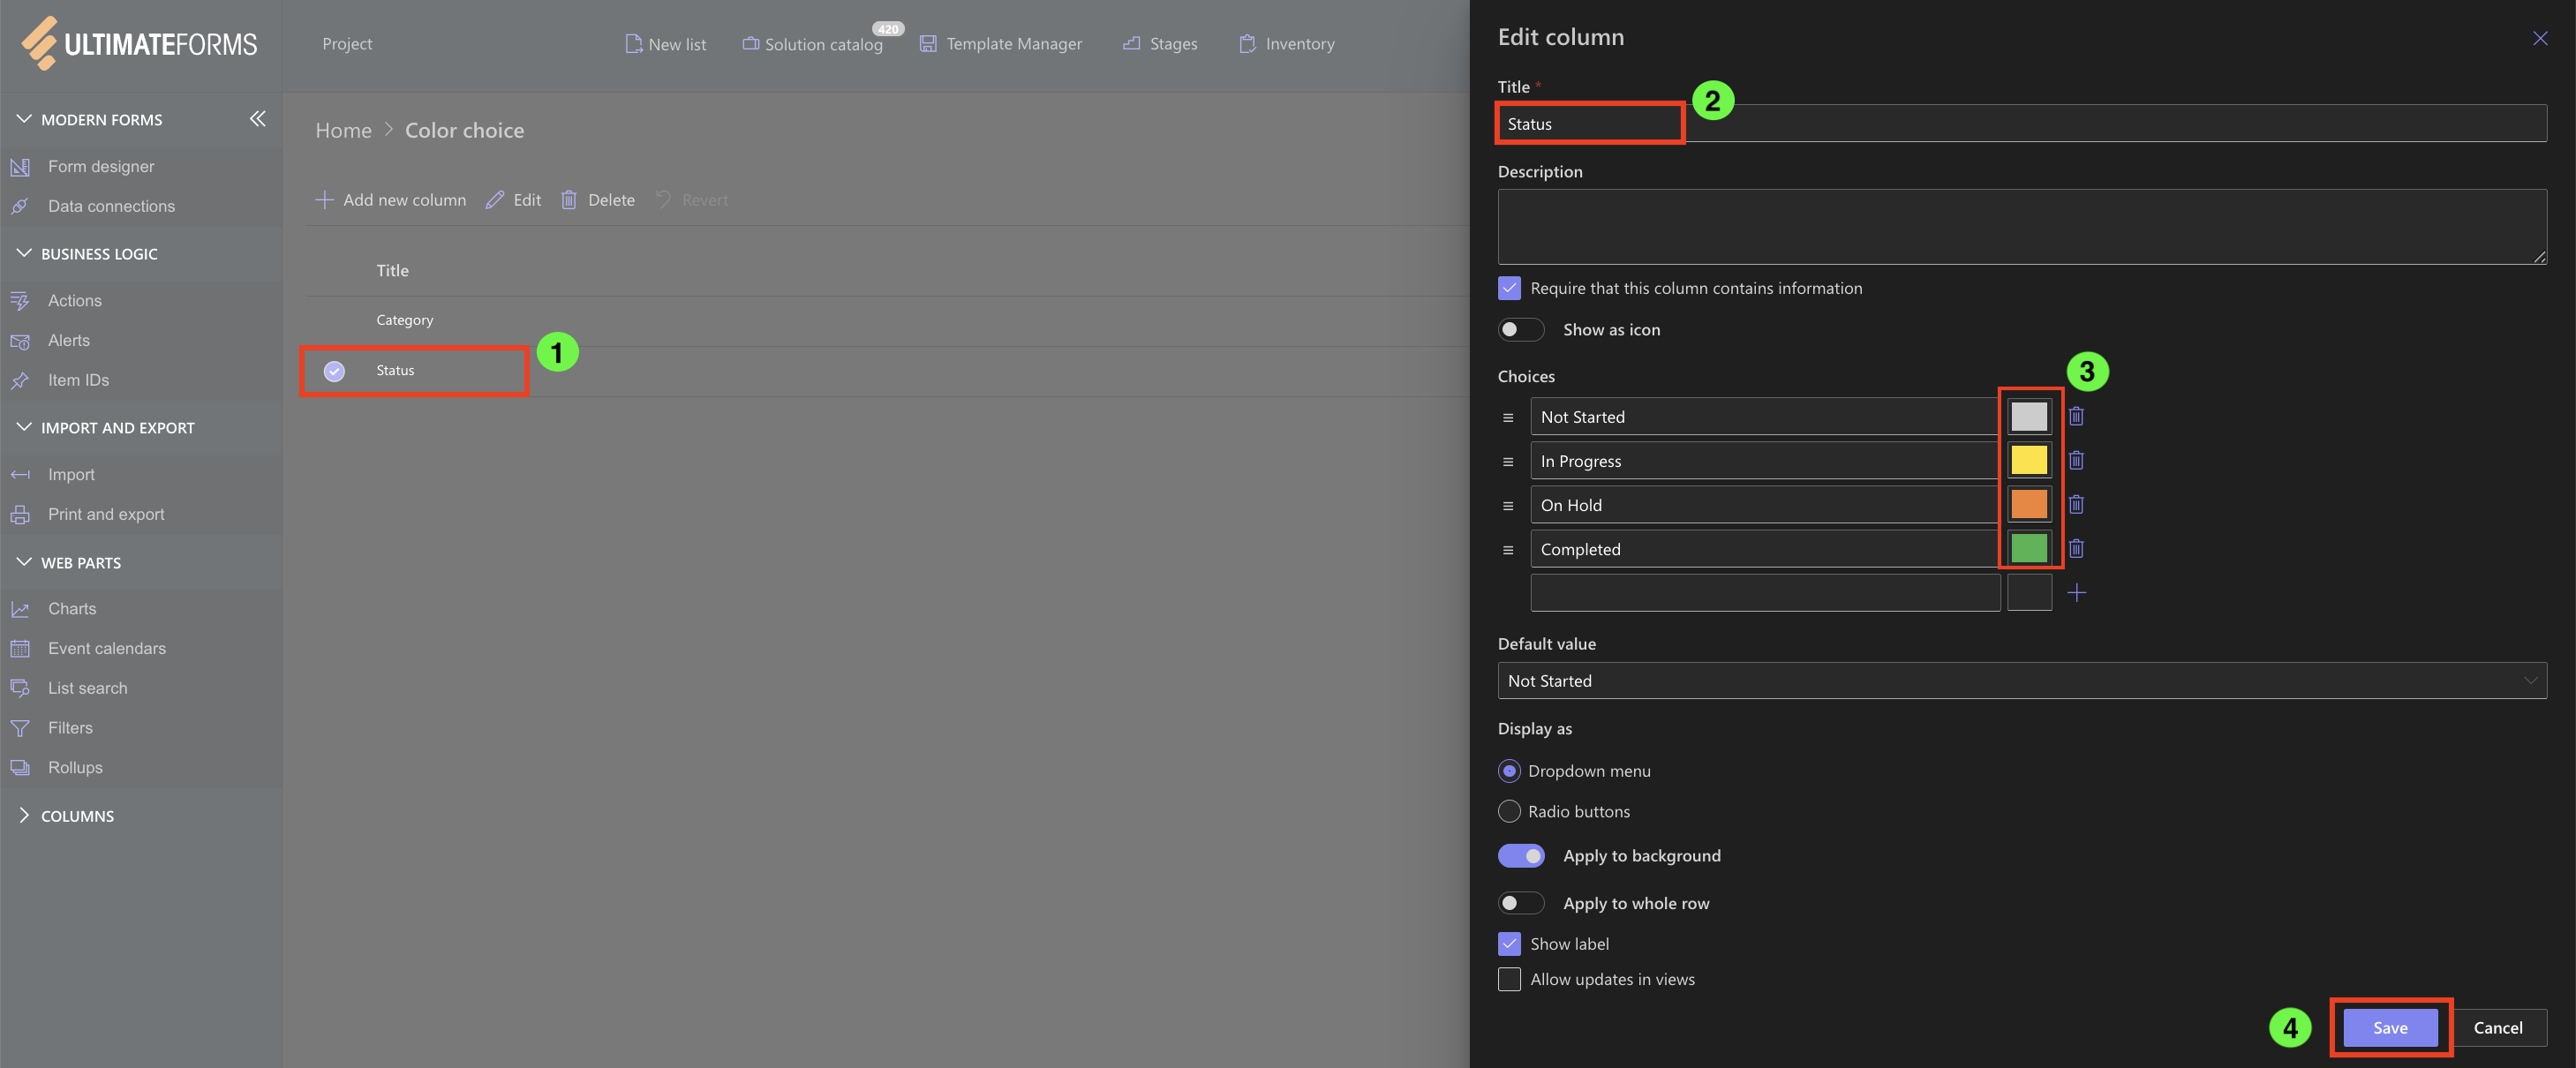
Step 3: Apply Column Formatting
- In Designer, go to Configure Columns → Color Choice
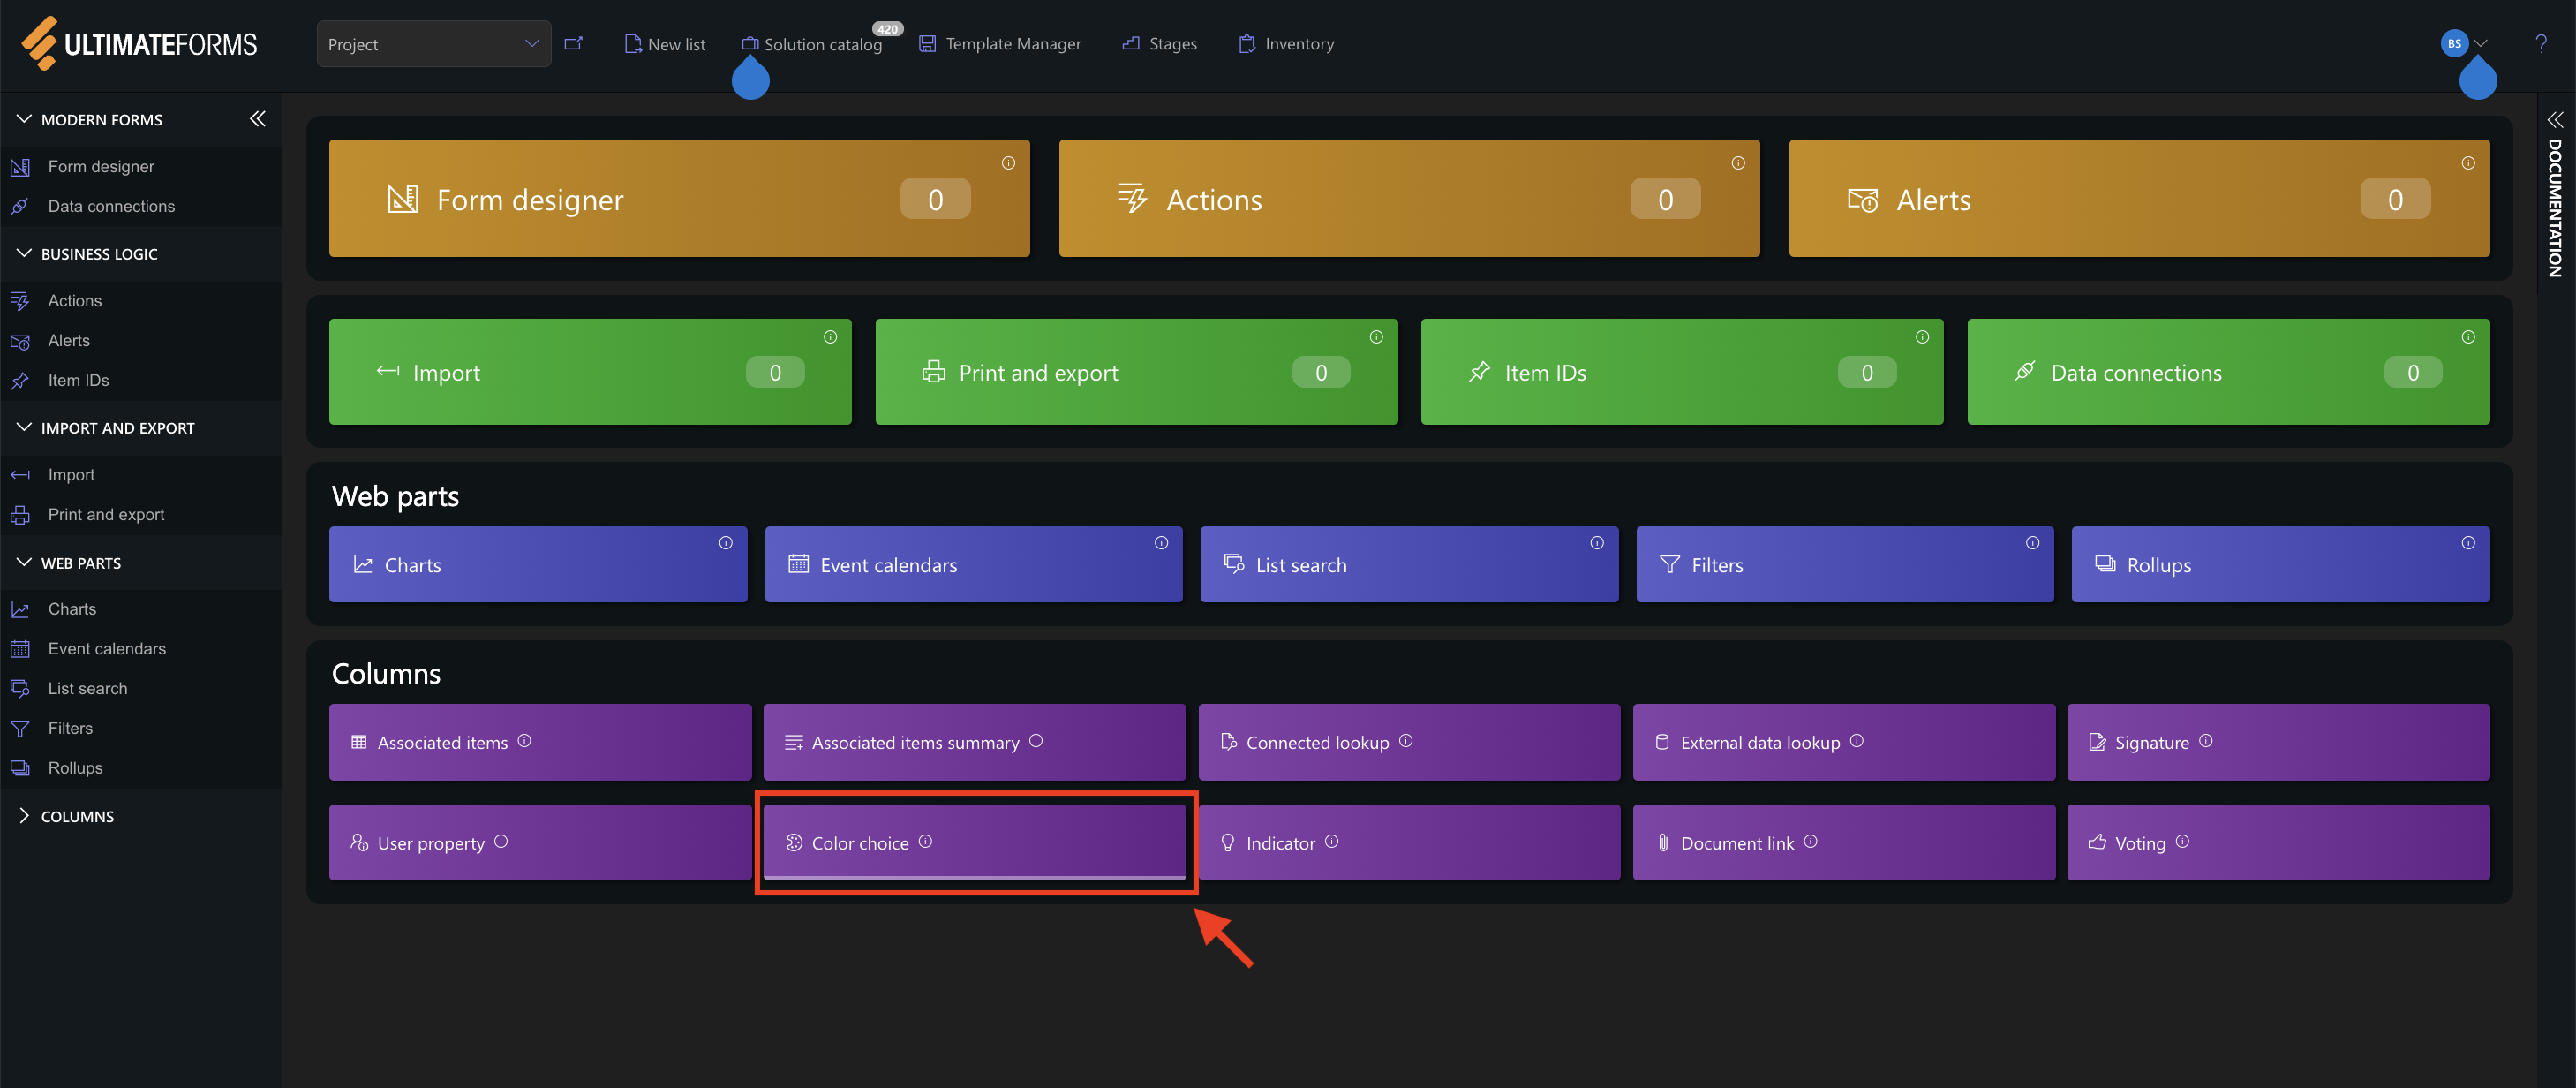
- First, select Category and assign color values or icons to each choice. Click Save
- Next, select Status and assign colors. Click Save
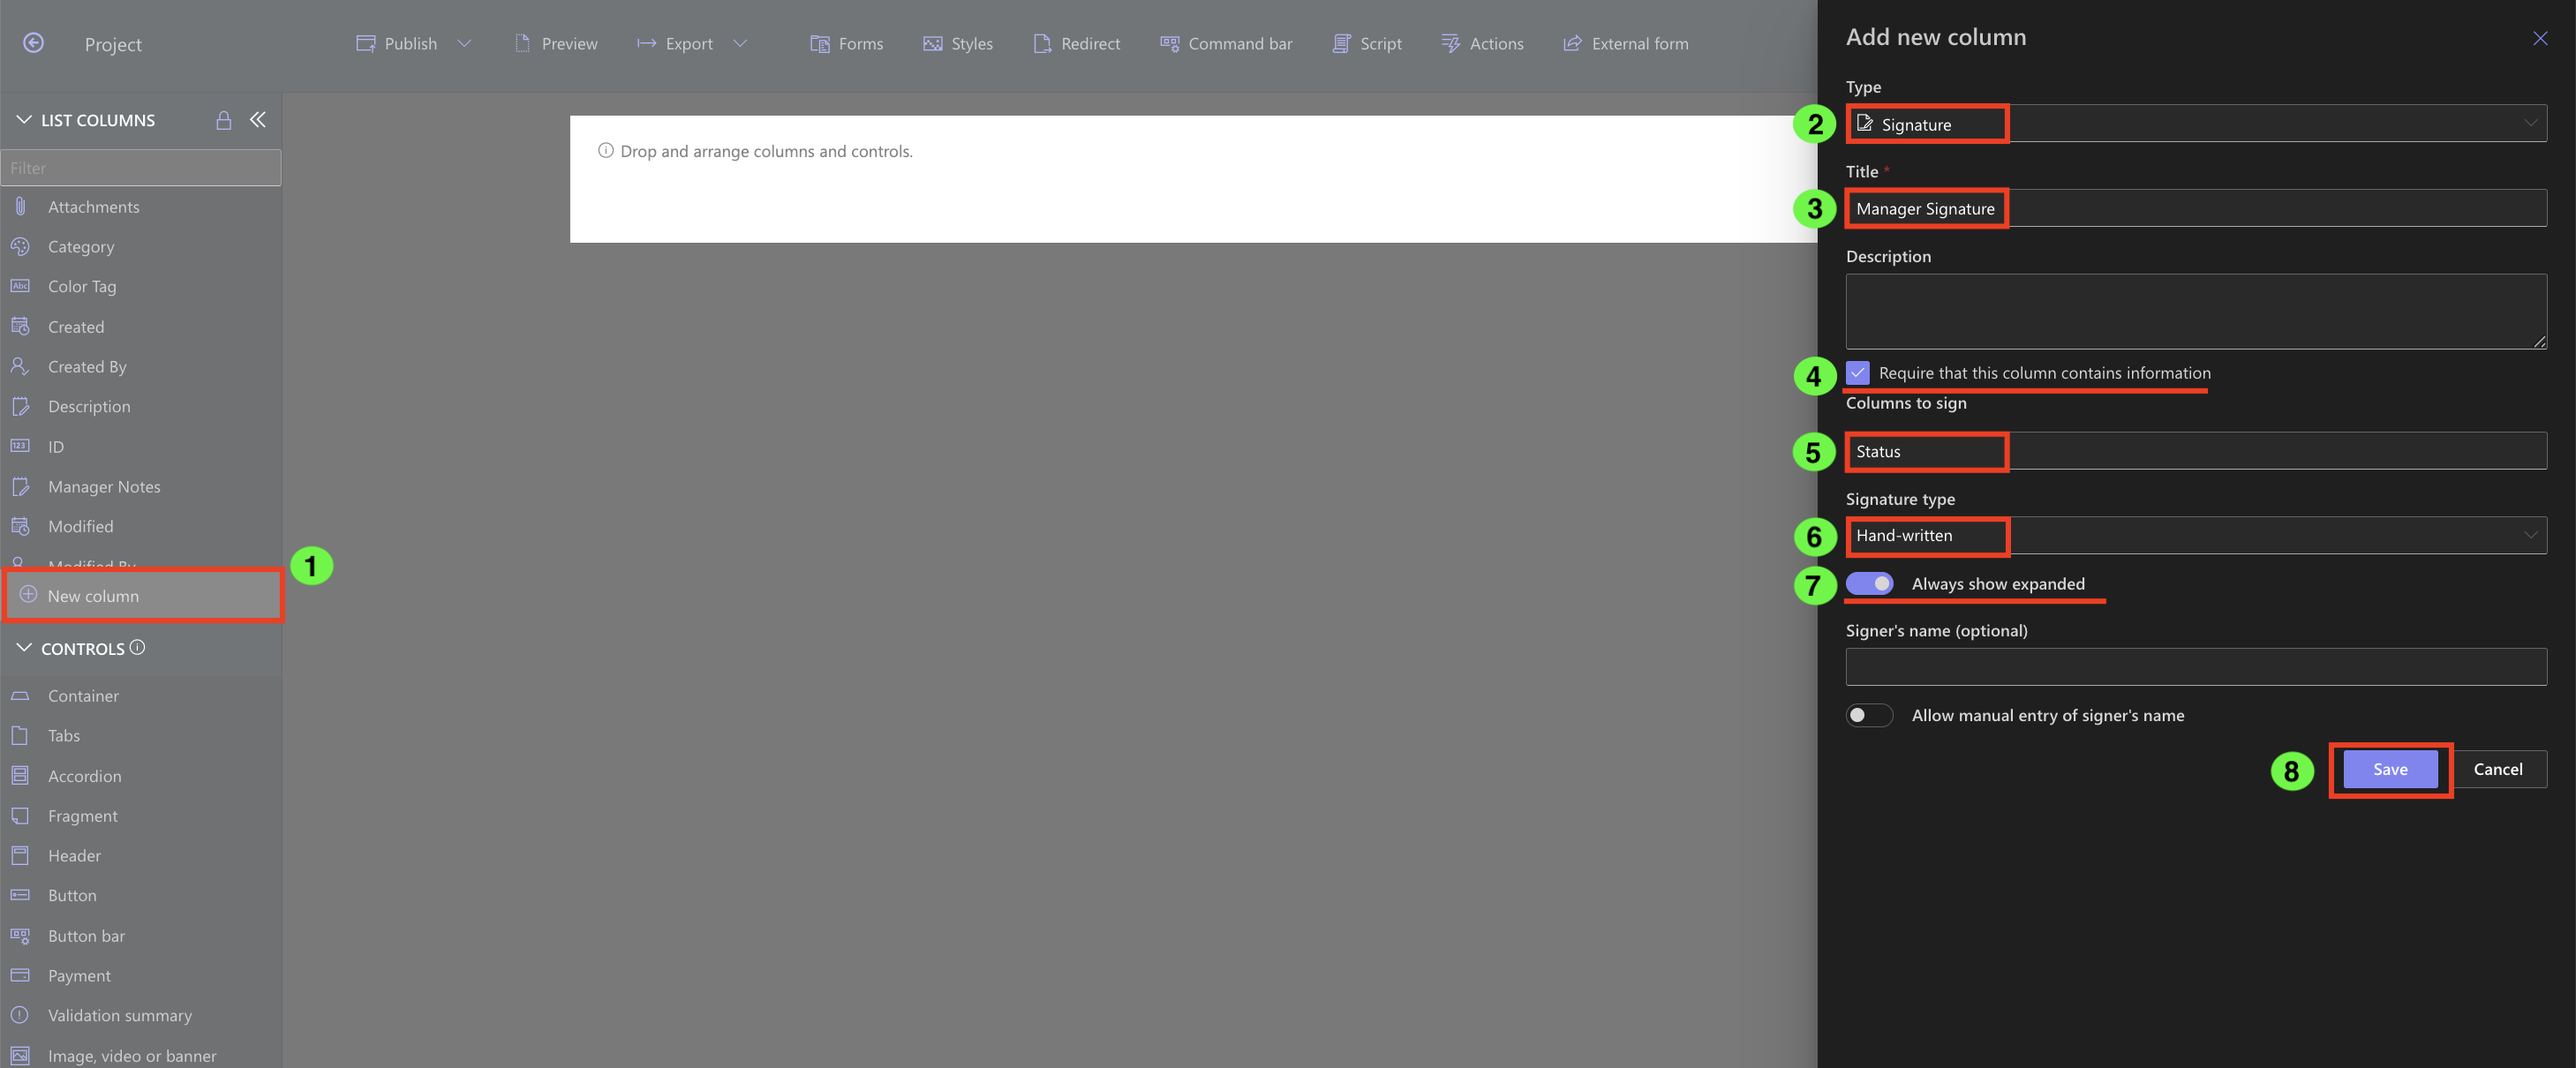
Step 4: Add Signature Column
- Go to Form Designer → Add New Column → Type: Signature.
- Create a Signature column
- Title: Manager Signature
- Column to sign: Status
- Signature type: Hand-written
- Set: Always show expended
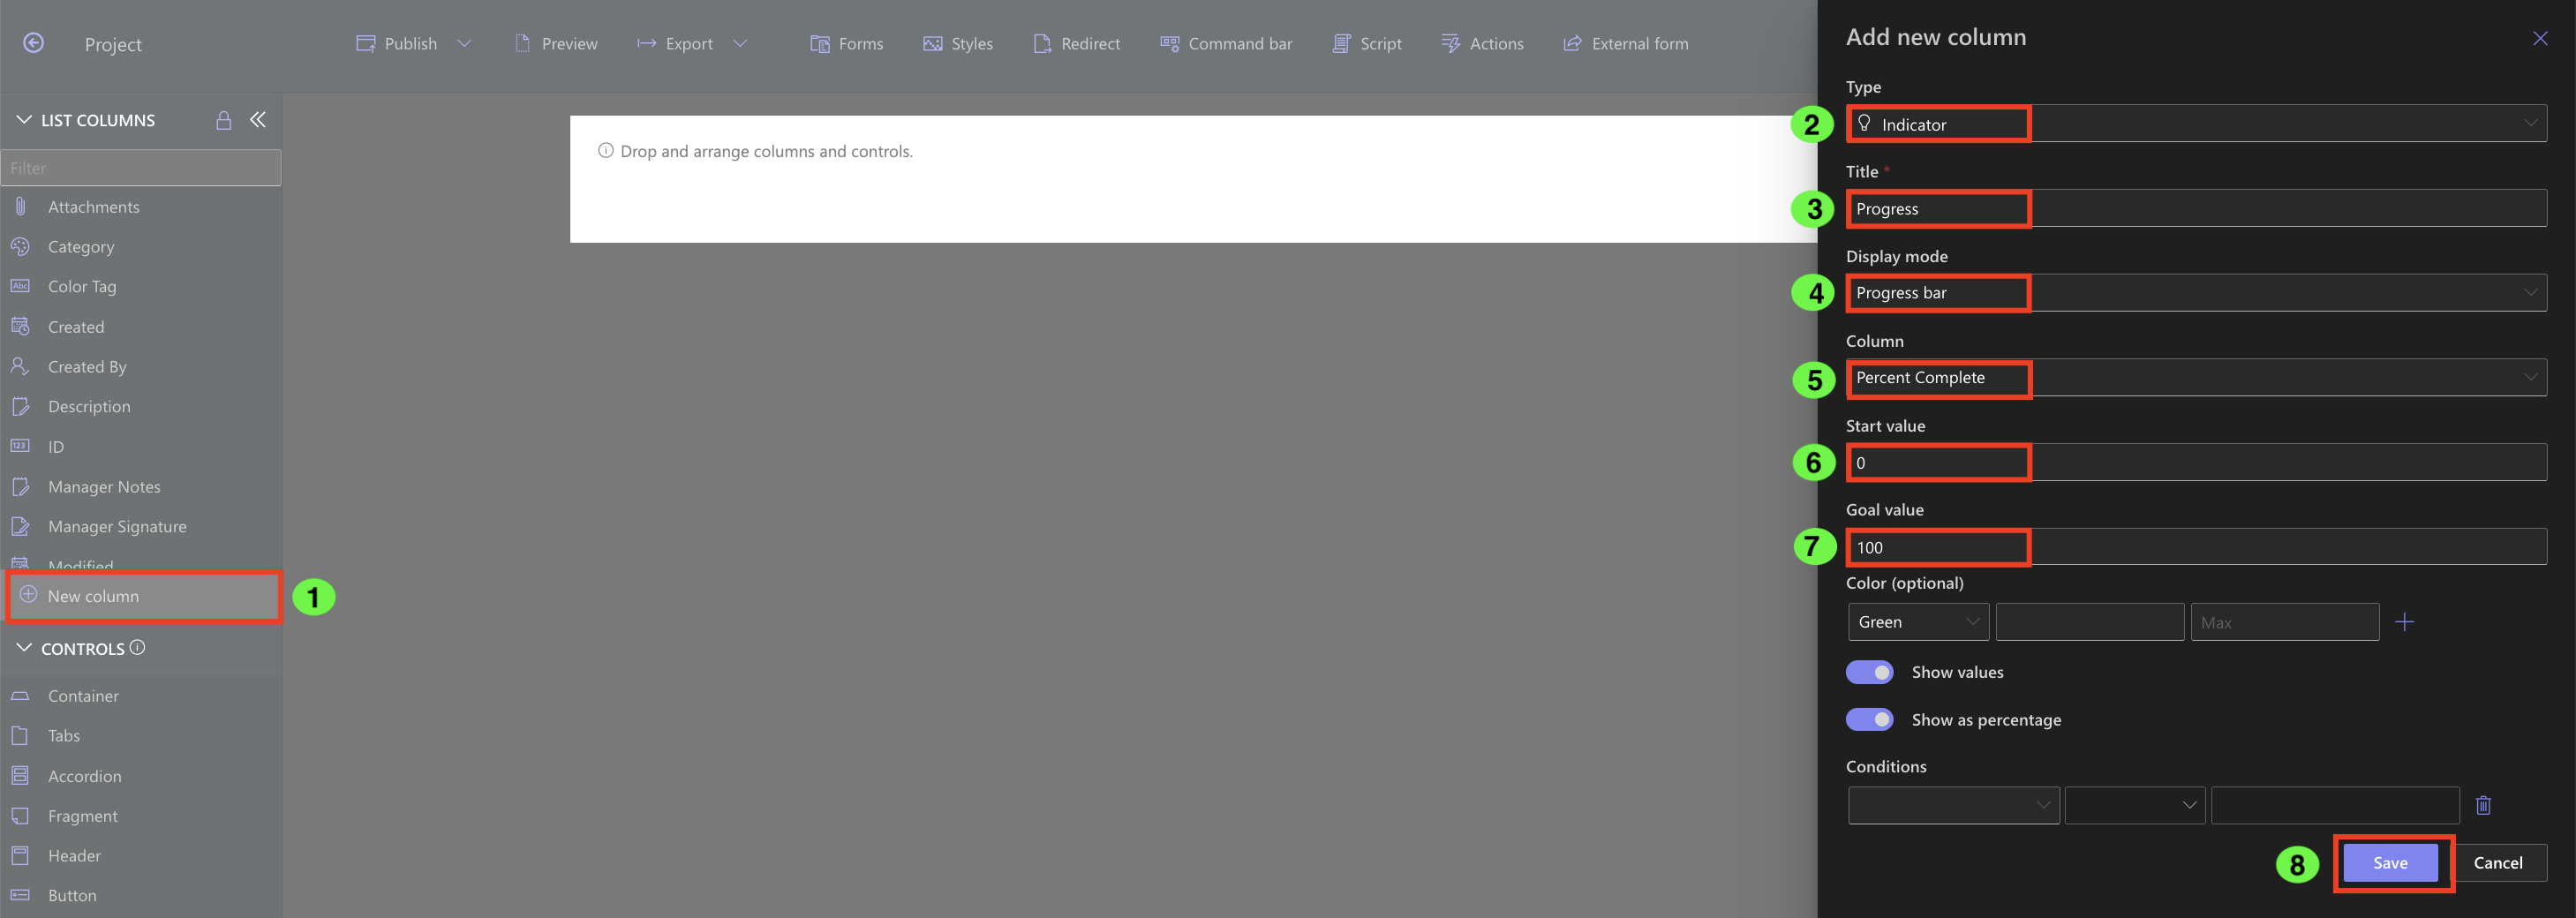
Step 5: Add Progress Indicator
- Add New Column → Type: Indicator
- Create an Indicator column
- Title: Progress
- Display mode: Progress Bar
- Column: Percent Complete
- Start value: 0
- Goal value: 100
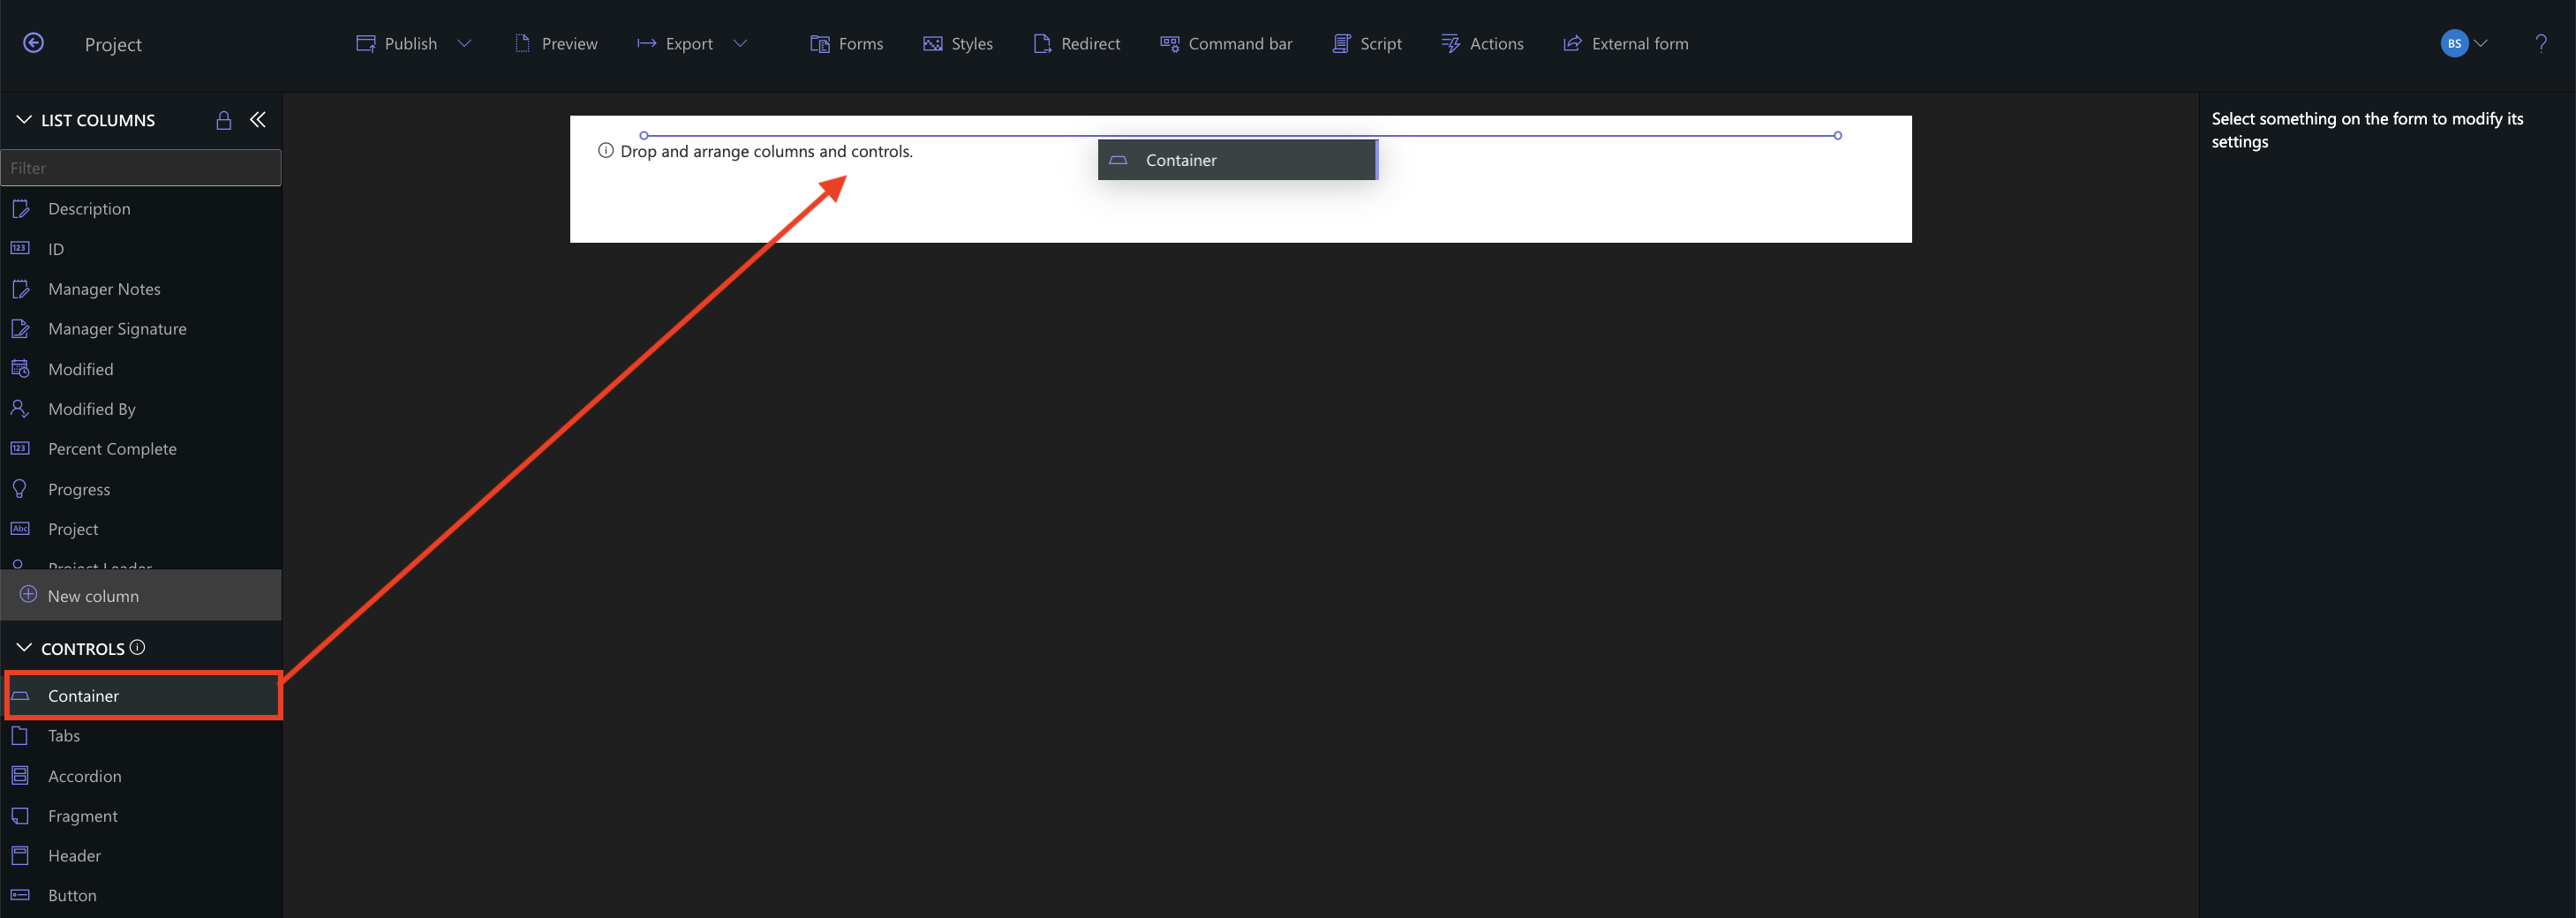
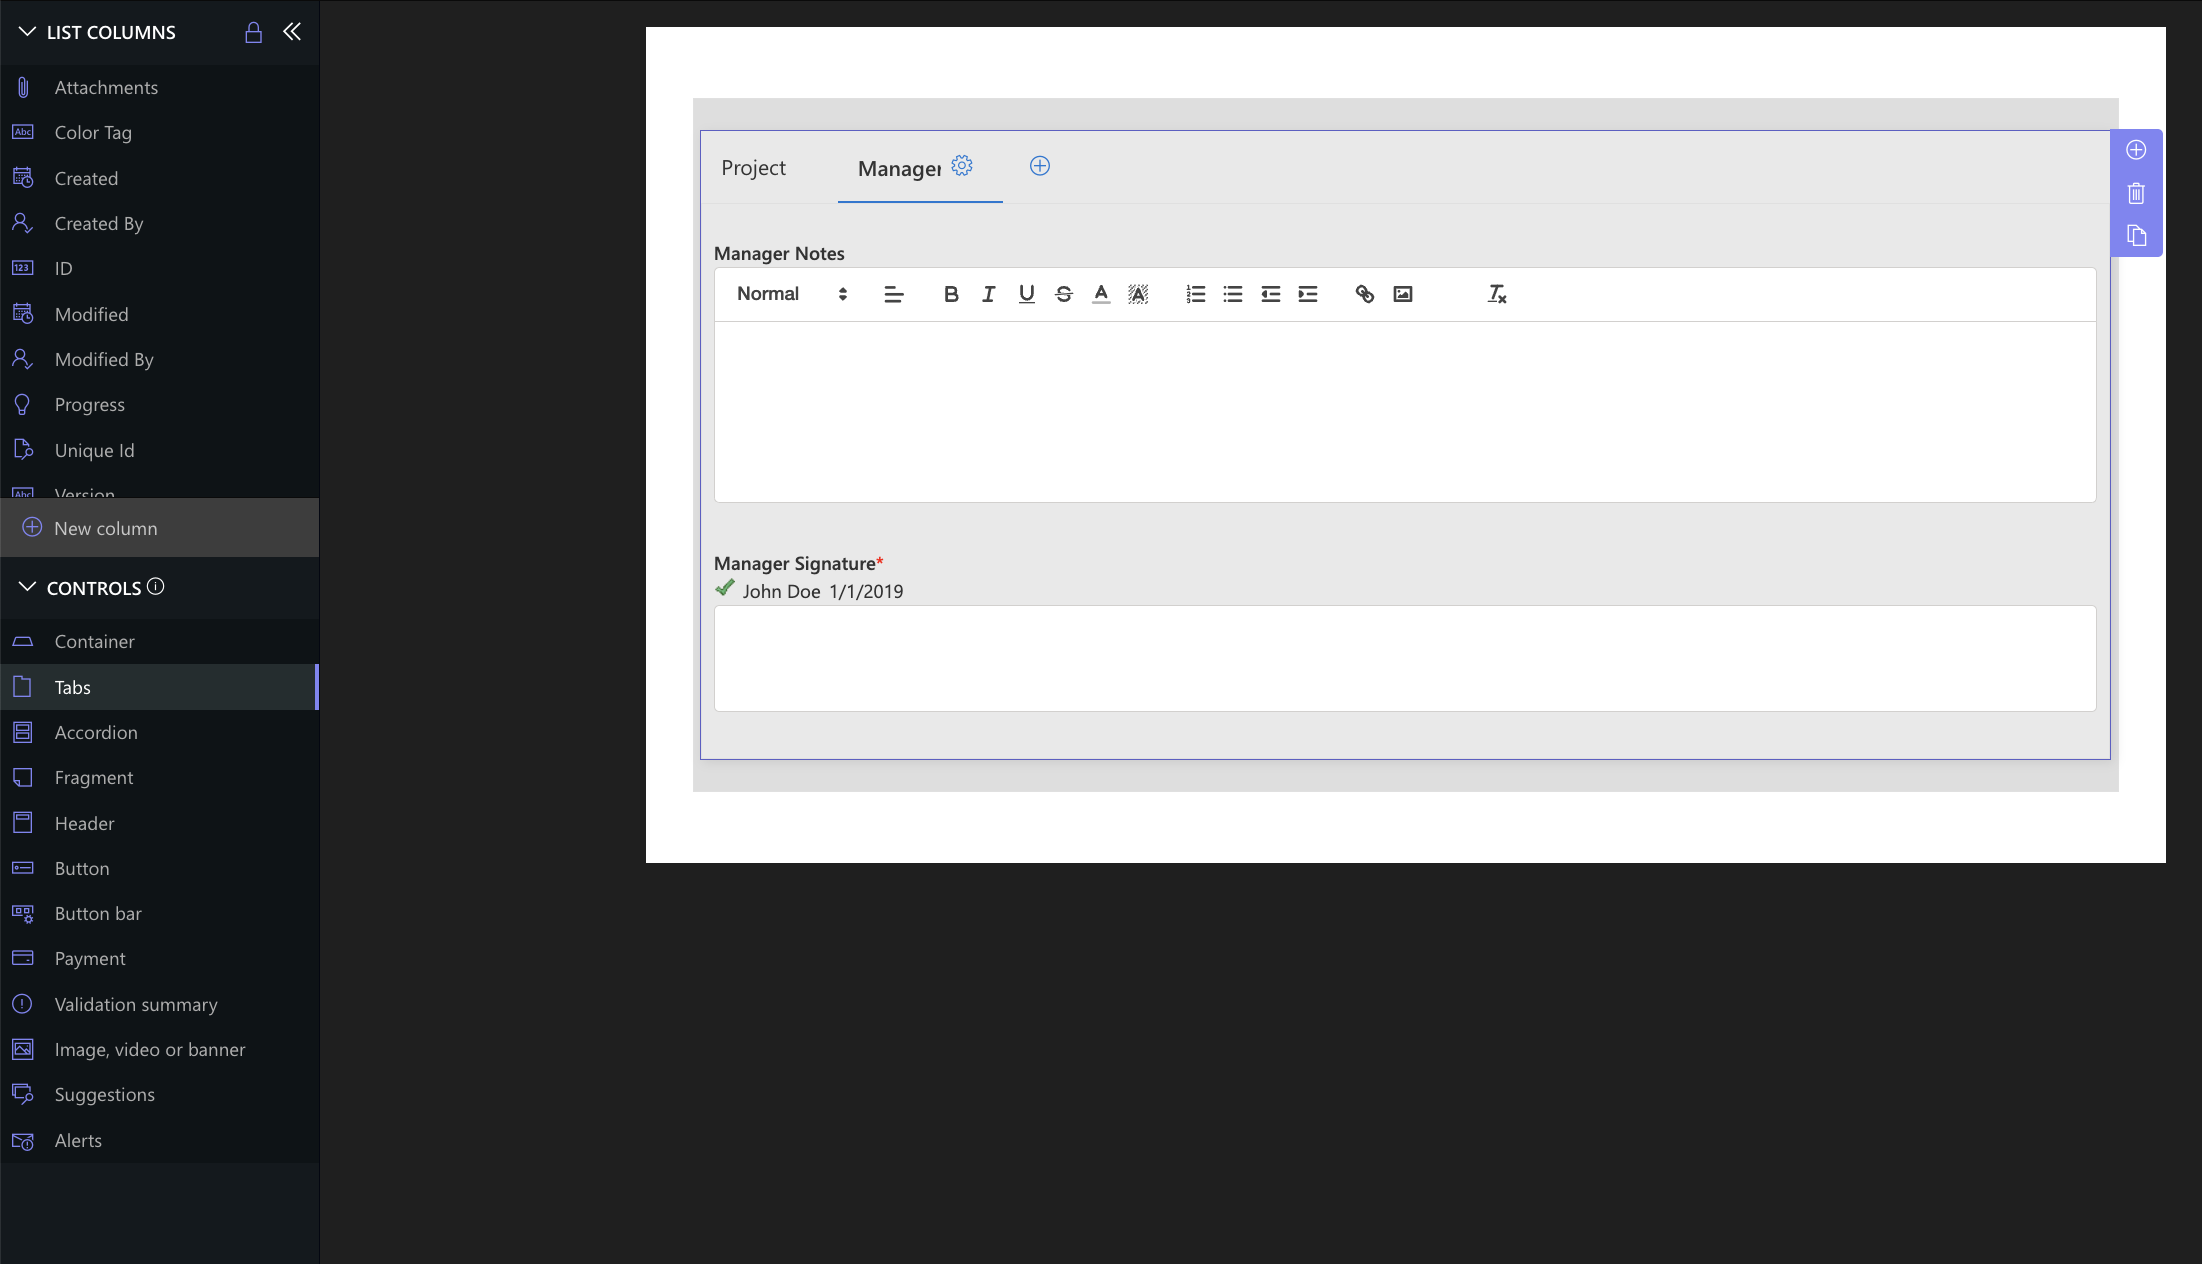
Step 6: Build the Form Layout
- In Form Designer, drag a Container onto the canvas
- Set a light gray background for the container
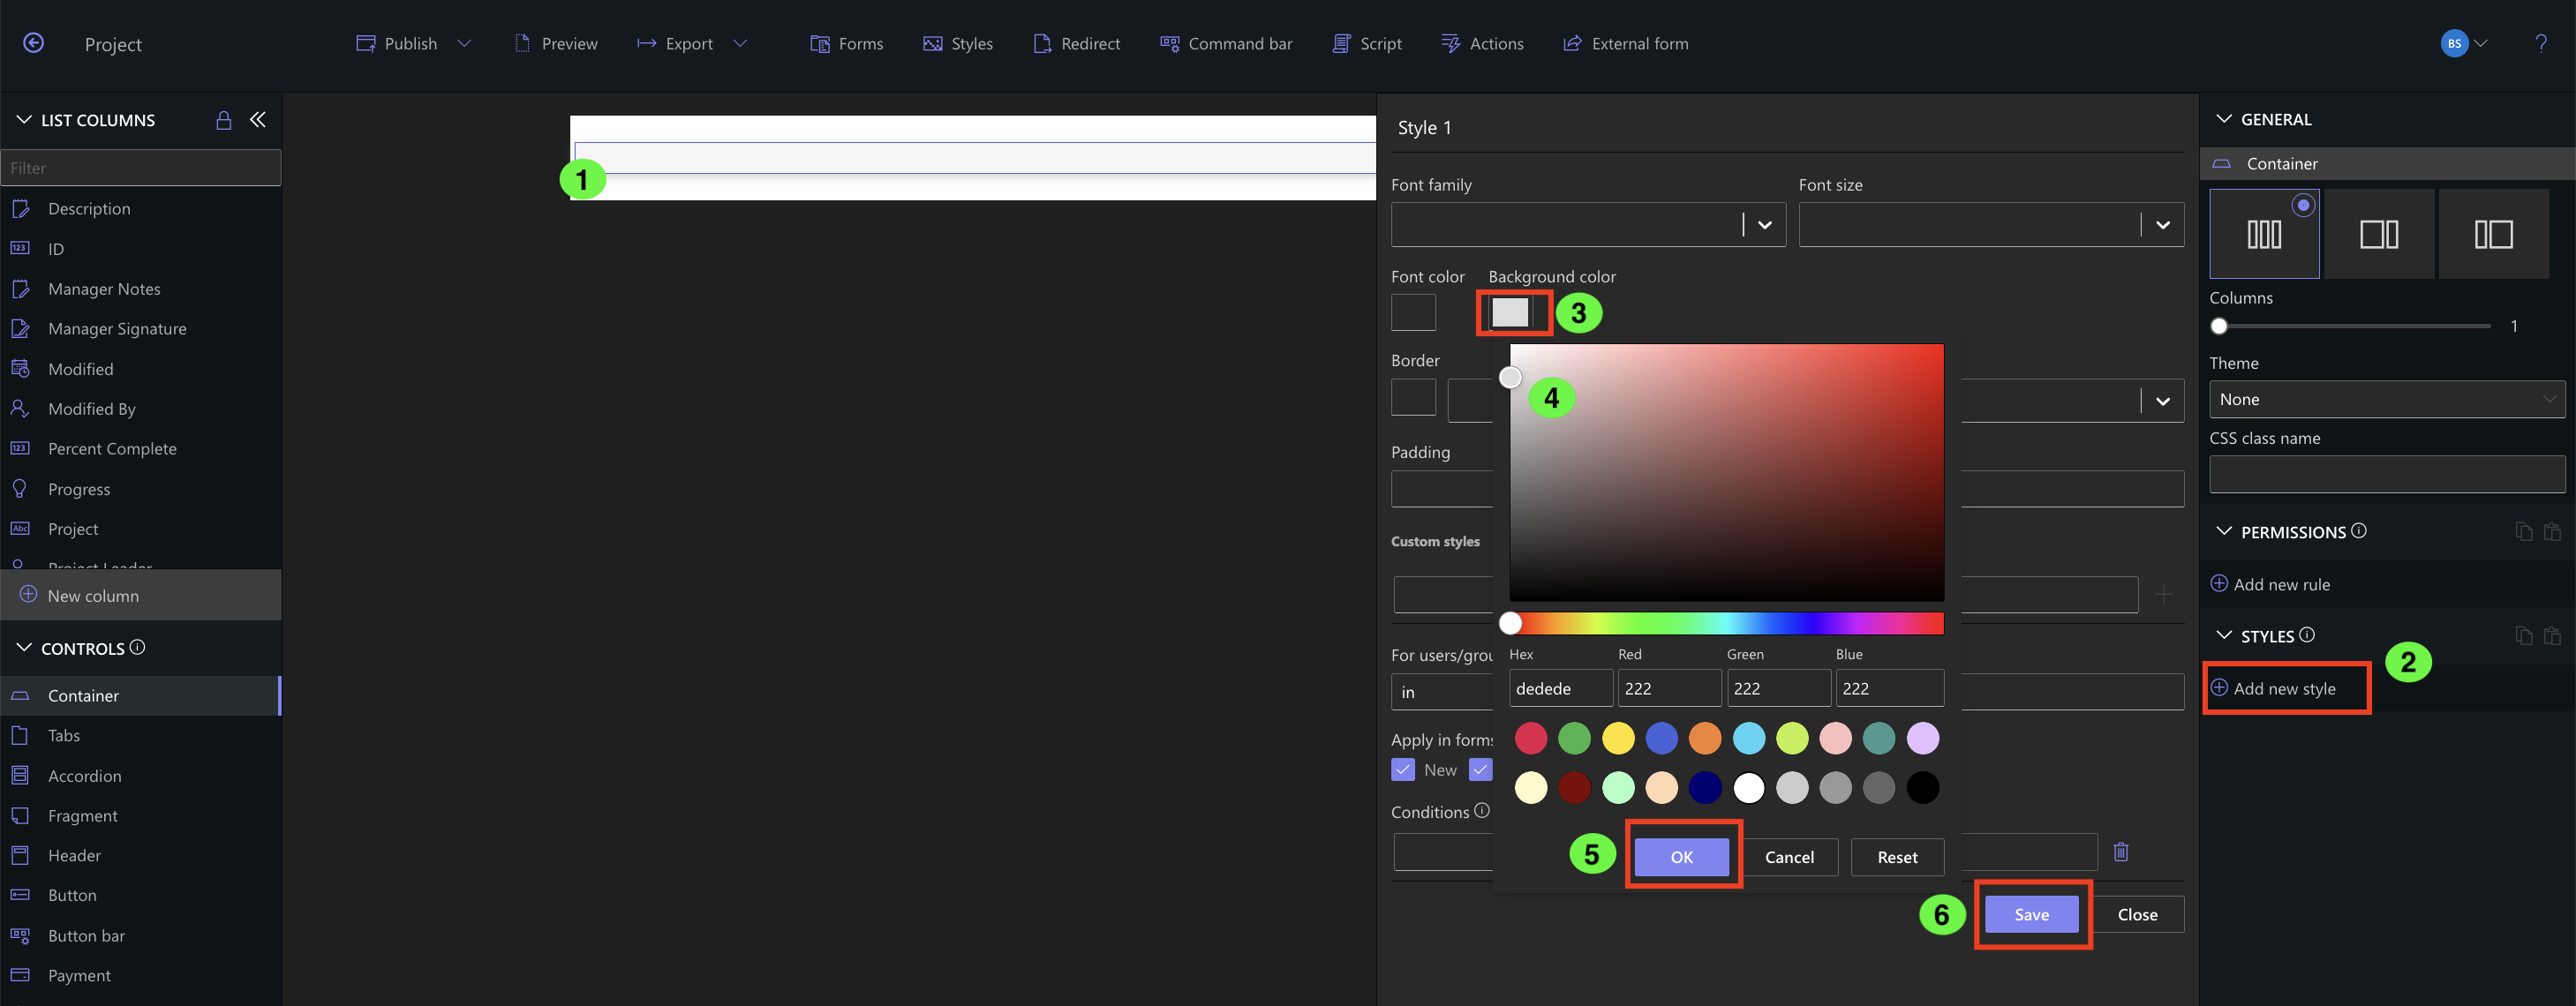
- Drag a Tabs control inside the container
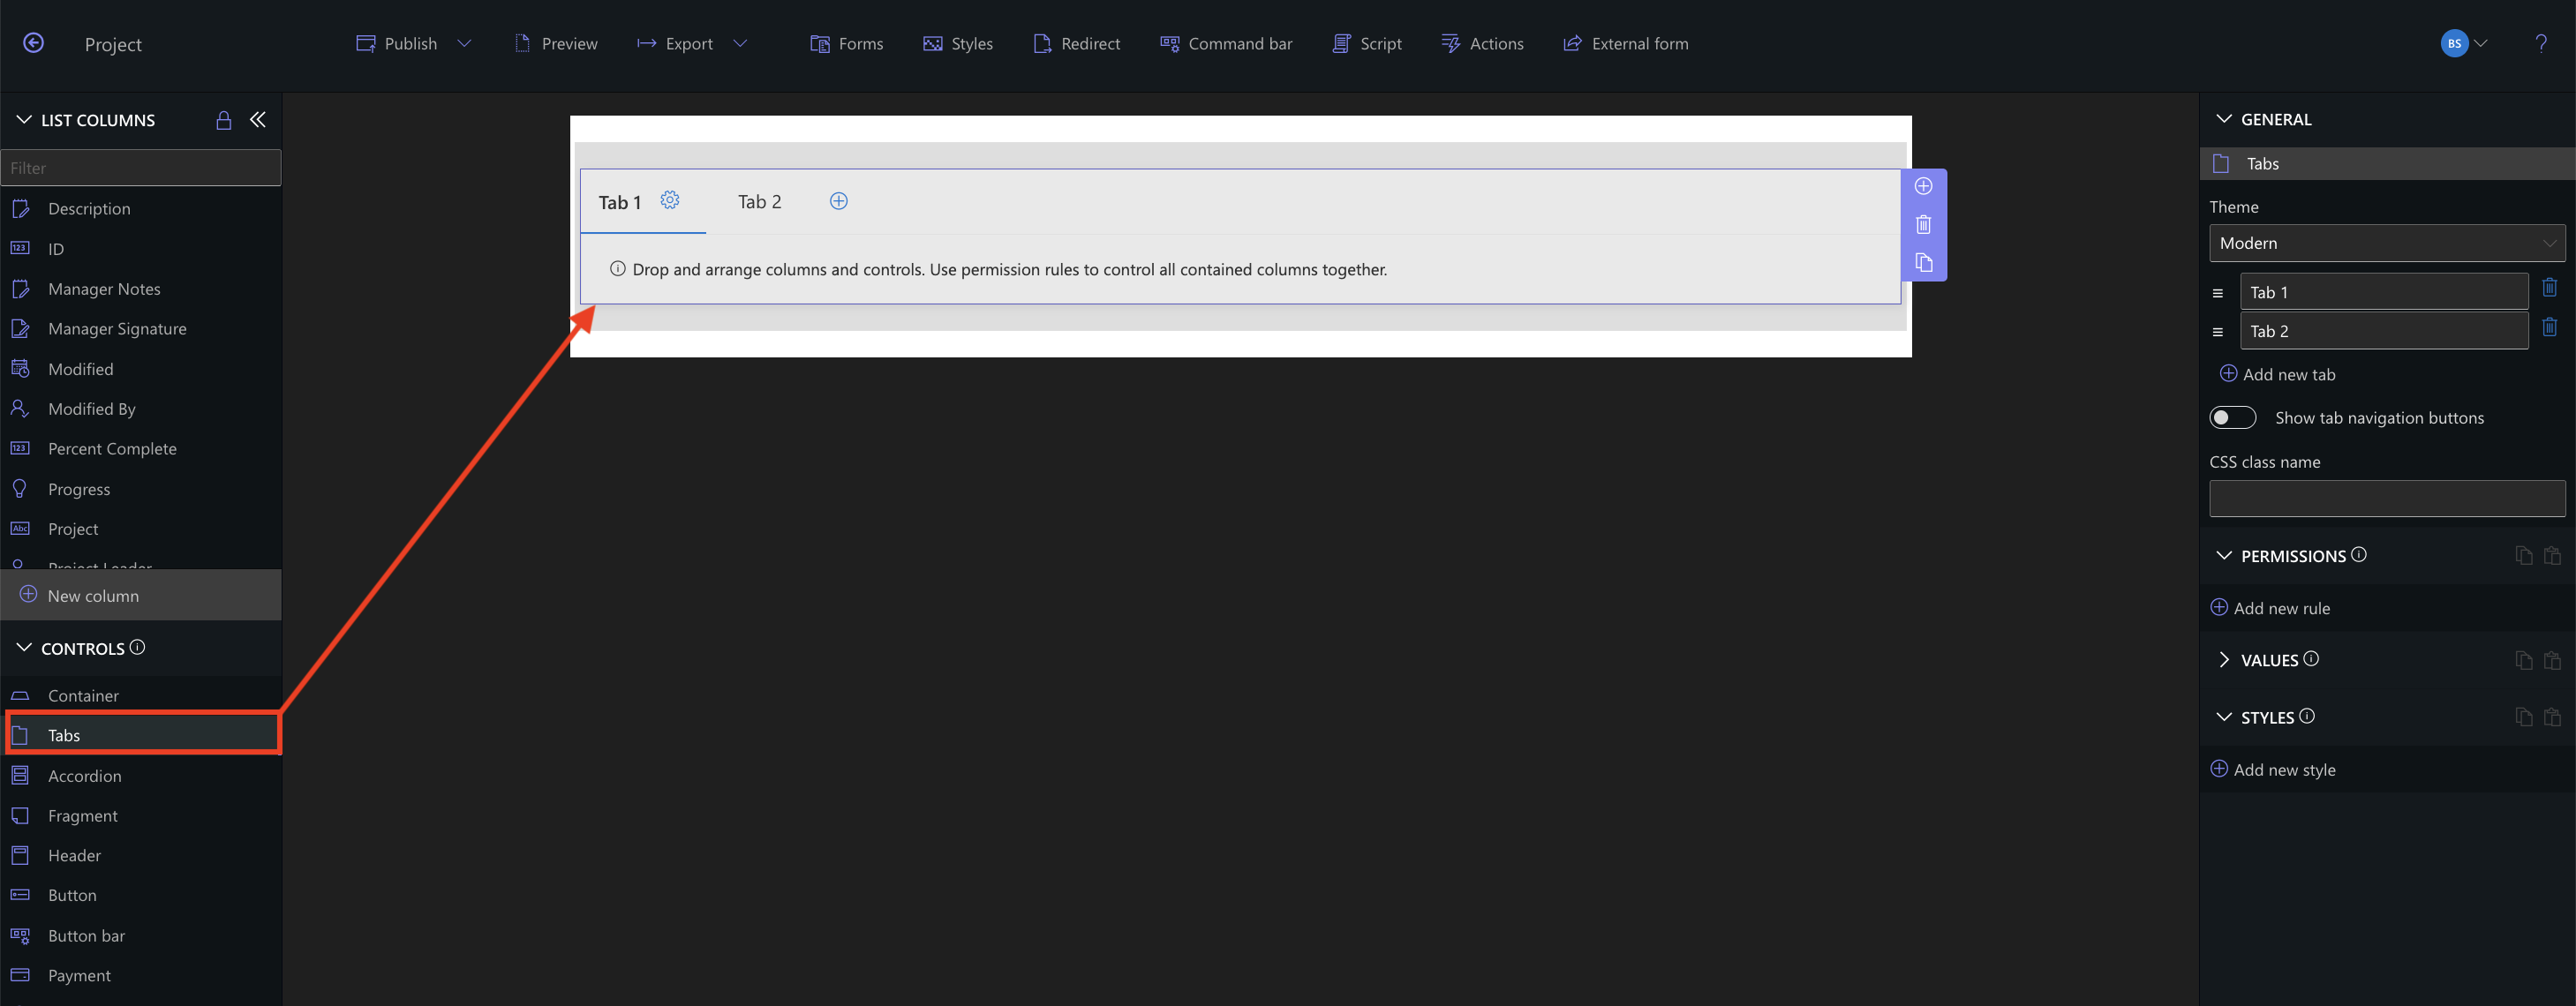
- Name two tabs: Project and Manager
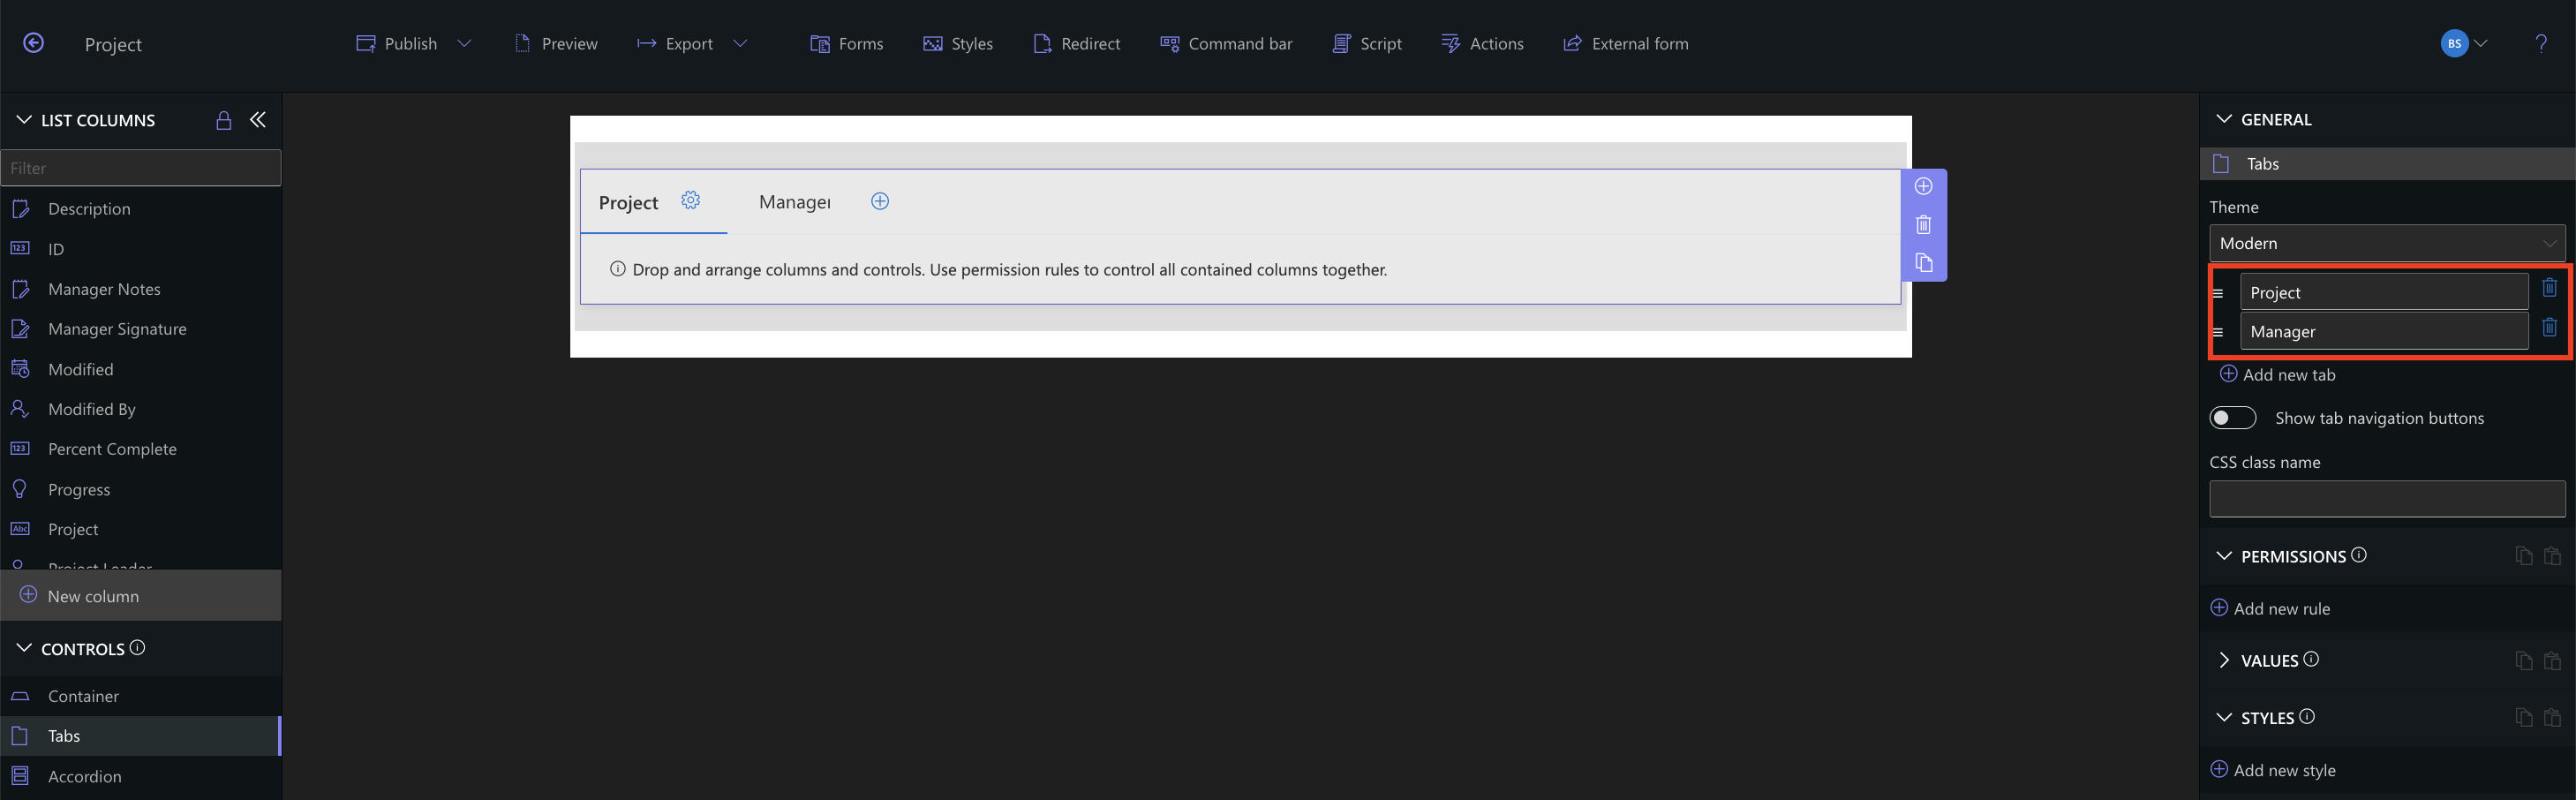
- Publish the form to save progress (do this regularly)
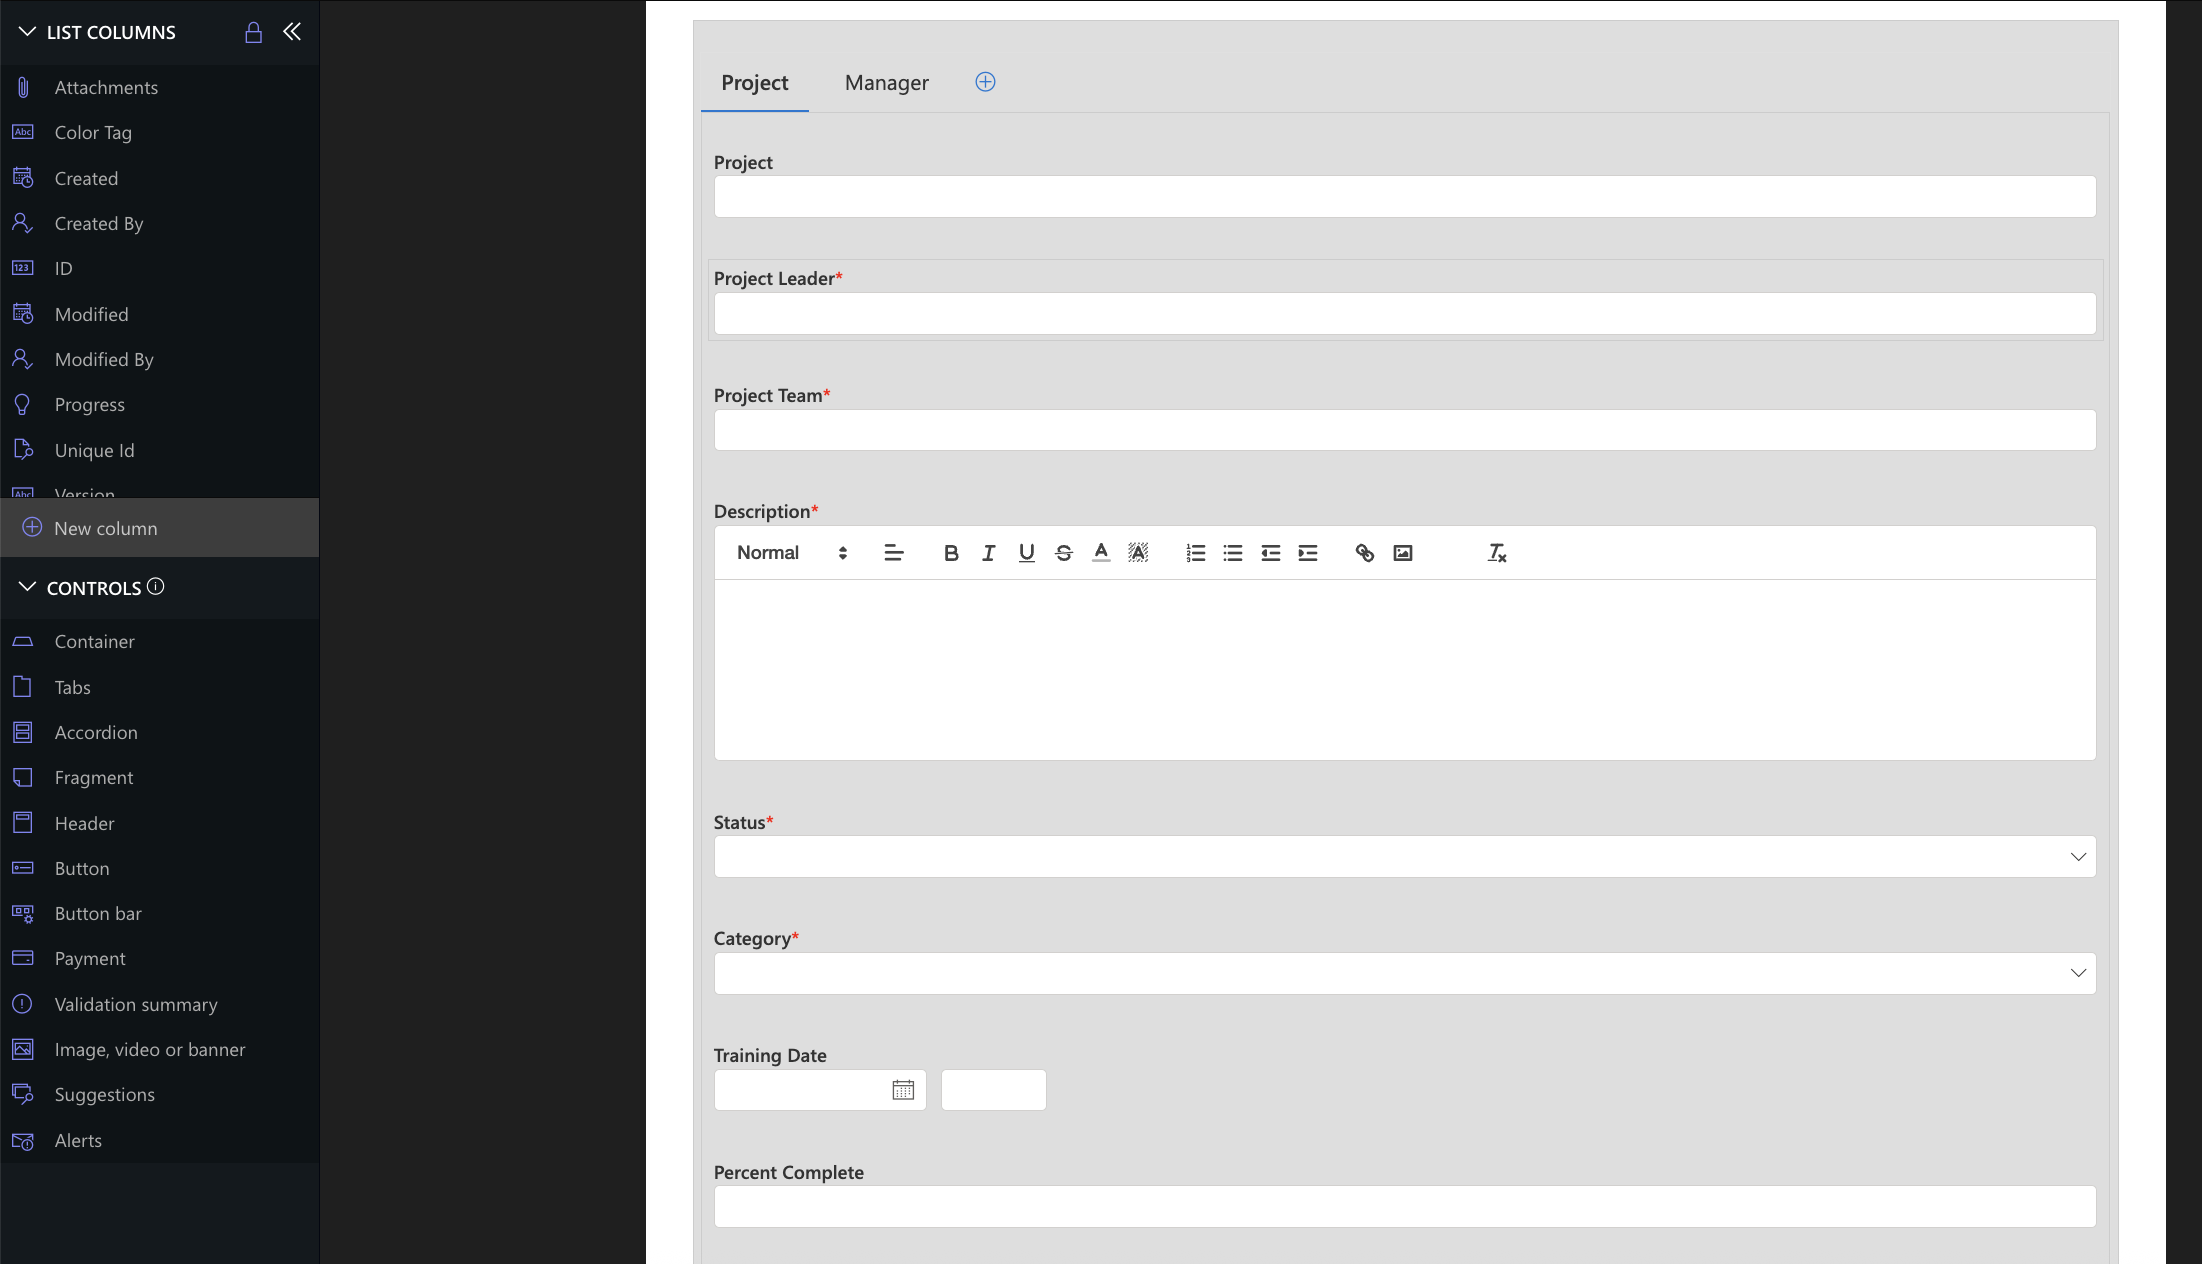
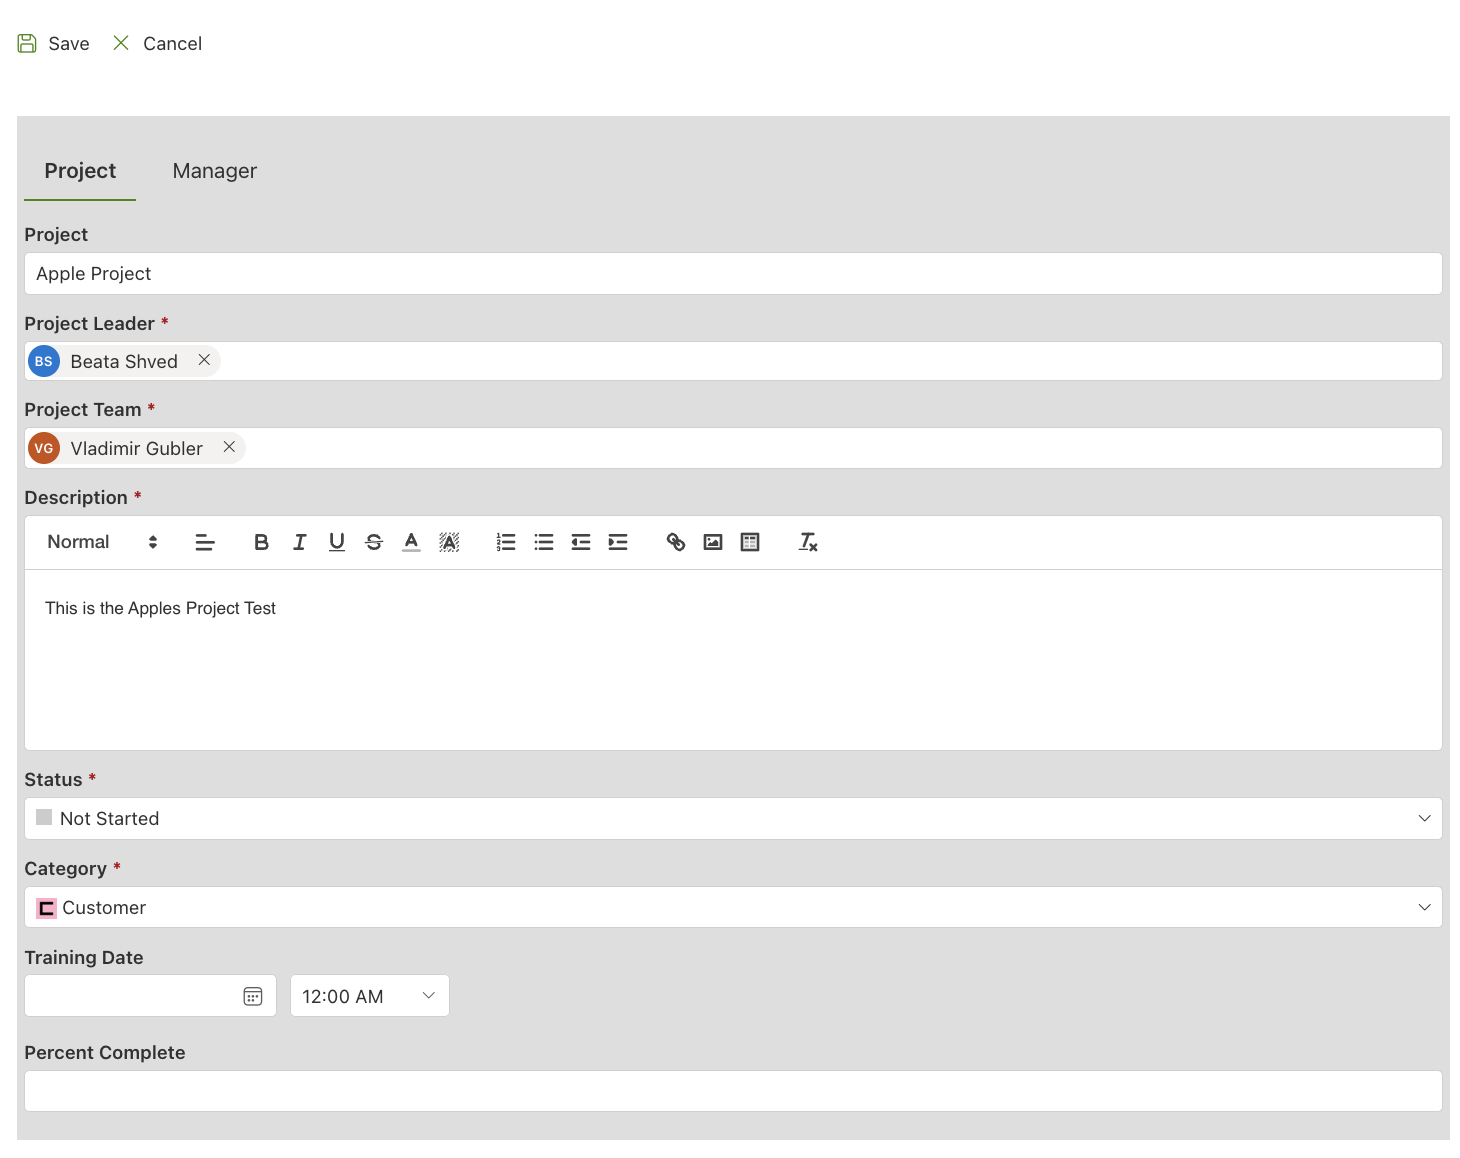
Step 7: Place Columns in Tabs
- Project Tab: Project, Project Leader, Project Team, Status, Category, Training Date, Description, Percent Complete, Progress
- Manager Tab: Manager Notes, Manager Signature
- Publish again to save changes
Step 8: Test the Basic Form
- Exit Form Designer and open the Projects list view
- Click New and create a test record to verify the layout
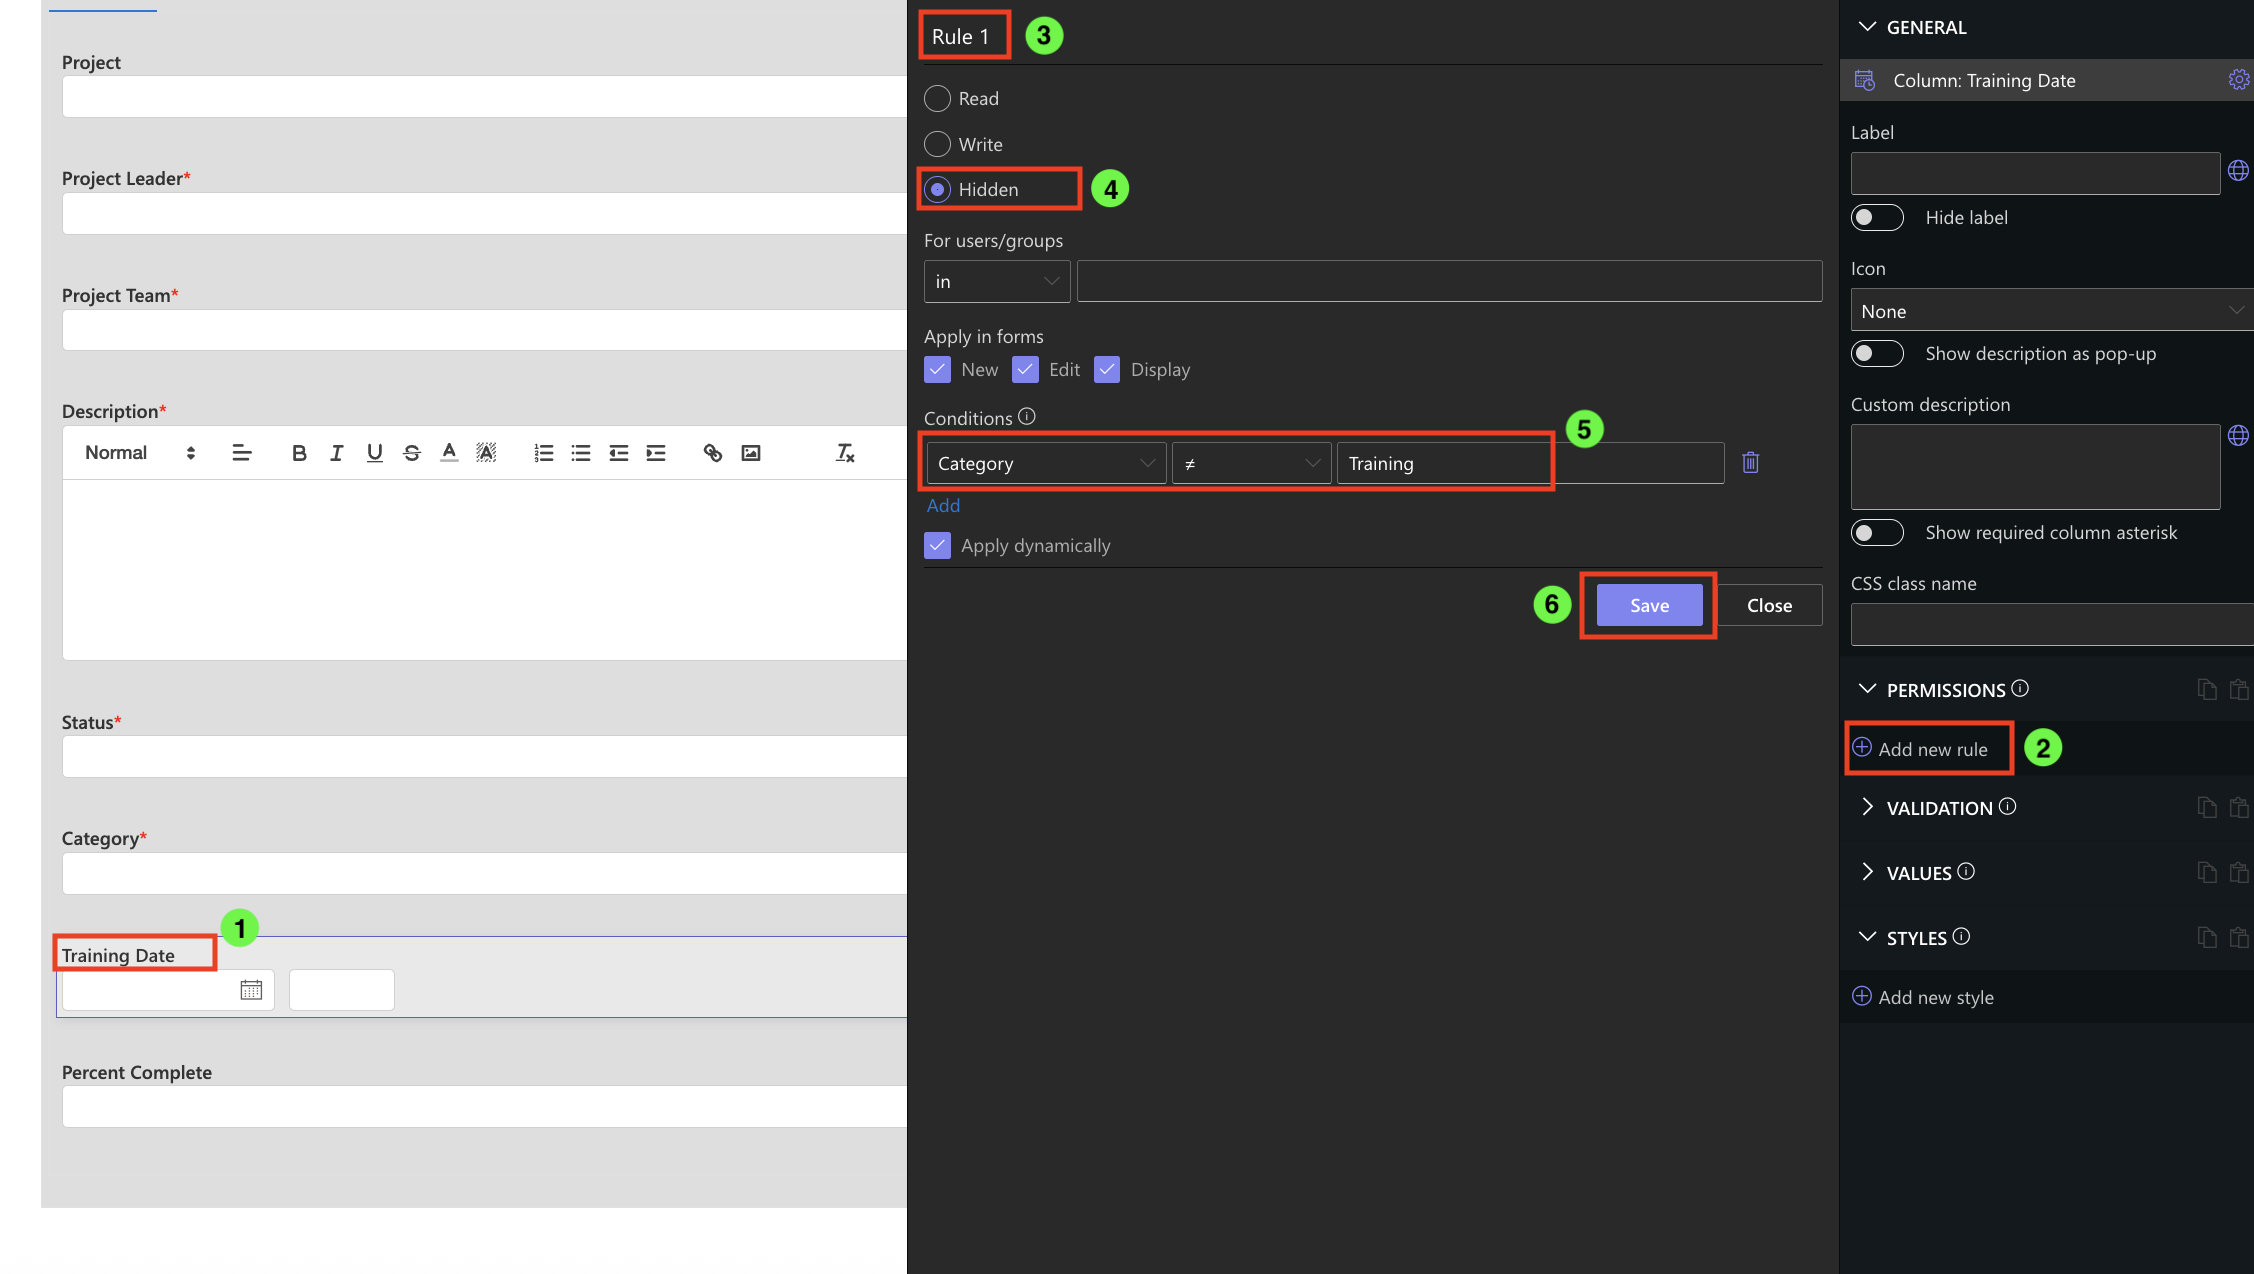
Step 9: Add Conditional Logic
Training Date Visibility and Requirement Rules:
- Select Training Date
- Add Permissions Rules:
- Hide when Category ≠ Training
- Writable when Category = Training
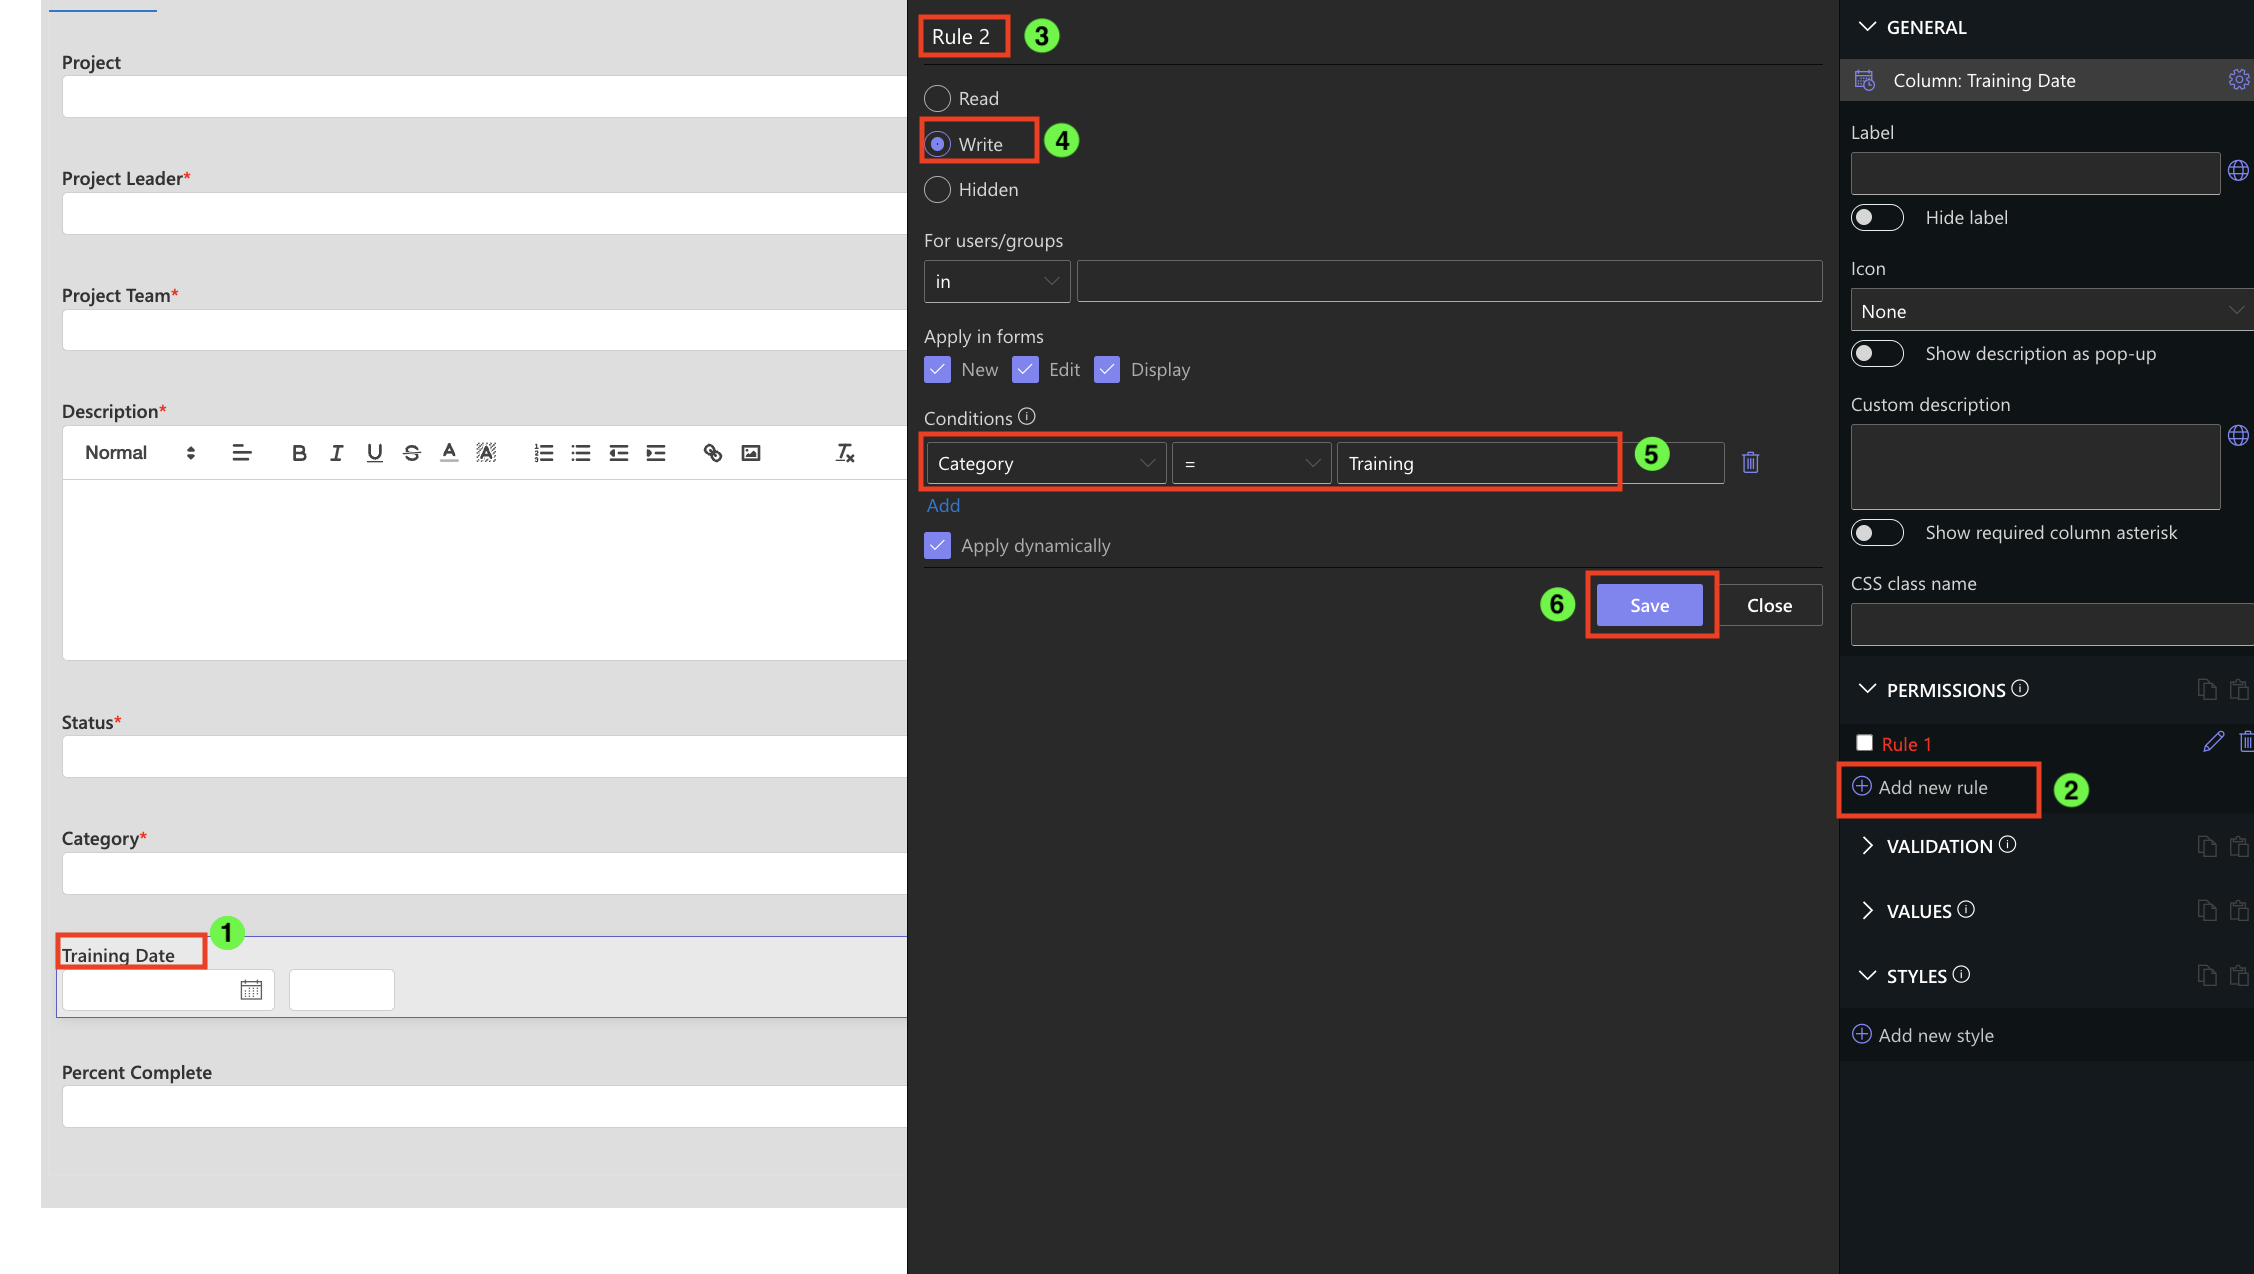
- Add a Validation Rule:
- Required when Category = Training
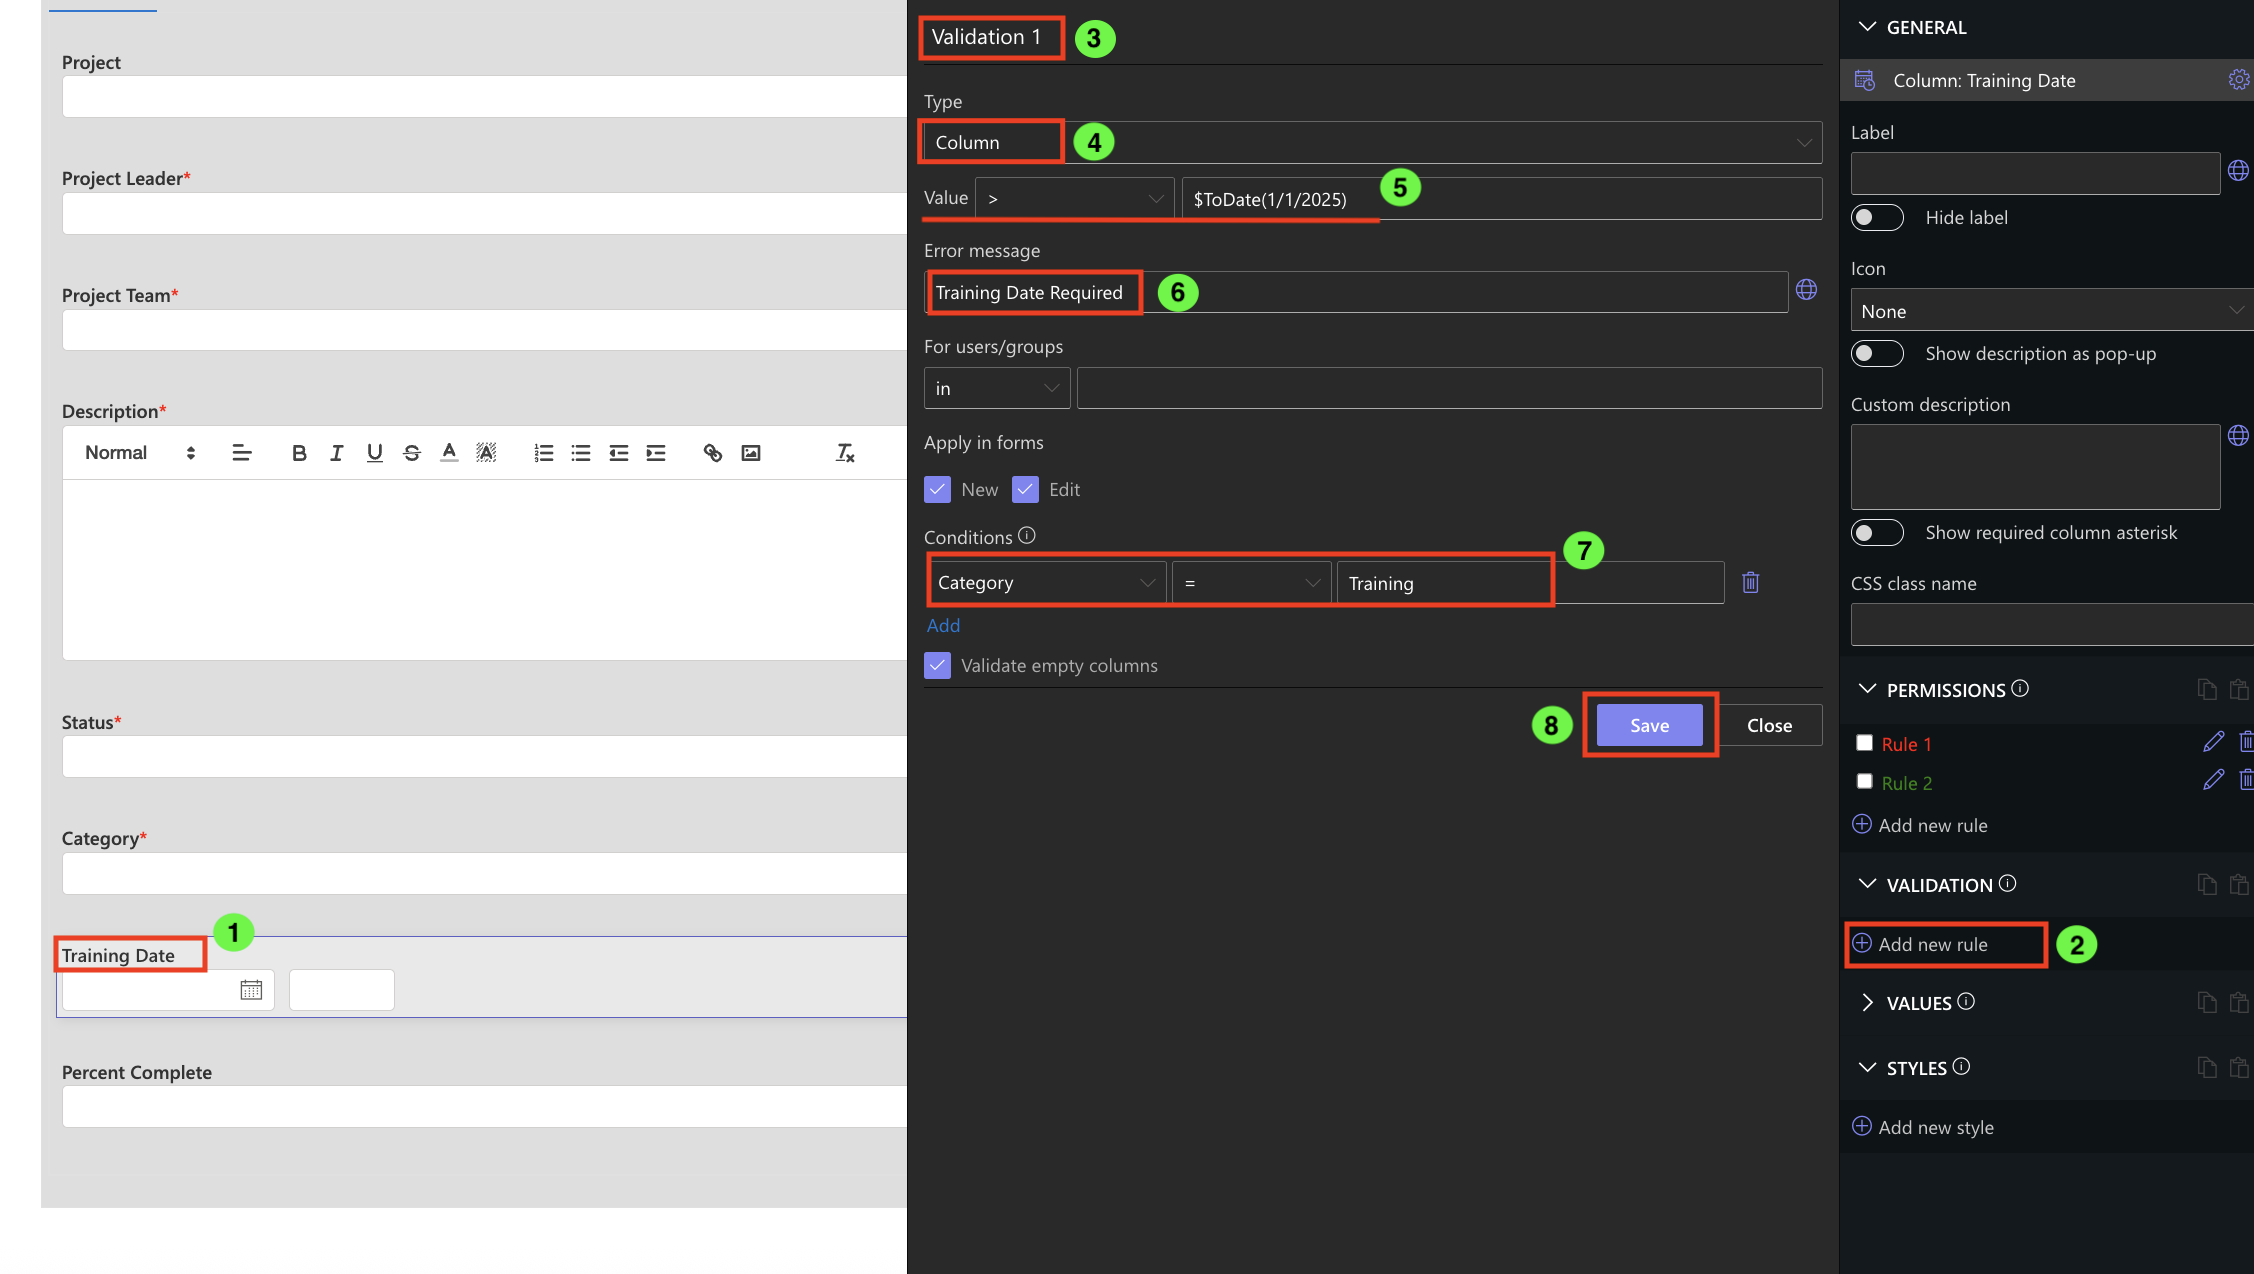
- Required when Category = Training
- Publish changes
Step 10: Final Test
- Open the form and test with Category = Customer → Training Date is hidden.
- Switch Category = Training → Training Date appears and becomes required.
Summary
You’ve created a dynamic, user-focused form using Ultimate Forms: Forms. All columns were added and configured directly in the Form Designer (no List Settings), then organized into tabs and enhanced with conditional rules — resulting in a powerful form without code.