How to Set up Associated Items
In this tutorial, we’ll configure Projects as the parent list and Tasks as the child list. This setup will allow you to manage project-related tasks directly inside the project form—without switching between lists or writing any code.
By the end, you’ll have a working Projects + Tasks solution where users can:
- Create a project.
- Add and edit tasks directly inside the project form.
- Keep all related records connected automatically.
Instructions
Step 1: Create the parent list (Projects)
- Create a new SharePoint list named Projects.
- Add columns:
- Title (default) → Project name
- Description (Multiple lines of text)
- Project Manager (Person/Group)
- Start Date, End Date (Date/Time)

Step 2: Create the child list (Tasks)
- Go to the Projects list.
- Open Design.
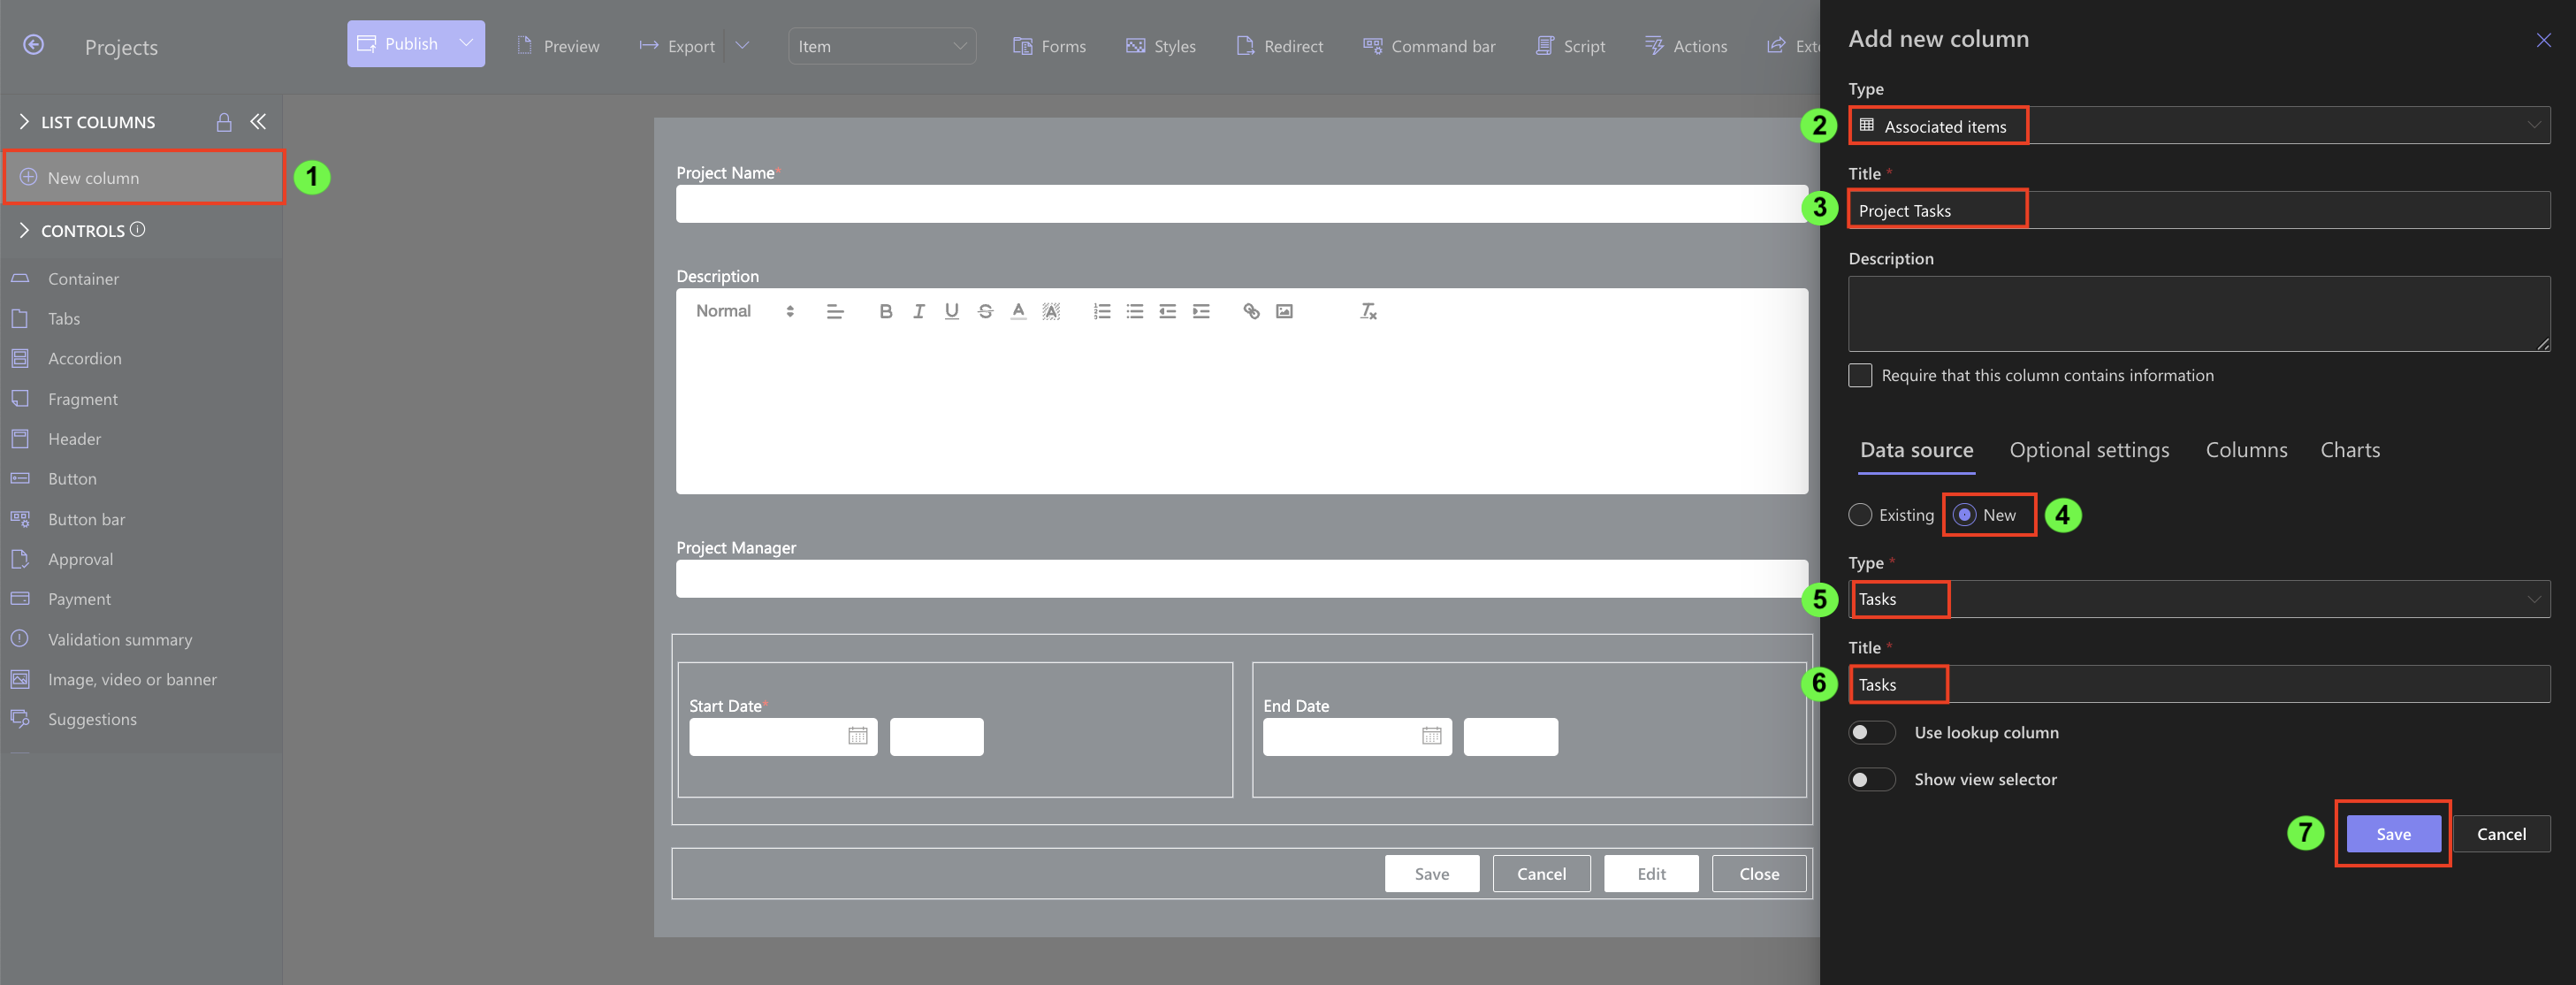
- In Form Designer, click Add Column.
- Choose type Associated Items.
- Name it Project Tasks.
- In the column settings:
- Select Create new list
- Type: Tasks
- Enter list name: Tasks
- Save.
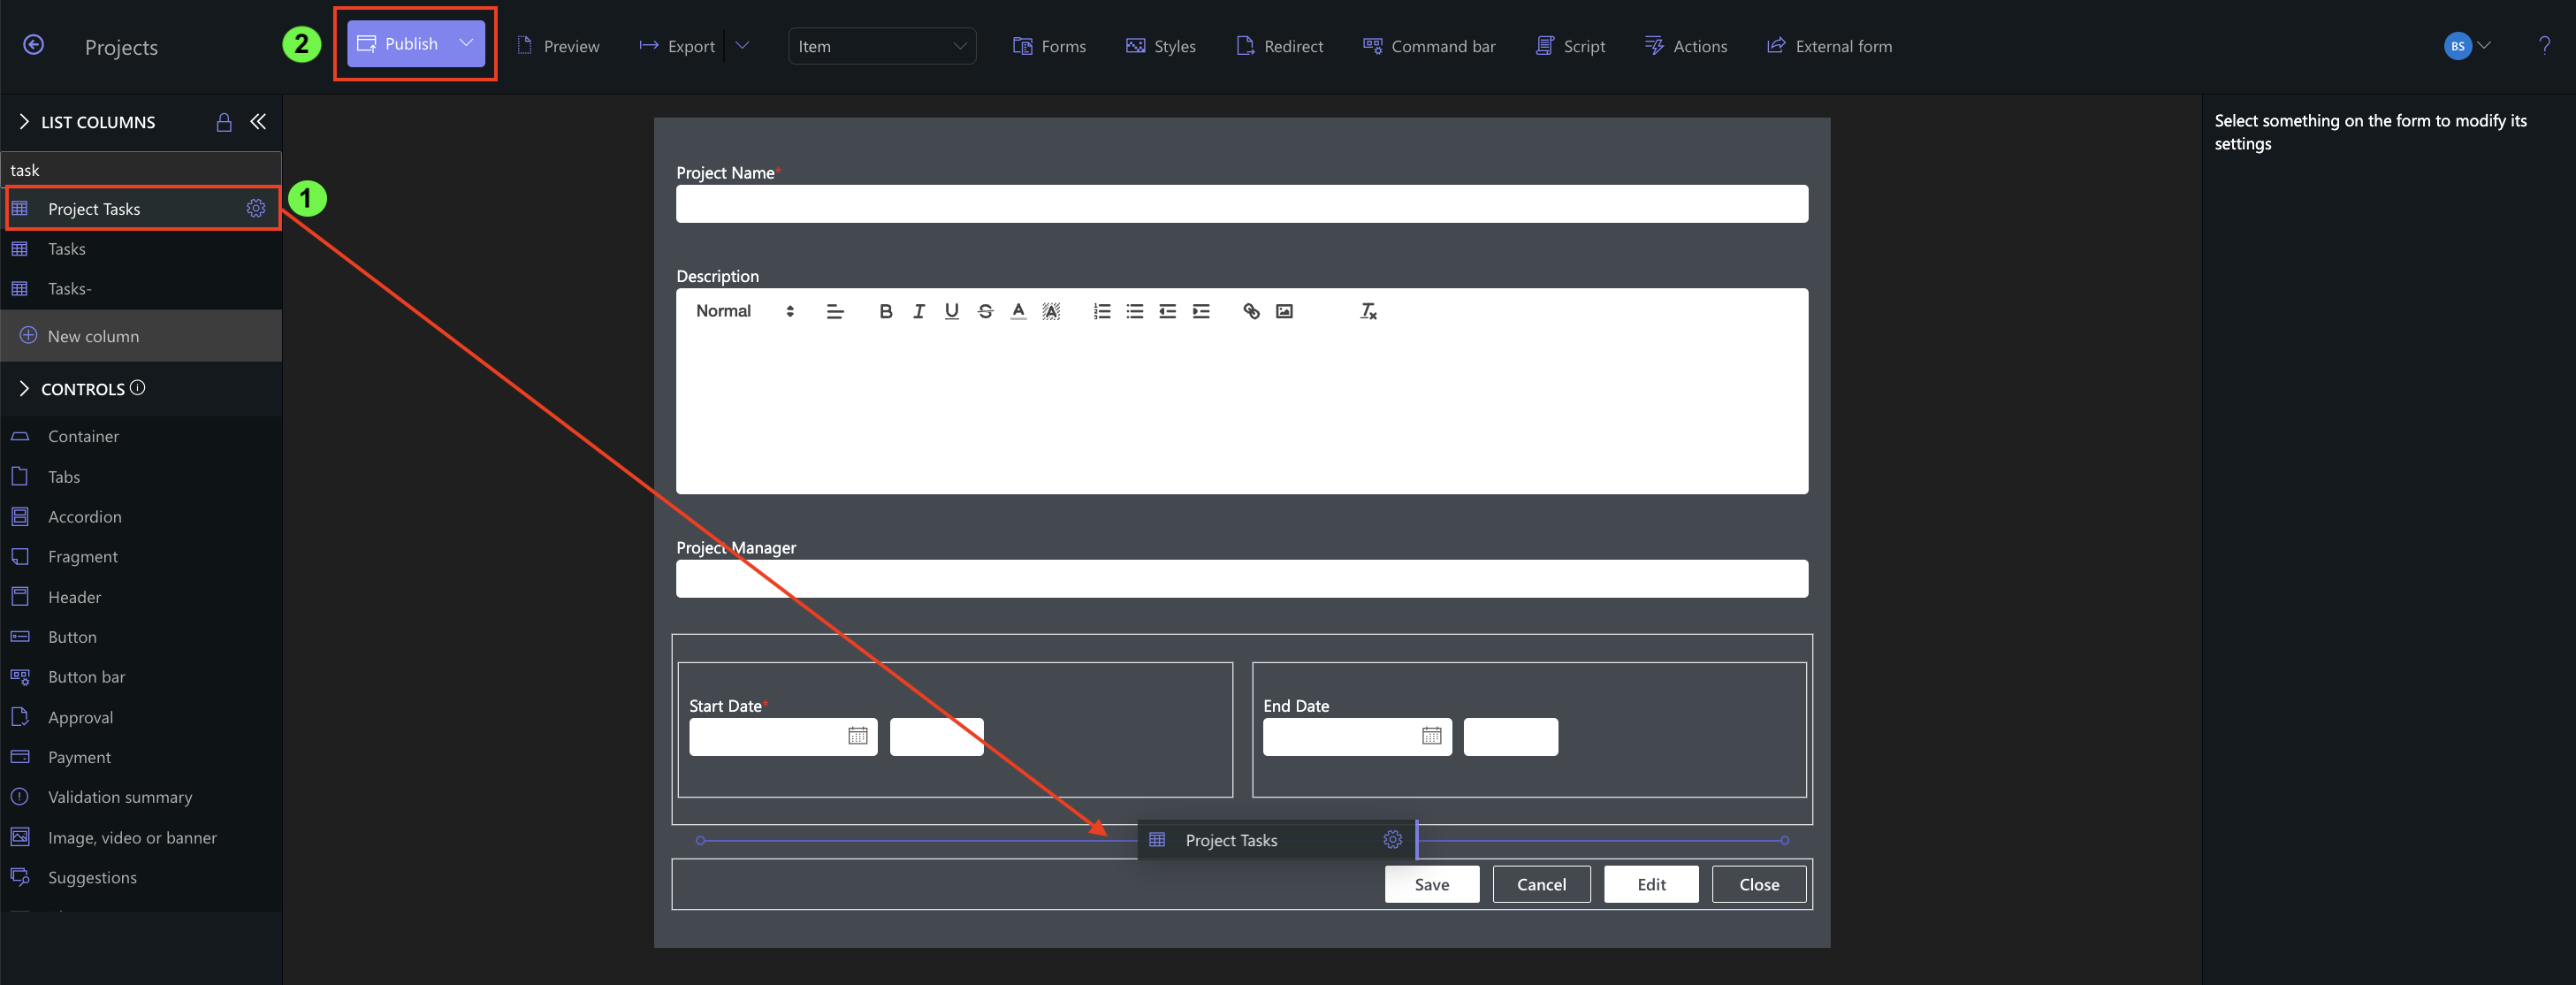
- Drag the Project Tasks column into Project form and Publish.
Step 3: Configure the child list
- After creating the list, configure its fields::
- Task Title (Single line of text)
- Assigned To (Person/Group)
- Status (Choice: Not Started, In Progress, Completed)

Step 4: Test the setup
- Create a new Project.
- Inside the Project form, you’ll now see a Project Tasks section.
- Add tasks directly in this section.
- Save the project.


Summary
You’ve just set up your first Associated Items configuration in Ultimate Forms. With only a few steps, you connected Projects and Tasks so that tasks can be managed directly within the project form.
Last modified: 3/24/2026 12:18 PM