Introduction
Validation Rules are a powerful feature in Infowise Ultimate Forms that help keep your data accurate and consistent. They act as automatic checks that ensure users enter information correctly, preventing mistakes before they reach your SharePoint lists.
Think of Validation Rules as guidelines for your form columns. They allow you to define conditions that the entered data must meet, such as "This column cannot be empty," "This date must be before another date," or "This text must match a specific format."
Instructions
Why Use Validation Rules?
- Prevent errors: Stop users from entering incorrect or incomplete data.
- Save time: Reduce the need for manual data corrections.
- Guide users: Provide clear instructions on what type of data is expected.
- Improve workflows: Ensure that automated processes work with clean and reliable data.
How Validation Rules Work:
Validation Rules are set up directly in Form Designer. You don’t need to write any code — everything can be configured through a visual interface.
When a user fills out a form:
- The system checks all active validation rules.
- If a rule is not satisfied, an error message appears.
- The user cannot save the form until all validations are passed.
Key Capabilities
Validation Rules in Form Designer allow you to:
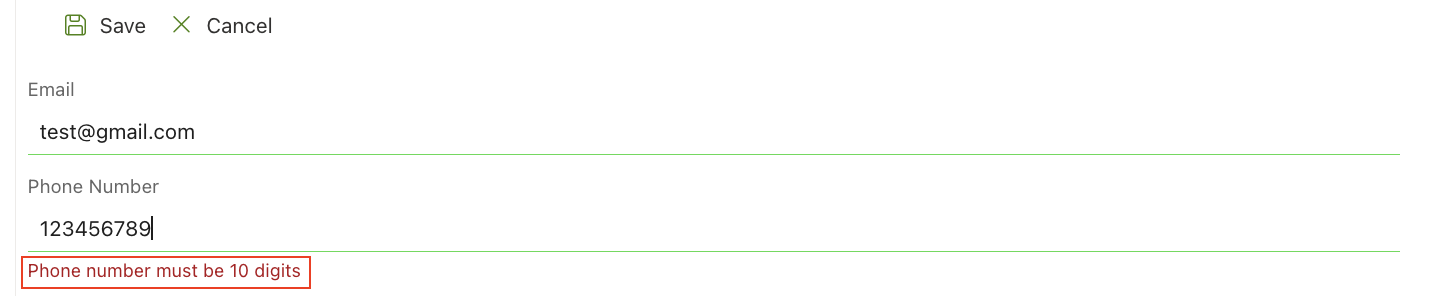
- Pattern Validation: Ensure data matches a certain format (like emails, phone numbers, or custom patterns).

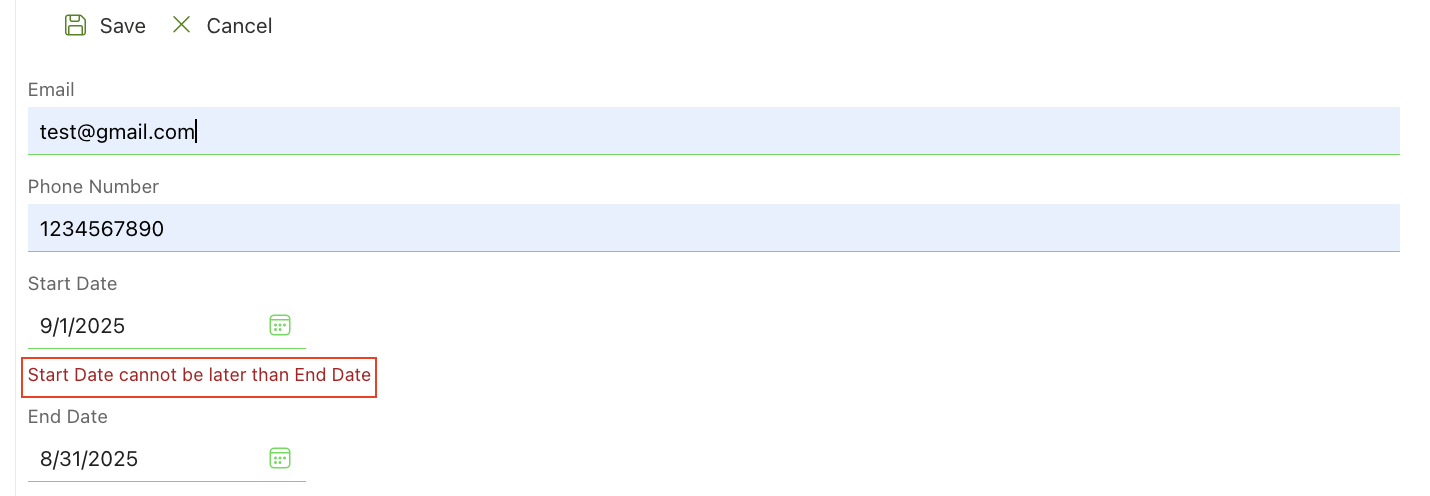
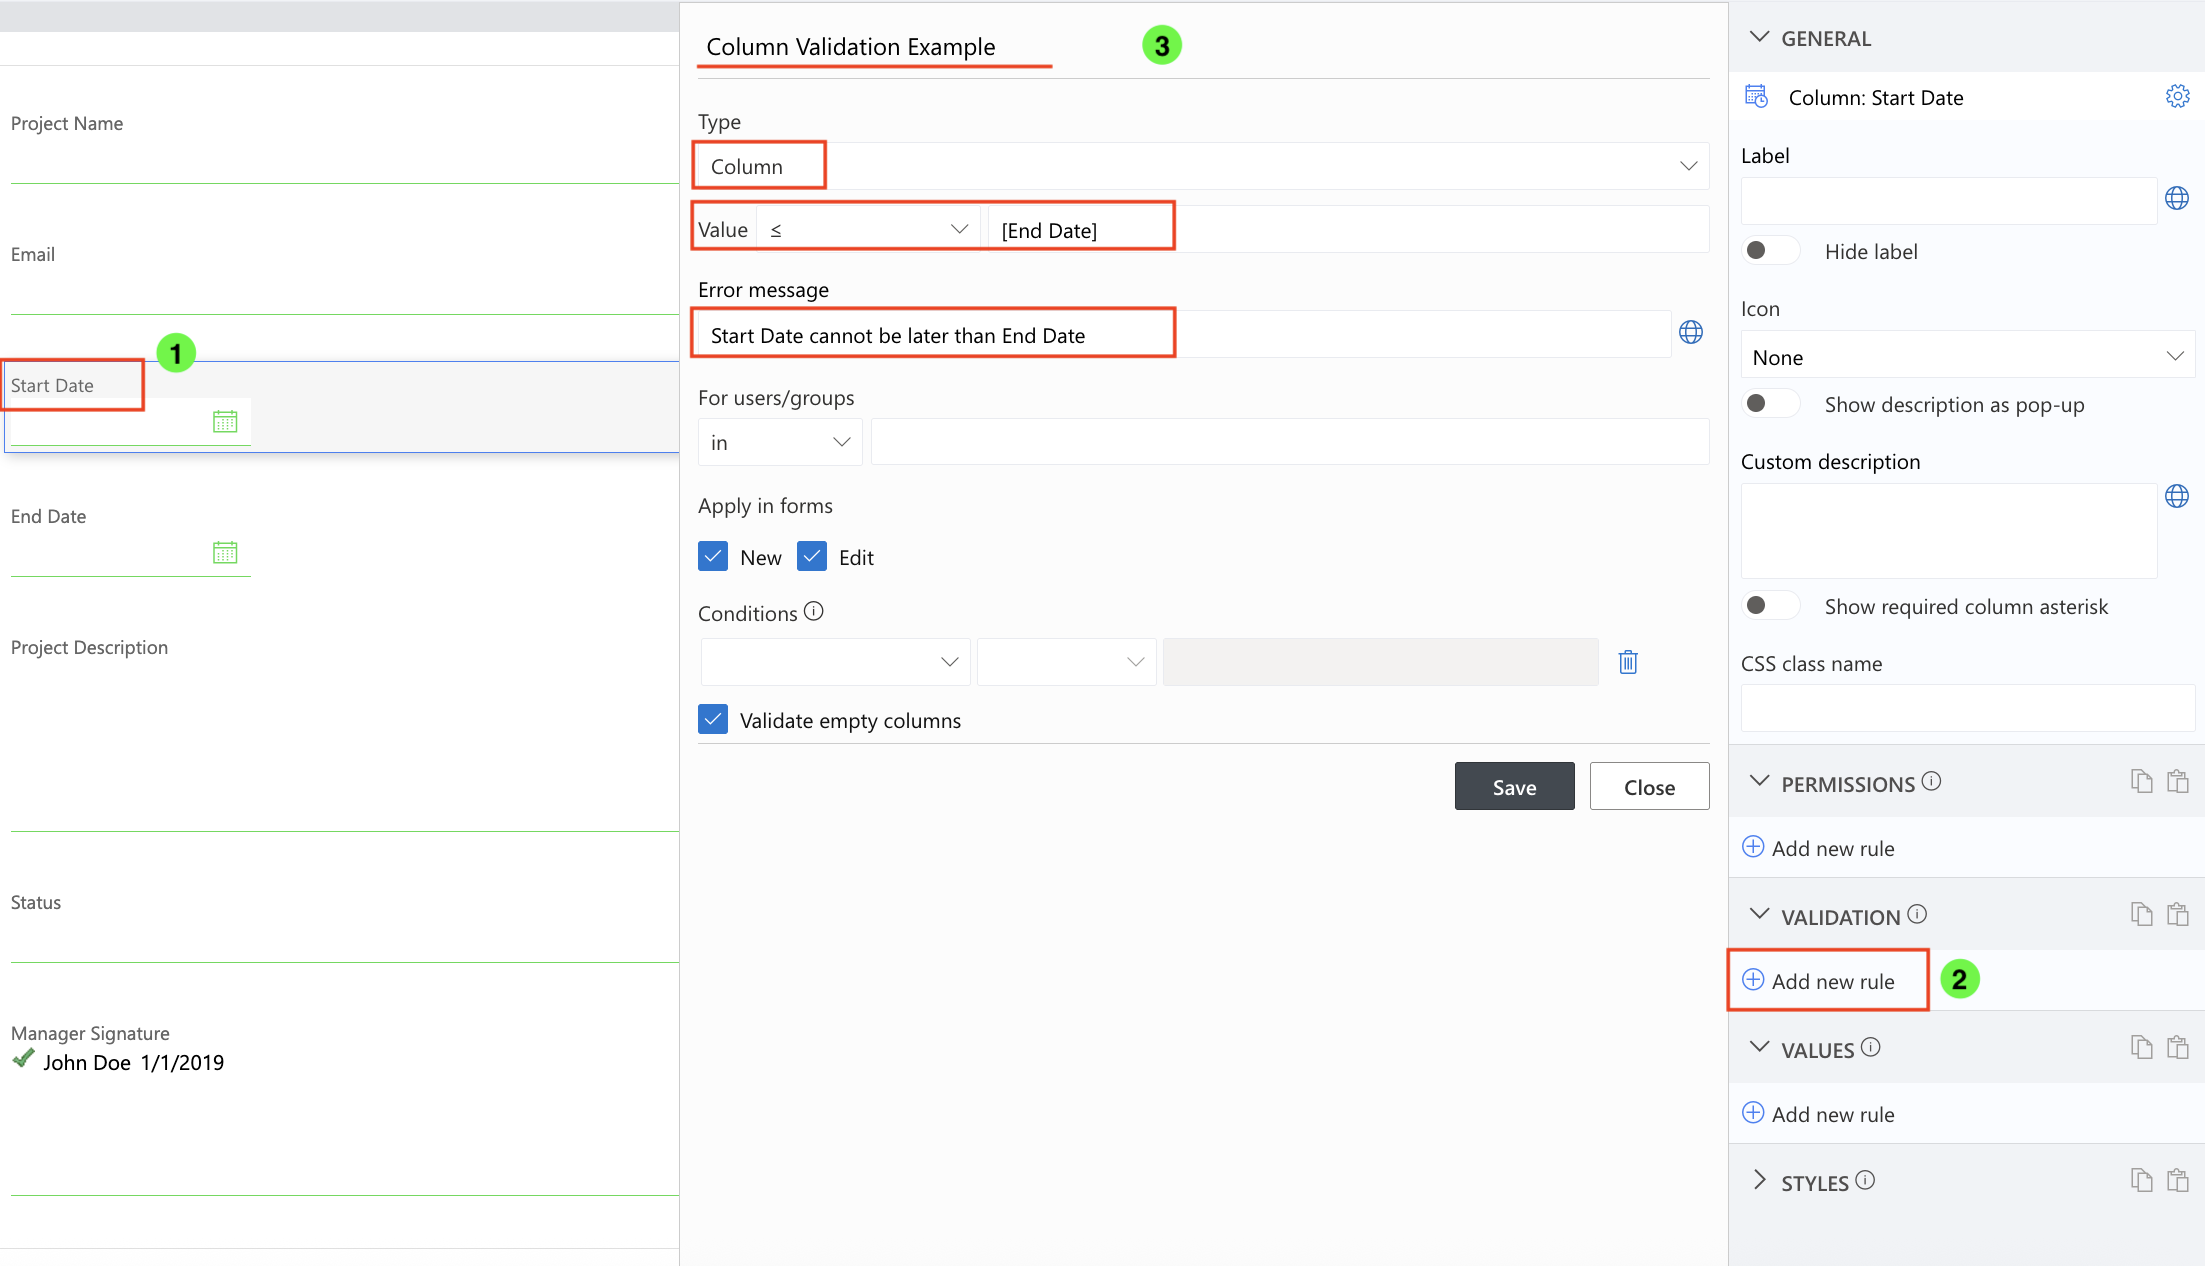
- Column Validation: Make sure one column's value relates correctly to another (like Start Date ≤ End Date) or provide the value to test for (like >[Today]-30) to check is the date entered is within the last 30 days.
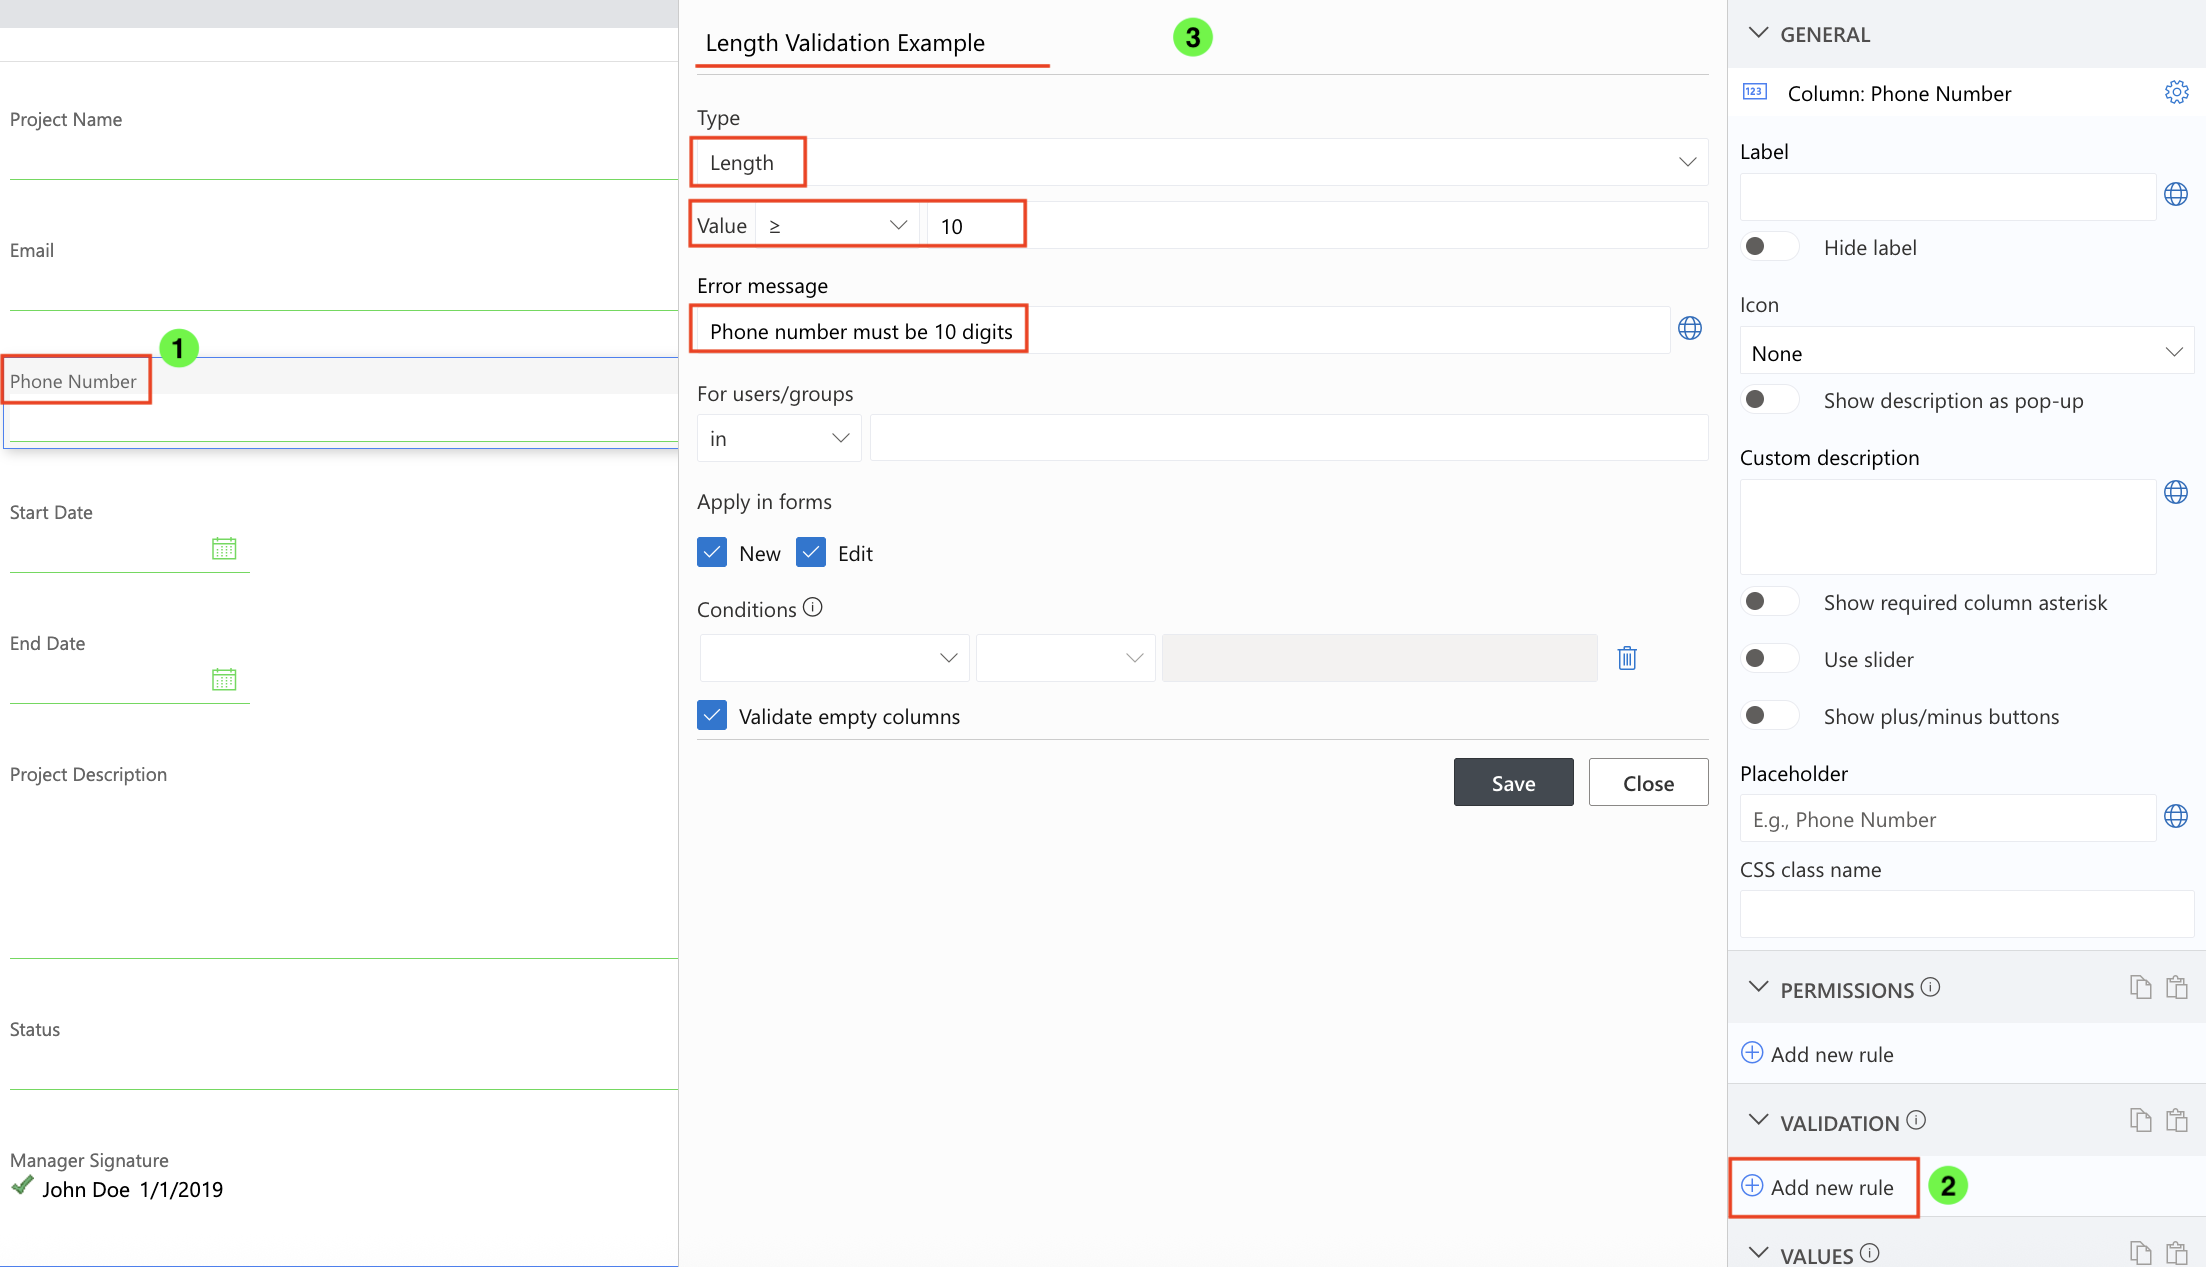
- Length Validation: Require minimum or maximum characters in a text column.
- Note: Enhanced Rich text multiple lines of text columns are never a length of 0 due to initial html that exists in them.
- Use conditions: Apply rules only for certain users, groups, or form states.
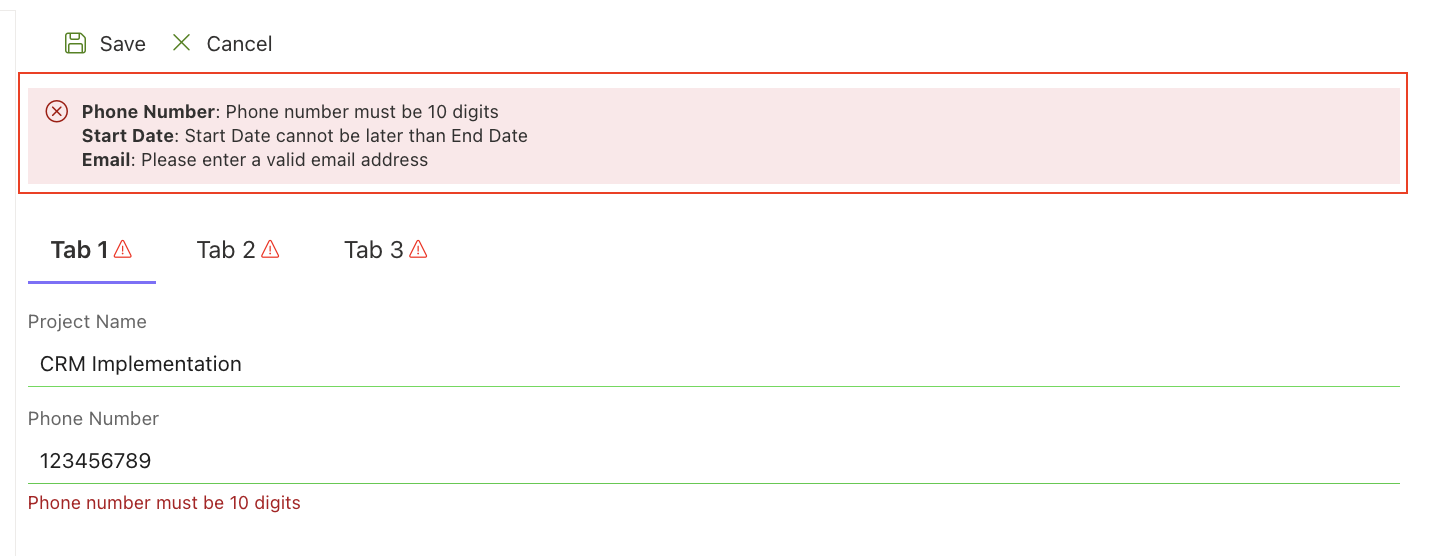
- Provide user feedback: Display clear messages and use the Validation Summary control for a consolidated view.
How to Get Started
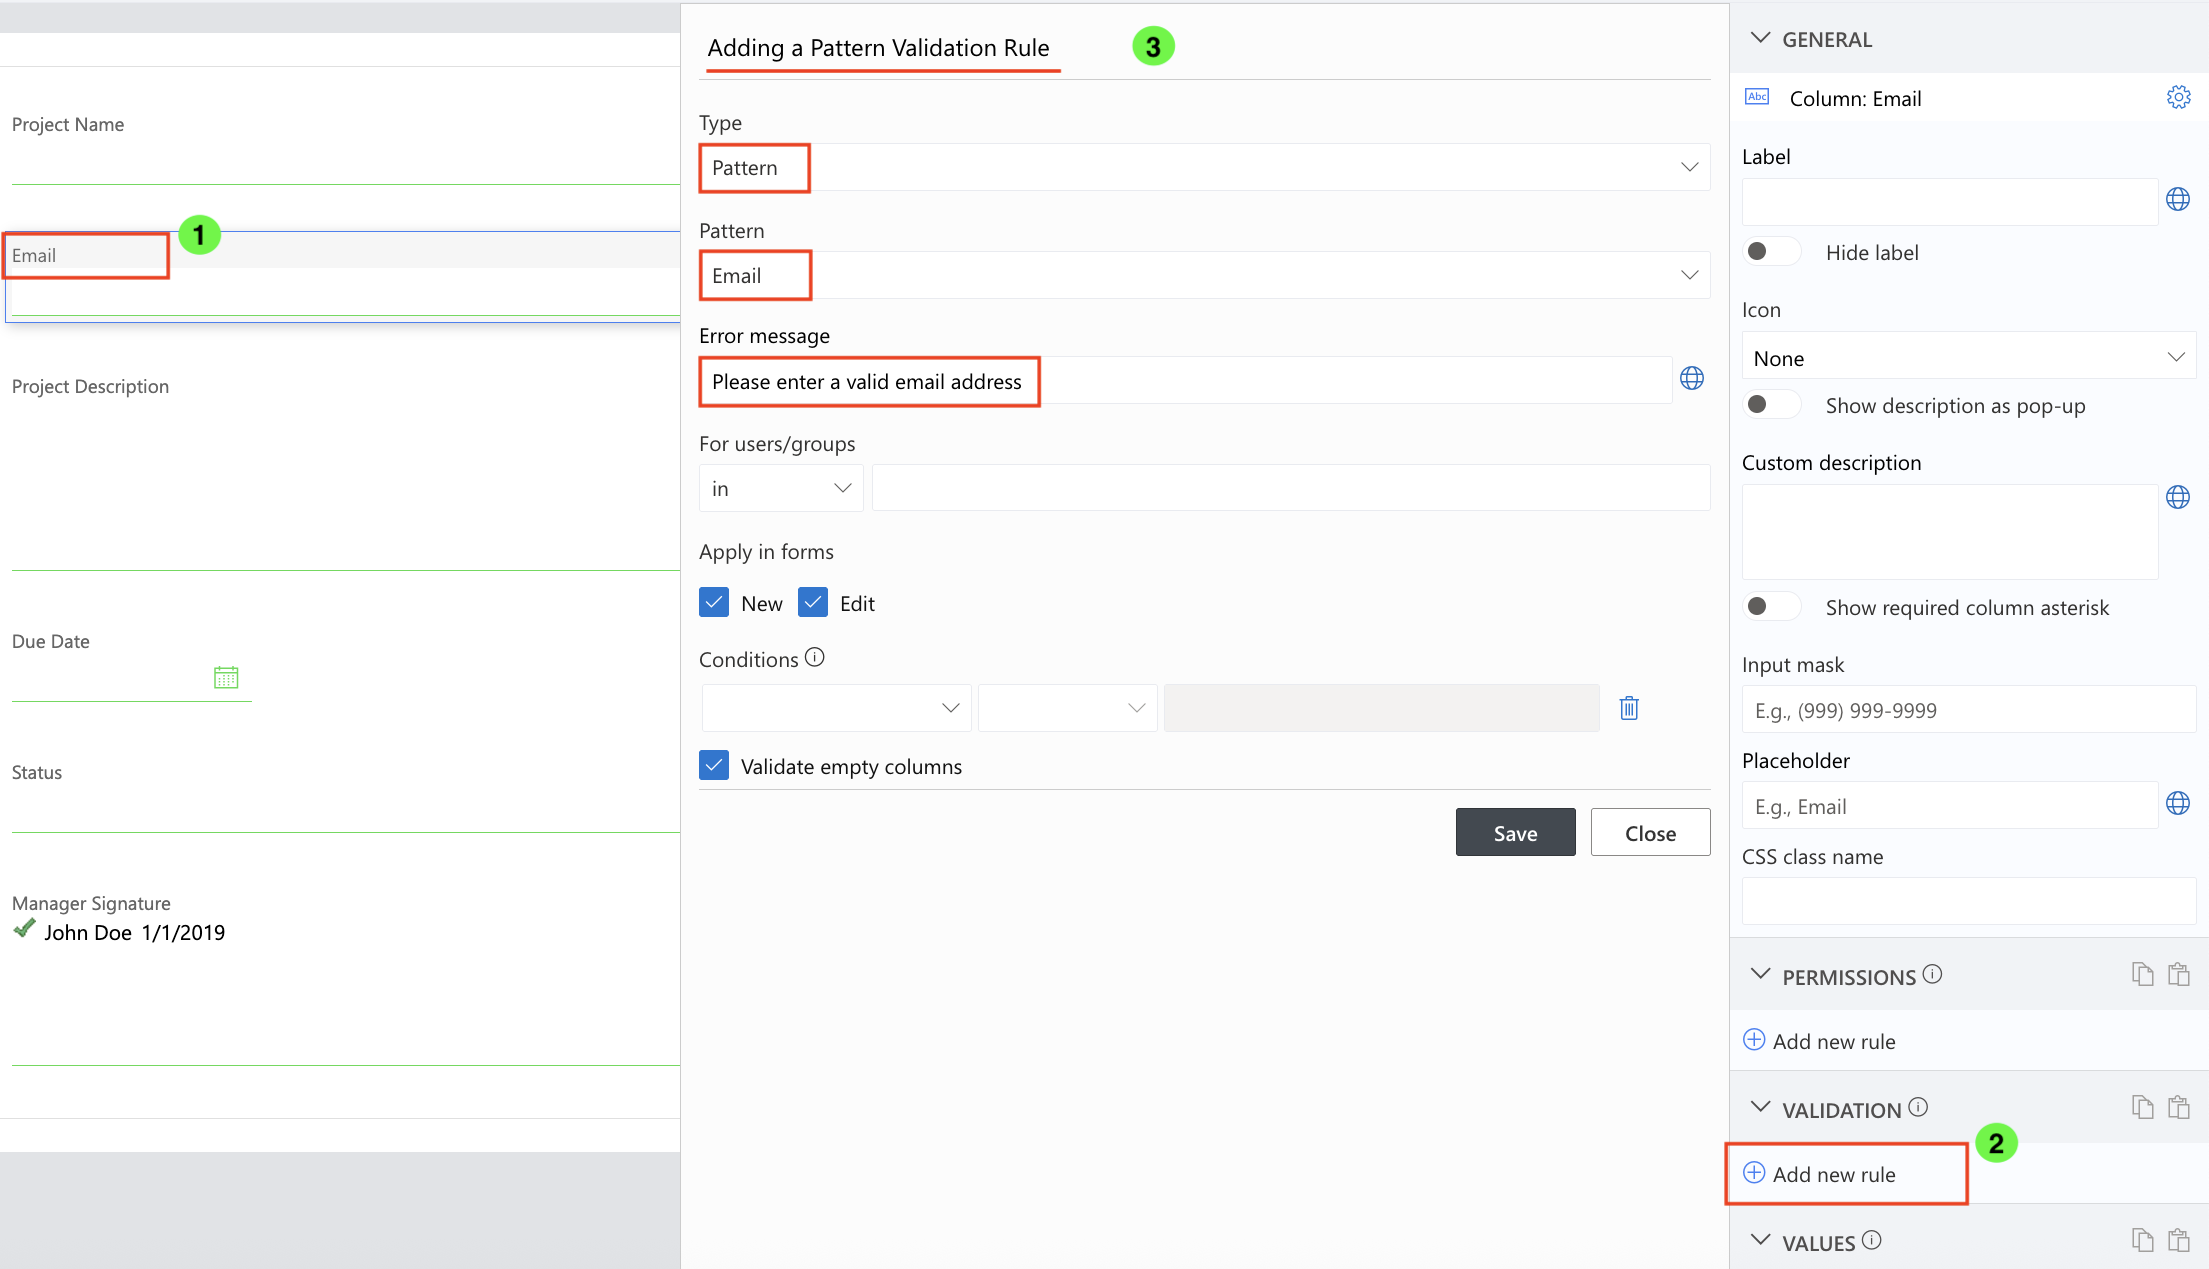
- Open your form in Form Designer.
- Select the column you want to validate.
- Go to the Validation section.
- Click Add New Rule
- Choose the type of validation and set your conditions and error message.
- Pattern Validation
- Column Validation
- Length Validation
- Pattern Validation
- Save the rule and test your form.
Tips for Effective Validation
- Keep messages simple and clear. Users should understand what they need to fix.
- Test rules with different data to ensure they work correctly.
- Use conditions to make rules dynamic — they can change depending on the context.
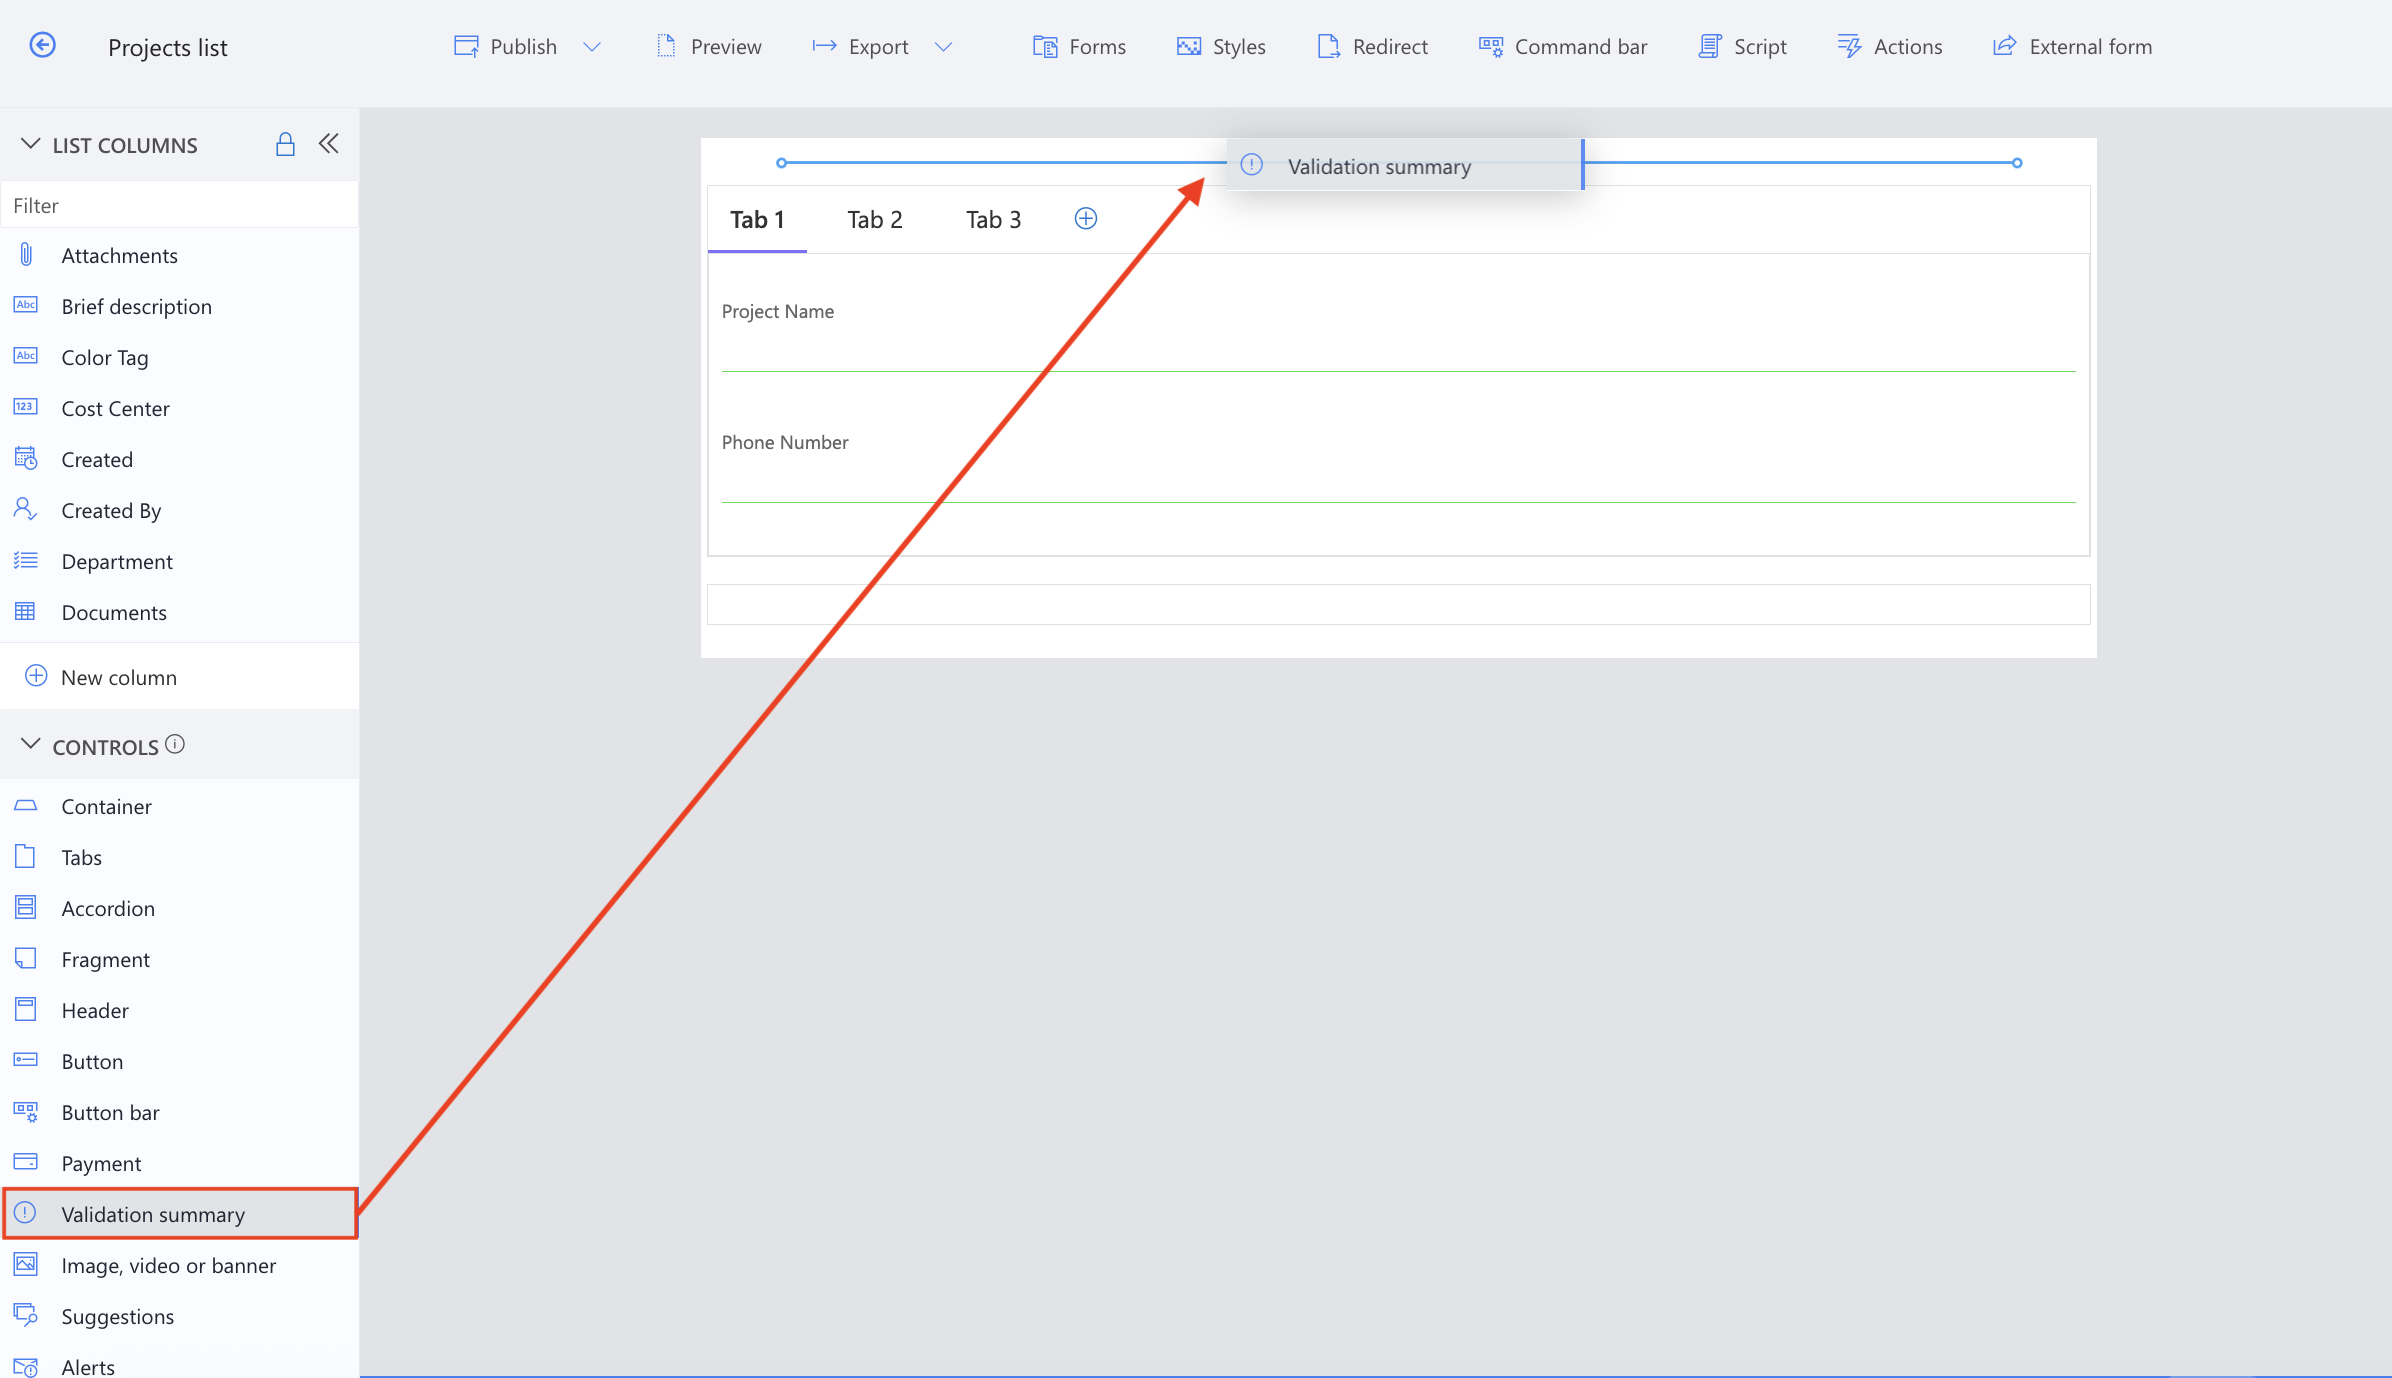
- If you have a very long form or multiple tabs add a Validation Summary to help users see all errors at once.
Watch this quick video walkthrough from Infowise:
Note: The video below demonstrates validation using the Classic-style Form Builder. If you are working with the SharePoint Modern experience, we recommend using the new Form Designer, where validation is integrated as part of the form configuration rather than as a separate feature.
Summary
Validation Rules are a simple way to improve data quality and user experience. By learning how to set them up thoughtfully, you can make your forms more reliable, easier to use, and error-proof, even for users who are not familiar with SharePoint forms.